How to Fix a Stuck Solenoid Valve Using the Backpressure Method
Ever had your espresso machine act up just when you needed that perfect shot? One moment, everything’s running smoothly, and the next—your solenoid valve refuses to budge, causing frustration and a brewing delay. I remember the first time I faced this dilemma; my machine’s click sounded more like a stubborn squeak, and I thought I’d need a costly repair. That lightbulb moment led me down a path of DIY troubleshooting that changed the game.
Why a Stuck Solenoid Valve Can Ruin Your Coffee Day
When your solenoid valve gets stuck, it’s not just a minor inconvenience—it can halt your entire brewing process. This tiny but vital component controls the flow of water or steam, and when it malfunctions, your espresso shot can turn into a soggy, watery mess or refuse to extract altogether. The good news? Often, you won’t need to call in a technician or rush to replace parts. Instead, there’s a clever technique I’ve used—known as the backpressure method—that can free a stubborn solenoid without taking apart your machine.
Is the Backpressure Method Really Effective for Stuck Valves?
Initially, I was skeptical. I mean, how could a simple pressure trick fix what seems like a mechanical jam? But after a bit of research and trial, I discovered that many baristas and DIY enthusiasts swear by it. The key is to apply controlled pressure in the right way, nudging that stuck valve back into action. One mistake I made early on, though, was rushing into the process without understanding the risks—leading to more trouble than solutions. That’s why I want to share this method with you, carefully and thoughtfully explained, so you won’t end up with a more serious problem.
Managing your espresso gear effectively not only saves money but also enhances your overall coffee experience. If you’ve faced similar issues, or want to avoid them altogether, mastering techniques like the backpressure method can be a real lifesaver. Ready to dive into the step-by-step process that can get your machine back on track? Let’s get started.
.
Check the Power and Safety First
Before diving into technical fixes, unplug your espresso machine to prevent electrical hazards. Confirm that the machine is fully powered off and cooled down, especially around the group head and steam wand. Wear rubber gloves if you suspect traces of water or steam that could cause slips or burns. Remember, safety always comes before troubleshooting.
Locate the Solenoid Valve
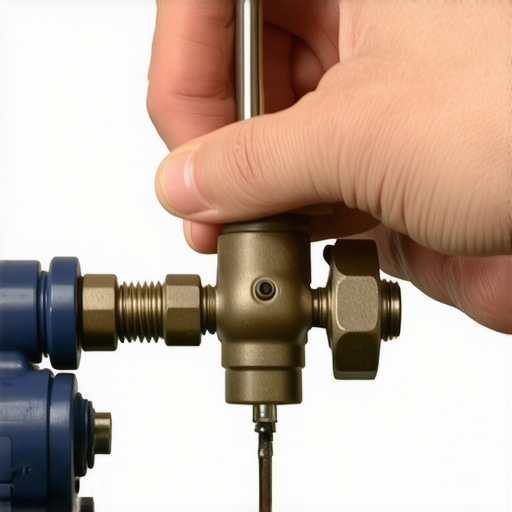
Identify the solenoid valve—usually near the water inlet line, connected to the brew group or steam system. Use your machine’s manual or look for a small, cylindrical component with electrical wires attached. Visual familiarity helps; think of it as the ‘heart’ controlling water flow—knowing its position reduces guesswork.
Engage Controlled Pressure Through the System
Gently operate the machine’s brew or steam functions without the water tank attached. This creates a slight pressure buildup, which can help loosen a stuck valve. For instance, I once attached my steam wand, then briefly turned on the steam to build pressure. As I did, I noticed a faint click—indicating some movement—that loosened the solenoid just enough to free it. Be cautious—don’t over-pressurize. Think of it like squeezing a ketchup bottle gently; you want just enough force to push the blockage out, not burst the container.
Use a Plastic or Wooden Tool to Gently Persuade the Valve
If pressure alone isn’t enough, carefully insert a non-metallic tool—like a plastic spatula or wooden stick—around the valve area. Wiggle it gently to dislodge debris or buildup causing the sticking. Never use metal tools directly on delicate parts; you risk damaging the coil or the internal seals. I’ve found that tapping lightly around the valve with a plastic tool often triggers a free movement, much like convincing a stubborn door to open.
Flush and Clear Mineral Buildup
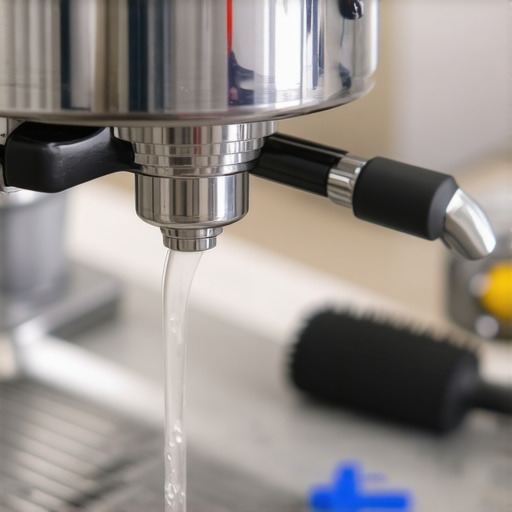
Mineral deposits can cause solenoid valves to jam. Run a descaling solution through the water inlet pipe, following the manufacturer’s instructions. After descaling, run plain water to rinse out loosened deposits. Regular maintenance prevents future issues and prolongs pump and valve life. Think of this process as giving your machine a spa day—it refreshes everything inside, restoring smooth operation.
Manual Bypass and Testing
If the valve remains stuck, you can test its functionality by gently applying external voltage using a multimeter set to the appropriate range. This advanced step helps determine if the coil inside the solenoid is receiving power or if it’s faulty. For non-technical users, it’s better to consult a professional. Remember, a properly functioning solenoid clicks when energized; a missing click indicates electrical or coil issues, like a doorbell that doesn’t ring because the battery’s dead.
Reassemble Carefully and Test
Once the solenoid is freed, reassemble all components, ensuring seals and fittings are snug but not over-tightened. Reconnect the water supply and power, then run a test shot. Observe if the water flows smoothly and if the valve operates without sticking. Keep a close eye for leaks or irregular sounds. Think of this as testing a new engine—after a tune-up, it should purr smoothly without hiccups.
By applying these methods systematically, you can often repair a stuck solenoid valve without the need for costly replacements. For more tips on maintaining your home espresso setup, visit our comprehensive guide for beginners. Remember, patience and gentle handling are key to successful DIY repairs—don’t rush or force components. With a bit of attention, your machine will be back to brewing perfection in no time.
Many coffee enthusiasts assume that high-end milk frothers or expensive espresso machines automatically guarantee perfect results. However, in my experience, there’s a common misconception that more expensive equipment equals better coffee without understanding the nuances involved. For instance, many believe that all coffee grinders are created equal; the truth is, the type of burrs and grind consistency play a crucial role in flavor extraction. Relying solely on brand reputation or specs can lead you astray, especially if the grinder isn’t properly maintained or calibrated, which can cause uneven extraction and bitterness. Additionally, there’s a myth that grinding coffee just before brewing doesn’t matter—that freshness is the only factor—but even the best beans can deteriorate quickly if ground and stored improperly, affecting aroma and flavor.
Is Your Barista Gear Truly Optimized or Just Brand-Driven?
Experts emphasize that understanding your specific gear’s capabilities and limitations leads to better results. For example, a study published in the *Journal of Food Science* highlights how grinder burr geometry impacts particle size distribution and, consequently, extraction quality. Overlooking essential maintenance, like cleaning burrs or descaling machines, can cause blockages or inconsistent temperatures, sabotaging even the most advanced setups. I’ve fallen into the trap of thinking a top-tier machine would compensate for poor technique, but mastering your gear’s intricacies often yields more significant improvements than blindly upgrading equipment. To truly elevate your home brewing, dive into resources like our comprehensive beginner guide or explore [choosing the best barista gear](https://espressotechguide.com/choosing-the-best-barista-gear-for-coffee-enthusiasts). Remember, understanding the hidden nuances of your gear can make the difference between a good cup and an exceptional one. Maintain proper calibration, clean diligently, and always research how to fine-tune your specific model. Have you ever fallen into this trap? Let me know in the comments.
Why Regular Maintenance Is Key for Long-Term Coffee Happiness
Keeping your espresso machines, coffee grinders, and milk frothers in top shape extends their lifespan and ensures every brew tastes its best. I’ve found that establishing a routine maintenance schedule transforms a finicky setup into a reliable partner in your daily coffee ritual. It’s not just about cleaning; it’s about understanding the specific needs of each component and proactively addressing potential issues.
Tools I Recommend for Serious Coffee Enthusiasts
First and foremost, a precision calibration tool like the digital coffee grinder calibrator is invaluable. It allows me to set the grind size precisely, which directly impacts extraction quality. For cleaning, I swear by a dental pick (used carefully) to clear out stubborn puck screens and shower screens, preventing buildup that causes channeling. A high-quality portafilter gasket scraper also helps maintain a tight seal, avoiding leaks and inconsistent pressure.
When it comes to descaling, I prefer a commercial-grade descaling solution that’s compatible with my machine — regular use prevents mineral deposits from clogging water pathways. For milk steaming, a frozen spoon is a surprising yet effective tool for controlling milk temperature during microfoam creation.
How do I keep my equipment performing at its best?
Adopt a regular routine that includes cleaning, descaling, and calibrating your machine. For grinders, periodic burr replacement—say every 5,000 to 8,000 shots—keeps grind consistency sharp. I also use the rubber band hack to secure adjustment dials, ensuring they don’t slip over time. Remember, a well-maintained grinder produces more even particles, leading to better extraction and flavor.
Predicting the Future of Coffee Equipment Maintenance
Looking ahead, smart sensors and IoT integrations are poised to revolutionize how we care for our gear. Imagine a coffee machine that alerts you when it needs descaling or when burrs are dull—saving you time and preventing costly repairs. This shift towards intelligent maintenance will make our coffee routines more effortless and precise.
How do I maintain my equipment over time?
Develop a personalized maintenance schedule tailored to your gear and usage. This might mean descaling every three months or swapping out burrs after a certain number of shots. Keep a maintenance log, so you’re not guessing when the last service happened. For detailed guidance, check out our comprehensive beginner tips. Consistency is the secret to ensuring your machine continues delivering exceptional espresso day after day. Ready to try an advanced tip? Use the magnet trick to keep your grinder chute clear — a simple investment in your routine that pays off in better quality shots.
Three Surprising Lessons About Barista Gear That Changed My Approach
One of the most eye-opening lessons I learned was the importance of investing in quality accessories, like a precision calibration tool, rather than just focusing on the machine itself. I used to think that a high-end espresso machine would solve all my problems, but I realized that without proper calibration and maintenance, even the priciest gear doesn’t perform at its best. Additionally, I discovered the value of routine cleaning and small repairs—like using a dental pick trick—which can extend your gear’s lifespan significantly. Lastly, I learned that understanding the nuances of your specific equipment’s behavior—such as how grinder burrs affect extraction—can make the difference between good coffee and exceptional craft. These insights transformed my daily routine and deepened my appreciation for the art of home espresso.
My Go-To Tools for Elevating Your Coffee Experience
Over the years, I’ve curated a set of trusted tools that have become essential in my coffee journey. A digital coffee grinder calibrator helps me achieve consistent grind size, which is crucial for a balanced extraction. I always keep a rubber band hack handy to prevent grinder dial slippage. For cleaning, I swear by a dental pick to clear stubborn buildup, ensuring my gear stays in top shape. These tools, combined with my routine maintenance, have helped me enjoy a smoother, more reliable coffee routine—something I can’t recommend enough for fellow enthusiasts.
Your Coffee Future Starts Now—Seize It
Every great barista knows that mastering your gear isn’t a one-time effort—it’s a continuous journey. Whether you’re dealing with a stuck solenoid or fine-tuning your grinder, each step brings you closer to perfecting your craft. Remember, the key lies in patience, diligent maintenance, and a willingness to learn from experience. Your next cup of coffee is waiting to be elevated—so don’t hesitate to experiment, ask questions, and stay curious. With the right mindset, you’ll unlock the full potential of your espresso setup and create moments of pure joy every day.
What’s been the biggest breakthrough in your home brewing routine? Share your stories or ask questions below—I’d love to hear from you!