Why Your Puck Screen Is Actually Making Your Shots Channel More Often
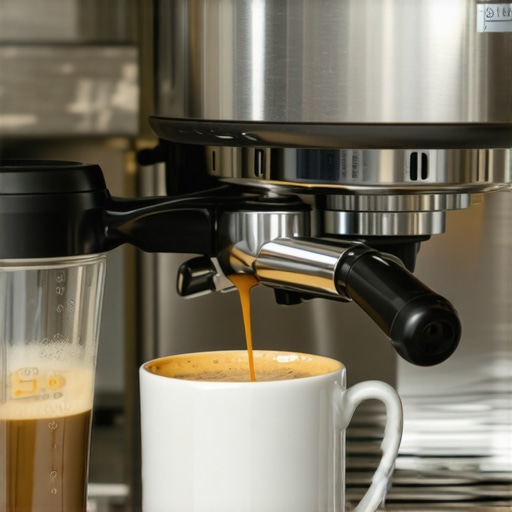
It happened to me just last week. I was all set for my morning espresso, eager to enjoy that perfect shot. I placed my puck screen over my freshly tamped coffee, confident that it would help maintain clarity and cleanliness during extraction. But as I watched my shot, I noticed something strange—more channeling, uneven extraction, and a less-than-stellar crema. I was puzzled. How could a simple puck screen turn into a culprit for my brewing mishaps?
That moment was a lightbulb for me. I realized that sometimes, what seems like a useful tool can actually interfere with the process if misused or misunderstood. And it’s not just me—many home baristas face similar frustrations, wondering if their puck screens are doing more harm than good.
Today, I want to share my experience and insights into why your puck screen might be inadvertently channeling your shots more often than you’d like. By understanding the common mistakes and the science behind proper usage, you can finally stop wasting your time and start pulling consistently delicious espresso.
Understanding the Real Role of Your Puck Screen in Espresso Extraction
At first glance, a puck screen seems like a simple, helpful addition to your espresso setup. It claims to reduce channeling, prevent blowouts, and keep your brew bed tidy. But here’s the catch—if used incorrectly, it can do the exact opposite, opening up pathways for uneven water flow. Early in my journey, I made the mistake of placing the puck screen straight on top of the coffee without considering tamping pressure and distribution. This misstep made my shots channel more often, and it took me a while to realize that the puck screen is just one piece of the puzzle.
According to barista experts, a puck screen can be beneficial when used thoughtfully, especially in maintaining cleanliness and reducing mess. However, over-reliance or improper placement can alter how water interacts with your coffee bed, leading to uneven extraction. The key is to use it as a refinement tool, not a crutch. If you’re struggling with channeling or inconsistent shots, perhaps your puck screen is a factor worth re-examining. For more on other common pitfalls, check out [this guide on troubleshooting bitter-tasting shots](https://espressotechguide.com/why-your-shots-taste-bitter-even-when-the-timing-is-perfect)!
Are you often facing unpredictable channeling despite following all the standard steps? If yes, you’re not alone. Let’s explore why this happens and how you can address it effectively.
Set Your Coffee Bed Properly Before Tamping
Start by evenly distributing your coffee grounds in the basket. Use a gentle tap or a distribution tool to level the surface, preventing uneven channels from forming. I remember a morning when I meticulously spread my grounds with a spoon, watching to ensure no high spots or clumps remained; that small step resulted in much more consistent shots.
Adjust Your Tamping Pressure Thoughtfully
Apply consistent, firm pressure on the tamping paddle—about 30 pounds of force—ensuring the coffee is evenly compressed. Think of tamping like pressing down on a trampoline to create a flat, steady surface. Too little pressure causes channels; too much can over-compress and restrict flow. I once watched my shot flow unevenly because I rushed my tamp, which taught me the importance of steady, measured force. For detailed tamping techniques, check out this guide.
Place the Puck Screen Correctly and Experiment with Its Position
Position your puck screen gently on top of the tamped grounds, ensuring it lays flat without compressing the coffee further. If you notice channeling, try raising the screen slightly—about 1-2mm—to allow water to flow more evenly. In my own experience, I initially placed the screen directly on the puck, which caused uneven water distribution. After experimenting by slightly lifting it, I saw a marked improvement in shot quality.
Monitor Water Flow and Adjust Brew Parameters Accordingly
Observe the flow rate during extraction—it should be steady and resemble warm honey. If you see spurts or uneven flow, consider adjusting your grind size—finer for slower flow, coarser for faster. Also, check your dose—too much coffee can cause over-pressurization, leading to channeling. Remember, every machine reacts differently; keep notes of your adjustments. If issues persist, revisit your grind setting at this resource.
Practice and Fine-Tune Your Technique Regularly
Consistency is key. Set a routine for dosing, distributing, tamping, and placing the puck screen. Over time, small refinements—like adjusting tamp pressure or experimenting with puck screen height—will lead to more reliable shots. I made a simple habit of timing each step and reviewing my results, which helped me identify subtle tweaks that improved consistency. For more tips on dialing in your espresso, see this definitive guide.
Many coffee enthusiasts start their journey believing that investing in high-end equipment guarantees perfect results, but in my experience, some widely accepted beliefs about barista gear, espresso machines, grinders, and milk frothers can actually lead you astray. For example, the myth that more expensive grinders produce proportionally better shots often overlooks the importance of proper calibration and grinding technique. In reality, a poorly maintained or misused high-end grinder can deliver inconsistent results, regardless of its price point. According to expert barista training programs, grinder calibration is crucial—simply owning a top-tier grinder doesn’t ensure optimal performance unless it’s regularly cleaned and precisely dialed in.
Is it better to use a dedicated grinder for each type of coffee bean or to clean and adjust one grinder for all?
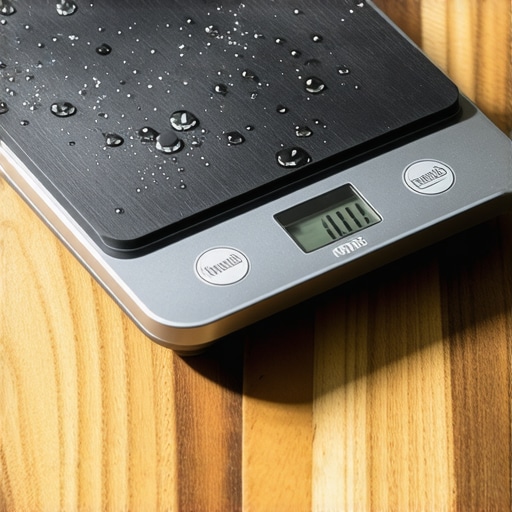
Most home baristas don’t realize that static buildup and residual oils can significantly impact grind consistency, especially with light roasts. Overlooking proper cleaning routines—like thorough chamber cleaning or chute maintenance—can cause clumping and uneven grinds, leading to channeling during extraction. This is a nuanced detail often missed, yet it can make a noticeable difference in shot quality. Additionally, many assume that milk frothers or steam wands are merely accessories, but improper use or neglect can introduce bacteria or cause spattering, affecting flavor and cleanliness. Regular descaling and cleaning are often underappreciated steps in maintaining equipment longevity and performance. To optimize your setup, it’s vital to understand that equipment maintenance, calibration, and technique mastery trump simply owning premium gear. Embrace detailed routines and continuous adjustments—your shots will thank you. Remember, even the most advanced espresso machine won’t compensate for poor tamping, distribution, or grind setting. Want more insights on fine-tuning your gear? Check out this guide on selecting the perfect grinder. Have you ever fallen into this trap? Let me know in the comments.Maintaining and scaling your home espresso setup requires not just good equipment but also smart tools that ensure consistent results over time. One of my go-to items is a calibration scale with a built-in timer, which I use to measure my dose precisely every session. It helps me develop a repeatable routine and catch inconsistencies early. Additionally, I rely heavily on a dedicated burr cleaning brush, especially for conical burr grinders, which I clean thoroughly every few weeks to prevent oil buildup that can impact grind quality. Regular maintenance extends the life of your equipment and keeps your shots tasting optimal.
For quick and thorough cleaning of espresso machine group heads, I swear by a chemical-free descaling solution mixed with water—it’s gentle but effective, and I run a cleaning cycle monthly. To keep my milk frothing top-notch, I use a steaming wand cleaner—a small rubber brush designed to fit inside the wand—which makes cleaning after each use effortless, avoiding milk residue buildup that leads to poor foam quality.
Looking ahead, I predict that automation tools, such as Bluetooth-enabled scales and smart cleaning reminders, will become more affordable, helping even home baristas keep their gear in pristine condition without extra effort. Getting comfortable with basic maintenance tools now prepares you for this trend and ensures your equipment remains reliable.
How do I keep my gear performing over the years?
Regularly scheduled maintenance routines are key. I set reminders for descaling, burr cleaning, and calibration checks. For instance, I follow a monthly deep-cleaning protocol that includes removing and soaking any removable parts, inspecting gaskets for wear, and recalibrating my grinder and espresso machine to maintain consistency. Documenting all adjustments helps me track what works best for my specific setup.
If you’re serious about long-term results, investing in precision tools like a dedicated scale or specialized cleaning brushes is worthwhile. These tools can seem minor but make a significant difference in shot quality and equipment longevity. For detailed procedures on cleaning burrs thoroughly without taking your grinder apart, visit this guide.
Don’t overlook the importance of routine checks; a simple calibration every few months can prevent common issues like channeling or uneven extraction. Try scheduling a monthly maintenance day—cleaning, recalibrating, and inspecting—and watch your espresso game elevate. Remember, keeping your gear in excellent shape is an ongoing process, not a one-time fix. Want to ensure your grinder stays sharp longer? Experiment with a routine that includes regular burr cleaning using the right tools, and you’ll notice the difference in your coffee quality.
Why Fumbling with Puck Screens Taught Me More Than Perfect Shots
One of the most profound lessons I learned was that even well-intentioned tools, like puck screens, can hinder your espresso mastery if misused. My early experiments, where I blindly placed the screen on top of my tamped grounds, resulted in more channeling and uneven extraction. It wasn’t until I closely examined how water interacts with the coffee bed that I realized the importance of proper placement and technique. This experience taught me that understanding the science behind your gear can prevent costly mistakes and elevate your skills faster.
The Power of Small Adjustments in Achieving Consistency
Late-night tinkering with tamp pressure, grind size, and puck screen height revealed how tiny tweaks can dramatically improve shot quality. I learned to focus on even distribution of grounds, applying consistent tamping force, and experimenting with puck screen elevation. These nuanced adjustments turned my inconsistent mornings into reliable routines. Now, I see every espresso as a chance to refine my craft—making it both a science and an art that rewards patience and curiosity.
Detecting Equipment Myths That Sabotage Your Coffee
Myths surrounding high-end equipment often mislead so many home baristas—believing that fancy gear guarantees perfect shots. I discovered that calibration, maintenance, and technique hold far more weight than price tags. Regularly cleaning my grinder chute, recalibrating my grinder, and understanding my machine’s quirks were the game-changers. Upgrading my tools didn’t mean much without these crucial habits. That realization shifted my focus from gear obsession to mastery, a lesson I wish I had embraced sooner.
Curated Gems That Accelerated My Espresso Knowledge
Over time, I built a toolkit of trusted resources. I rely on detailed guides about cleaning grinder burrs, which helped me extend equipment lifespan. The comprehensive articles on home espresso techniques provided step-by-step routines that boosted my confidence. Additionally, connecting with experienced baristas through forums and community groups keeps me motivated and accountable. These curated sources are invaluable for translating theory into practice and avoiding common pitfalls.
Your Next Espresso Step Starts Today
Remember, the journey toward consistently excellent home espresso isn’t about owning the best gear but mastering your tools and techniques. Every shot is an opportunity to learn, experiment, and improve. Whether you’re tweaking tamping pressure, adjusting grind settings, or experimenting with puck screen height, each small victory brings you closer to your ideal cup. Keep building your knowledge, stay curious, and don’t hesitate to share your progress. Your best espresso experience is just around the corner—go seize it!
What’s one tweak you’re excited to try on your next brew? Share your plans below—I’d love to hear about your journey with home espresso!