Why Your Coffee Puck Is Wet and Sludge-Like Every Morning
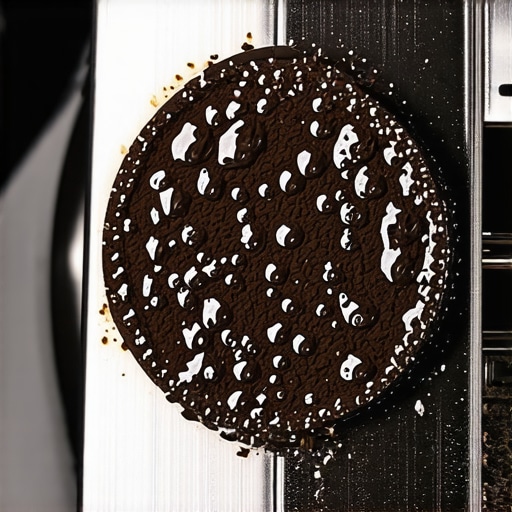
It was a typical hectic morning when I finally sat down to enjoy my freshly brewed espresso. I eagerly pulled the shot, only to be greeted with a soggy, muddy pile of coffee grounds instead of that beautiful, golden crema I’d been dreaming of. That moment of disappointment? It’s all too familiar for many home baristas. If you’ve ever been puzzled by a wet, sludge-like coffee puck after brewing, you’re not alone. This frustrating problem can throw off your entire morning ritual, leaving you questioning whether your machine is malfunctioning or if you’re doing something wrong.
Understanding Why Your Coffee Puck Gets Wet and Sludgy
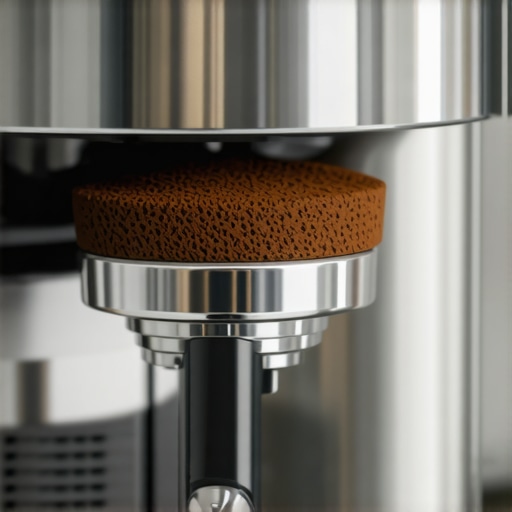
Knowing why this happens is the first step toward fixing it. Typically, a properly extracted coffee puck should be firm, dry to the touch, and resemble a compact cake. When it’s wet and sludgy, it often signals underlying issues in your brewing process. Common culprits include over-dosing your portafilter, using coffee grounds that are too fine or too dense, or tamping unevenly. These factors can cause water to channel through the coffee unevenly, leading to over-extraction in some areas and under-extraction in others, creating that undesirable wetness and mud.
Early on, I made the mistake of believing that a wetter puck was just a sign of strong extraction. I kept increasing tamping pressure, thinking it would improve things, but it only made the problem worse. It wasn’t until I read a detailed guide on espresso extraction that I realized my tamping technique was part of the issue. Proper tamp pressure and consistent distribution are crucial to prevent water from rushing through weak spots, which results in that wet, muddy aftermath.
Are you tired of ending up with a soggy puck every morning? Don’t worry—we’re about to address this head-on, sharing practical solutions that helped me turn things around. Before we dive into the fixes, let’s tackle a common doubt that often holds people back.
Question: Is a Wet Coffee Puck Really That Big of a Deal?
Many skeptics dismiss the puck moisture as a minor detail, but it actually points to significant inconsistencies in your brewing process that can ruin the flavor and texture of your espresso. If unchecked, it can also lead to clogs or damage over time. One mistake I made early on was ignoring the importance of grinder maintenance, which contributed heavily to uneven grounds and channeling issues. Regularly cleaning your grinder and ensuring even tamping can dramatically improve your puck quality.
Want to learn more about preventing channeling and other extraction errors? Check out [this insightful article](https://espressotechguide.com/3-signs-your-bottomless-portafilter-is-actually-hiding-channeling) that discusses how a wet puck often indicates channeling problems. Understanding these details is key to homemade espresso bliss.
Now that you know why your puck ends up sludgy and wet, the next step is implementing practical adjustments. Let’s explore the actionable steps that will help you achieve a dry, cohesive puck with every brew—making your mornings smoother and your coffee tastier.
Perfect Your Grind Size and Distribution
Start by grinding your coffee to a consistency slightly coarser than powdered sugar. Too fine, and water struggles to flow evenly, resulting in channeling and a soggy puck. Aim for uniform particle size to promote even extraction. When I first adjusted my grinder to a slightly coarser setting—similar to fine sand—I noticed a significant improvement in puck dryness and shot quality. To verify, use a quality grinder and periodical calibration to ensure consistency.
Optimize Tamping Technique
Apply consistent and moderate tamping pressure. Imagine pressing a cookie: too hard, and you crush the dough; too soft, and it remains crumbly. Use about 30 pounds of pressure—roughly the weight of a small backpack—as a benchmark. I once used a bathroom scale to practice tamping evenly; after a few repetitions, I achieved a uniform, dry puck. Ensure you’re distributing grounds evenly before tamping, avoiding any gaps or uneven spots, which can cause channeling and wet spots.
Ensure Proper Dosing
Measure your coffee dose precisely—most machines thrive on 18-20 grams for double shots. Overdosing leads to a thick, overloaded bed, making water struggle to pass through, whereas underdosing produces a loose, wet puck. I always use a scale to measure and weigh my doses, eliminating guesswork. For consistent results, consider investing in a precision coffee scale.
Maintain Equipment Cleanliness and Calibration
Clean your grinder burrs weekly to prevent grounds from becoming clumped and uneven, which causes inconsistent extraction. Dull burrs grind more unevenly, similar to trying to cut with a dull knife—push harder, and the results are jagged. I replaced my grinder burrs when I noticed grounds becoming inconsistent, leading to soggy puck issues. Regular calibration and maintenance keep your equipment performing optimally and preserve temperature consistency, which affects the drying process of the puck. For detailed maintenance steps, visit this guide.
Refine Tamping and Distribution Practices
After leveling the grounds with a distribution tool or finger, apply even pressure with a tamper—think of pressing gently but firmly enough to create a level, achture surface. This prevents water from favoring weak spots, which often results in a wet, mushy puck. Practicing consistent tamping height ensures your puck dries out uniformly post-extraction. I set a tamping station with a built-in level to improve my technique, and within days, I saw a marked improvement in puck consistency and shot quality.
Control Brew Parameters
Adjust your brew temperature to around 200°F (93°C) and ensure your machine maintains steady pressure—typically 9 bars during extraction. Fluctuations can cause water to channel unevenly, leading to over-saturation and mud. Use a calibrated scale to monitor shot time and volume, ensuring optimal extraction and a dry, cohesive puck.
While many home baristas believe that choosing the right milk frother or espresso machine is all about brand prestige or flashy features, the real nuances lie beneath these surface choices. A common misconception is that more expensive or technologically advanced equipment automatically leads to perfect coffee; however, in my experience, even high-end gear requires nuanced understanding to maximize its potential. For example, many think that high-pressure steam wands produce the best microfoam, but overlooking the technique and temperature control can sabotage your results.
Is More Power Always Better When Frothing Milk?
Experts like Scott Rao emphasize that temperature stability and steam wand techniques often overshadow raw power in achieving silky microfoam. Rushing to buy the latest high-wattage frother might seem appealing, but without mastering proper steaming techniques and understanding the physics of milk jug angles, you’re likely to end up with large bubbles and frothy chaos.
Additionally, a common trap many fall into is assuming that professional-grade barista gear is necessary for home brewing success. The truth is, even modest equipment can produce stellar espresso if calibrated properly and used correctly. For instance, a quality grinder with consistent particle size impacts extraction more profoundly than obsessing over the perfect espresso machine. Beware of underestimating the importance of grinder maintenance; dull burrs or inconsistent grind sizes can turn your beloved home setup into a source of frustration.
Why Does My Grinder Size Matter More Than I Think?
Studies and expert insights point out that grind size influences extraction efficiency and puck consistency more than the brand or model of your grinder. An improperly calibrated grinder can cause uneven grounds, leading to channeling and dull flavors. Regularly checking burr alignment and adjusting grind settings based on shot feedback is crucial—don’t just rely on presets. Want to master your grinder? Check out this guide for advanced calibration tips.
Another overlooked aspect is the role of routine maintenance. Cleaning and calibrating your equipment ensures longevity and consistency, preventing hidden issues like static buildup in grinders or scale buildup in machines, which subtly degrade performance. For detailed maintenance routines, visit our contact page.
In conclusion, mastering your barista gear involves understanding nuanced details—technique, calibration, and maintenance—beyond just the hardware. The true expert mindset recognizes that equipment is only as good as how well you understand and optimize its use. Don’t fall into the trap of assuming more expensive gear equals better coffee; instead, invest time in learning and refining your craft. Have you ever fallen into this trap? Let me know in the comments and share your experiences!
Invest in Quality Tools for Longevity
Choosing the right tools can significantly extend the lifespan of your coffee equipment. I personally rely on a high-quality precision coffee scale because consistent dosing is fundamental to both shot quality and machine health. A reliable calibration device, like a calibration tamper or a dedicated scale, helps me fine-tune extraction parameters and catch issues before they escalate, ensuring my espresso machine and grinder perform optimally over years.
Regular Cleaning Transforms Results
Consistent cleaning routines are the backbone of durable and efficient gear. I schedule weekly maintenance sessions, including deep-cleaning my grinder burrs and descaling my espresso machine, following expert advice from seasoned baristas. Regular cleaning prevents build-up that could cause clogging or inconsistent spraying, directly impacting flavor and equipment longevity. For instance, cleaning the portafilter gasket and shower screen monthly can prevent leaks and uneven pressure that might damage the machine over time. Check out this guide for detailed cleaning routines.
Tools I Recommend for Home Baristas
Beyond basic equipment, I swear by a chute brush to prevent grind clogging, which often causes uneven dosing and water channeling. Investing in a good tamping station with a built-in level helps me ensure even distribution and consistent tamp pressure, reducing wear on the machine’s internal seals. For long-term results, I emphasize calibrated grinders that maintain particle size and dosing consistency, as well as a sturdy cleaning brush set designed specifically for espresso machines and grinders.
How do I maintain my espresso setup over time?
Implementing a scheduled maintenance plan is key. Clean your grinder burrs weekly, descale your machine once a month, and verify calibration quarterly. Keep an eye on wear indicators like declining shot quality or unusual noises. Monitoring pressure gauges and keeping detailed logs can alert you to early issues, preventing costly repairs or replacements. For comprehensive advice, see our contact page. As technology advances, upcoming smart cleaning devices and auto-calibration tools promise to simplify maintenance, but regular manual checks will always be essential. Try integrating a calibration routine into your weekly coffee ritual and notice the improved consistency and equipment lifespan.
Lessons Hidden Behind the Steam Wand
One of the most eye-opening lessons I learned was that even the most advanced espresso equipment can’t compensate for inconsistent technique. No matter how cutting-edge your machine is, neglecting proper tamping or grind adjustment can turn a perfect shot into a soggy, muddy mess. This realization pushed me to focus more on the basics—consistent dosing, tamping pressure, and distribution—before chasing the latest gadgets. Remember, mastery begins with fundamentals that many overlook.
Another insight was understanding that equipment maintenance isn’t just about cleanliness but also about calibration. A misaligned grinder burrs or a poorly set pressure valve can subtly sabotage your efforts, resulting in wet pucks and uneven extraction. Regularly checking and maintaining your gear has been instrumental in elevating my espresso quality beyond expectations, and it can do the same for you.
Tools That Elevated My Home Espresso Game
If you’re serious about perfecting your espresso, investing in a few select tools can make all the difference. I swear by a precision coffee scale—it’s essential for accurate dosing and consistency. Alongside that, a bottomless portafilter helps me diagnose channeling issues visually, making adjustments more intuitive. And don’t forget a high-quality tamping station, which ensures even pressure—that’s been a game-changer for me.
Complement these with routine grinder cleaning kits and calibration tools, and you’ll be surprised how quickly your espresso game advances. These tools are reliable investments because they uphold your craft, prevent costly damage, and keep your setup performing at its best.
This Is Your Moment to Elevate Your Coffee Ritual
Transforming your approach to milk frothing, grind calibration, and espresso extraction isn’t just about better coffee—it’s about embracing a journey of continual learning and personal growth. Your dedication to refining technique and maintaining equipment will pay dividends in flavor, aroma, and the pure joy of a perfect shot. Remember, each adjustment brings you closer to that dream espresso, and the small wins along the way propel you forward.
If you’ve ever hesitated to tinker with your setup or doubted the importance of routine maintenance, now’s the time to act. Dive into your gear, practice intentionally, and enjoy the process. For tailored advice or troubleshooting tips, feel free to reach out through our contact page. Here’s to more flavorful mornings and impeccable espresso shots—your journey starts now!