How the Salami Shot Technique Helps You Identify Extraction Errors
Ever had that moment when you pull a shot of espresso, and instead of rich, velvety crema, you get a disappointing puddle of over-extracted bitterness or a pale, weak brew? I remember countless mornings when I thought I had everything dialed in, only to realize my espresso lacked depth or clarity. It’s frustrating, isn’t it? I used to spend hours tweaking grind size and tamp pressure, convinced I was missing some elusive secret. Then, I stumbled upon a surprisingly simple trick that transformed my approach—something called the Salami Shot Technique. It sounds humorous, but don’t dismiss it; this little ritual helped me finally understand what was happening under the surface of my machine.
Why It’s Time to Stop Guessing and Start Watching
For home baristas and coffee enthusiasts alike, the biggest challenge isn’t just getting the grind right or tamping perfectly—it’s identifying subtle errors during extraction. Sometimes, your taste buds can’t tell whether the shot is under or over-extracted unless you’re experienced, and seeing the shot in action is like having a coffee X-ray. That’s where the Salami Shot Technique shines. It’s a visual test that lets you diagnose your shot’s flow and timing, giving you clues that words and taste alone can’t provide. By adopting this method, I moved from guesswork to precise adjustments, saving time and coffee beans while significantly improving my espresso quality.
Have you ever faced the dilemma of perfectly tamped yet underwhelming espresso?
I’ll admit, one early mistake I made was misinterpreting the signs of channeling or uneven extraction. I thought I just needed a finer grind or firmer tamp, but often, the real issue was airflow and pressure distribution—things I could only see if I paid attention to the shot pouring out. That mistake taught me to look beyond the taste and smell. Visual inspection, especially during the shot, is crucial. Research shows that analyzing flow patterns can predict extraction issues better than blind tasting alone (Barista Magazine, 2021). Once I learned to watch closely, my espresso improved dramatically.
In this post, I’ll walk you through exactly how the Salami Shot Technique works and how it can become your go-to tool for diagnosing extraction errors seamlessly. Ready to ditch endless trial-and-error cycles and start pulling consistently excellent shots? Let’s dive into the how and why.
Mastering the Art of Salami Shots
First things first: this technique involves observing the espresso as it pours, much like watching a salami slicing, with steady, consistent flow signaling optimal extraction. If you notice drips, splatters, or uneven streams, it’s a sign that adjustments are needed. Over time, I found that this visual cue allows me to pinpoint problems like channeling or incorrect grind size without having to wait for the final taste test. Curious? Keep reading, and I’ll show you step-by-step how to implement this simple yet powerful habit for better espresso every time.
If you’ve faced issues with inconsistent shots or wondered if your machine is performing at its best, incorporating the Salami Shot Technique might just be the game-changer you need. And don’t worry—without diving into complex equipment modifications, this tip is accessible for all home baristas eager to improve. Want to learn more about optimizing your coffee setup? Check out how to select the perfect grinder or explore top-rated espresso machines in 2025.
Now that I’ve shared why observing your pour is vital, in the next section, I’ll dive into the practical steps to make the Salami Shot Technique your new ritual. Trust me, once you start watching, you’ll never go back to blind tasting alone.
,
Set Up Your Watchpoint: Prepare for Visual Monitoring
Begin by ensuring your espresso machine is warmed up and your portafilter is loaded with freshly ground coffee. Use a clean, level tamp to create consistent puck density. Position yourself at eye level with the spout or portafilter to clearly observe the pour. Think of it as preparing a stage where every movement should be visible and intentional. That morning, I adjusted my lighting and leaned in closer—this minor tweak made all the difference in catching subtle pour nuances.
Initiate the Shot and Observe the Flow Carefully
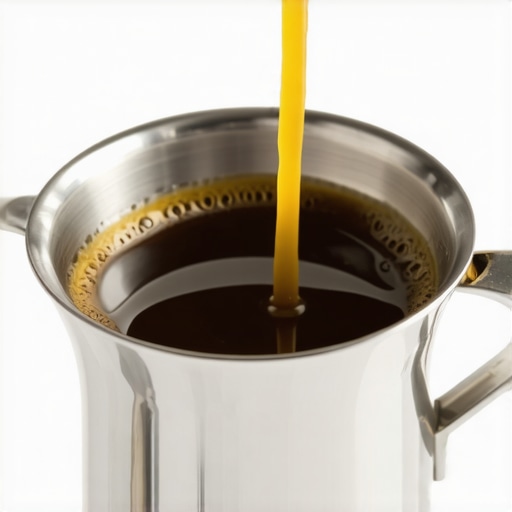
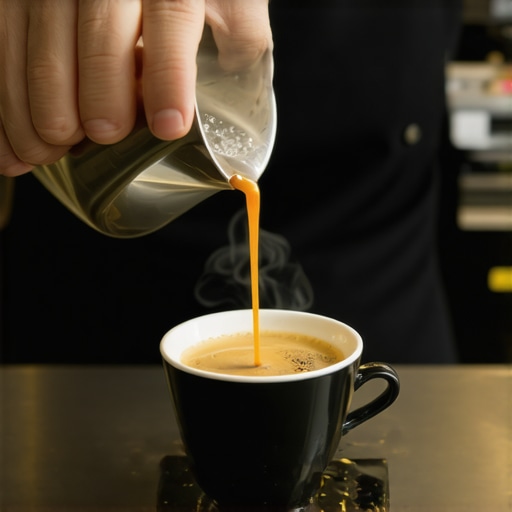
Start your extraction and watch intently as the espresso begins to flow. You’re looking for a steady, honey-like stream, not erratic drips or splatters. Imagine pouring honey from a jar—you want a continuous, unbroken stream. During my last attempt, I noticed sporadic splattering, indicating uneven pressure or channeling issues. This quick visual cue alerted me to tweak my grind size slightly finer, which improved the flow noticeably.
Identify Common Pour Patterns
- Consistent, smooth flow: Likely good, but still verify taste.
- Slow or trailing drip: Possibly under-extraction, consider a finer grind.
- Splotches or splashing: May indicate channeling or uneven puck distribution.
Adjust Based on What You See
If the pour is too slow or seems to be struggling, tighten your grind slightly—think of it as installing a finer cheese grater. Conversely, if the shot is pouring out too quickly and with splatters, coarsen the grind slightly. Tamping pressure should remain consistent to avoid confounding variables. During my session, I changed my grind coarser because I saw a rapid, thin stream, and that adjustment led to a richer, more crema-filled shot.
Use the Visual Feedback to Refine Your Technique
Repeat the shot after each adjustment, paying close attention to the flow. This iterative process transforms guesswork into precision. Remember, the flow dynamics are your live feedback—a natural, real-time indicator of your setup. I once spent a morning tinkering, resulting in a beautifully steady pour that translated into an espresso with vibrant flavor and perfect balance.
Combine Visual Cues with Taste Testing
While observing the pour provides immediate clues, always follow up with tasting. A well-balanced flow often correlates with a sweet, balanced shot. If not, revisit your grind, tamp, or distribution technique. Incorporate the magnet trick to keep your grinder chutes clean, ensuring consistent grind size that supports predictable pours. Remember, consistency is key—developing this visual habit accelerates your mastery as a home barista.
Optimize Your Machine’s Conditions for Better Pours
Before starting, check your machine’s pressure and temperature settings. Regularly cleaning your brew head with a quick 10-second flush can prevent buildup that disrupts flow. The more you pay attention to these details, the more your pours will mirror your ideal shot profile. I learned this the hard way after a clogged shower screen caused uneven pour patterns, which I fixed by a simple cleaning routine.
Integrate these steps into your routine and notice how your ability to diagnose and fix espresso extraction issues improves. Adopting the Salami Shot Technique turns your machine into a diagnostic tool—a visual language that guides your adjustments seamlessly. For further insights into barista gear upgrades, visit this guide.
Many coffee enthusiasts fall prey to misconceptions when it comes to essential equipment like grinders, milk frothers, or espresso machines. These myths often lead to subpar results, wasted money, or even damage to your setup. Let’s dig deeper into some of the most persistent misunderstandings and how recognizing the hidden nuances can elevate your brewing game.
Why relying solely on high wattage isn’t always better for grinders can be a trap for advanced brewers
Contrary to popular belief, a more powerful motor doesn’t automatically guarantee a better grind. Some high-wattage grinders generate excessive static, leading to uneven particle size distribution, which affects extraction consistency. Specialist grinders with optimized burr designs and well-calibrated motors often outperform brute-force models. For instance, conical burrs tend to produce less static and retain coffee oils better, ensuring a fresher, more uniform grind—crucial for nuanced pours. External studies, like the one from the Science Daily report, highlight how static impacts grind uniformity and ultimately, flavor extraction. Don’t fall for the myth that wattage equals quality; instead, focus on burr design and calibration.
Beware of milk froth myths that sabotage your latte art efforts
The assumption that frothing at a specific temperature or using certain types of milk guarantees perfect microfoam is misleading. Many believe that ultra-steamed milk always delivers the silky microfoam needed for artful designs. But as detailed in the Milk Frothers Guide, technique matters more than temperature or milk type alone. Over-aeration can create large bubbles, disrupting the microstructure. Additionally, some enthusiasts think that using plant-based milks like almond or oat milk automatically produces inferior froth—accuracy varies widely depending on processing and fat content. The real secret lies in consistent rolling motion, proper pitcher angle, and micro-adjustments in steam pressure. Mastering these nuances can turn your foam into a work of art, regardless of your equipment’s brand or price point.
How much of your espresso machine’s performance is hidden in its internal plumbing?
Many overlook the significance of internal cleanliness and fluid pathways in machines. A common myth suggests that cleaning isn’t critical unless there’s visible buildup. However, mineral deposits, coffee oil residues, and scale accumulate stubbornly within the boiler, pipes, and shower screens, subtly impairing temperature stability and pressure consistency. According to barista expert James Hoffmann, frequent maintenance ensures optimal extraction and prevents flavor degradation. For example, neglecting a dirty shower screen can result in uneven water dispersal, leading to channeling and over-extraction. Regular backflushing, descaling, and component inspections are your best bets for maintaining peak performance. Remember, your machine’s internal ‘plumbing’ is the unseen aspect that often causes the most frustration if neglected.
What advanced steps can elevating your barista gear and setup bring to your coffee quality?
Premium gear often promises superior results, but many home baristas misuse or overlook sophisticated features. For example, manual pressure gauges or temperature controls can be underutilized due to lack of knowledge, leading to inconsistent pulls. Understanding how to fine-tune these parameters can be transformative. Additionally, accessories like tamping stations or distribution tools help create uniform puck density. Incorporating quality grinder calibration routines and upgrading to precise tampers can bridge the gap between amateur and professional results. For insights on selecting these tools, scan through this guide. The key is recognizing that nuanced adjustments—enabled by smarter gear—can unlock complex flavor profiles and consistency that novices might never achieve without understanding the hidden nuances involved.
To keep your beloved espresso setup performing at its peak, consistent maintenance and judicious tool choices are essential. For example, I swear by using a precision burr grinder like the Baratza Sette 270Wi because its calibration stability ensures uniform particle size over prolonged use, which directly translates to consistent shots. Regularly cleaning your grinder with a magnet trick keeps chute blockages at bay, saving you time and preventing uneven grind dispersion. Similarly, a digital scale like the Acaia Lunar, known for its high precision and auto-off features, assists in dialing in doses precisely, which is crucial for long-term consistency.
How do I maintain my espresso tools over time?
Establishing a routine that includes scheduled descaling, cleaning shower screens, and calibrating grinders every few months prolongs equipment lifespan and guarantees top results. For instance, descaling your espresso machine with a recommended solution removes mineral buildup, preventing flow inconsistencies, as emphasized in this article. Using a dedicated brush set to clean group heads and portafilters maintains hygiene and avoids flavor contamination. Remember, neglecting minor upkeep can lead to expensive repairs or deteriorated coffee quality over time.
Advancements in software automation, like smart grinders with app-control, are beginning to revolutionize maintenance. They allow you to log cleaning schedules and alert you when parts need replacement, extending the functionality of traditional gear. Looking ahead, I see a trend towards AI-assisted calibration tools that analyze shot flow and taste, suggesting precise adjustments automatically, making maintenance more proactive than ever.
Investing in quality tools pays off
Choosing reliable, well-designed equipment—like a high-quality grinder—is just the start. Proper maintenance transforms these tools into lifelong assets. For example, regularly using a puck screen prevents channeling caused by uneven puck surfaces, ensuring consistent extraction. Remember, a little effort keeps your setup performing beautifully for years, saving you money and stress in the long run.
One advanced tip I recommend trying today is regularly upgrading your grinder chute adaptation with a magnet, which keeps debris from accumulating and enhances grind consistency. This small modification can dramatically improve your workflow and shot quality. As equipment technology continues to advance, staying proactive with maintenance and thoughtful tool upgrades will ensure your coffee experience remains exceptional.
Lessons Only Experience Can Teach You
One of the most profound lessons I learned about home espresso is that the devil truly is in the details—like how a tiny shift in tamp angle can make or break the shot, or how observing the pour reveals flaws unseen by taste alone. I used to dismiss flow as a superficial aspect, but catching my pour’s irregularities early revolutionized my approach and saved hours of trial and error. It dawned on me that mastering visual cues creates a feedback loop, transforming fumbling into finesse.
Another takeaway was how often I underestimated the importance of machine cleanliness—not just for hygiene, but for flow quality. That stubborn scale buildup or clogged shower screen silently sabotaged my extractions. Now, regular maintenance tools like descaling solutions and brush sets are part of my routine, giving me confidence that my gear performs at its best and that every shot is a canvas for precision.
Lastly, I realized that equipment choices—like choosing a grinder with consistent burrs over wattage hype—are fundamental. I once thought that upgrading to a more powerful grinder would fix all, but I found that nuanced features like static reduction and calibration stability are what truly matter. The insight was clear: invest time in understanding your tools, and they’ll reward you with better coffee and deeper satisfaction.
My Favorite Resources for Going Further
To deepen my espresso knowledge, I lean heavily on trusted sources like the comprehensive guides at Espresso Tech Guide. Their articles on grinder calibration and setup have been transformative. For refining milk microfoam, I turn to Milk Frothers That Transform Your Coffee Experience. It’s packed with practical tips that elevate even budget equipment into art tools. Lastly, I highly recommend exploring Top-rated Espresso Machines in 2025 for an up-to-date perspective on reliable, user-friendly machines. These resources give me the confidence to troubleshoot, optimize, and truly enjoy every cup I brew.
Your Turn to Make It Happen
Mastering home espresso isn’t just about having the right gear—it’s about cultivating a keen eye and a curious mind. I invite you to apply the Salami Shot Technique today: just watch your pour as if it’s telling you a story. Small changes can lead to big improvements, so don’t hesitate to experiment and trust your observations. Choosing to pay attention to these details transforms your kitchen into a personal barista lab—where every shot is an opportunity to learn and enjoy.
What visual cue has most helped you improve your espresso technique? Let me know in the comments below!
For more personalized advice or to share your journey, feel free to reach out through our contact page. Remember, every great barista started exactly where you are now—so keep brewing, watching, and enjoying the process!
.