The 5-minute basket scrub that removes rancid coffee oil build-up
I remember the exact moment I realized my trusty espresso machine was losing its charm. It was a busy Monday morning; I had already ground my beans, tamped perfectly, and hit the brew button. But instead of that rich, aromatic shot I love, I was met with a dull, almost bitter experience. That familiar aroma was missing, replaced by a faint rancid smell—like old laundry left in a forgotten hamper. It hit me—my equipment was crying out for a deep clean, specifically a simple fix that I had overlooked for too long.
The Frustration of Rancid Coffee Oils and Dirty Equipment
If you’re like me, you probably love that first sip of a fresh shot of espresso. But sometimes, your gear betrays you. Over time, stubborn coffee oils build up inside the basket, shower screens, and other components. These oils become rancid, creating an off-putting flavor and compromising your coffee’s quality. It’s not just a matter of taste; this build-up can also cause machines to work less efficiently and even damage components if left unchecked.
In my early days, I made the mistake of ignoring this build-up and resorted to quick rinses or superficial cleaning. That was a mistake. I didn’t realize that these oils can embed deeply, turning your morning brew into a sour disappointment. Regular cleaning routines are vital, but even a thorough weekly clean can leave residues behind. That’s when I discovered the power of a simple, five-minute basket scrub—a routine that transformed my coffee experience almost instantly. And trust me, once I started doing this, I noticed a significant difference in flavor, aroma, and machine performance.
Feeling Skeptical About a Quick Fix? Think Again
I get it. You might be thinking, “Five minutes? Really? Will this small routine make any difference?” Honestly, I was skeptical too. But early on, I made the mistake of neglecting this simple step, which led to clogged baskets and bitter-tasting shots. It was only when I committed to this quick routine that I realized how much of a difference a tiny bit of effort could make. This isn’t about overhaul cleaning; it’s about targeted, effective maintenance.
By integrating this quick basket scrub into my weekly routine, I kept my equipment running smoothly and preserved the integrity of my coffee. Plus, it saved me from more complicated repairs down the line. Curious? Keep reading. I’ll walk you through how I do it, why it works, and how *you* can get started today to brew better, fresher coffees every morning.
Start with Disassembly and Prep
Before cleaning, unplug your espresso machine and remove detachable parts like the portafilter, baskets, drip trays, and water reservoir. Lay out microfiber cloths and brushes to prevent stray coffee grounds from spreading and to simplify reassembly. Remember, a cluttered workstation slows you down and risks missing spots.
Scrub the Basket and Portafilter
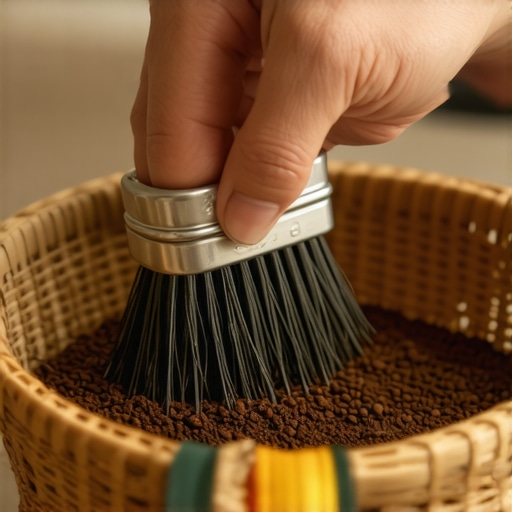
Use a dedicated brush or a toothbrush dipped in a mixture of warm water and food-safe espresso cleaner (or a mild detergent). Focus on removing coffee oils and grounds lodged in crevices. Apply firm, circular motions—think of it like polishing a gem—until the surface feels smooth and free of residue. Rinse thoroughly with warm water to wash away loosened oils.
Tip:
A quick immersion in a solution of equal parts hot water and vinegar for 10 minutes helps break down stubborn oils. After soaking, give it a vigorous scrub and rinse well. This process is especially effective for heavily soiled baskets.
Clean Shower Screen and Group Head
Inside the group head, coffee oils accumulate and can cause channeling. Use a damp cloth or a soft brush to wipe the shower screen—think of it as cleaning the ‘face’ of your machine. For thorough cleaning, remove the screen if possible, soak it in descaling solution or a vinegar mixture, then scrub gently with a brush until shiny. Reinstall carefully, ensuring a snug fit.
Flush the Machine
Replace the water reservoir with fresh, filtered water. Run a cleaning cycle or manually pull hot water through the group head for about 30 seconds. This flushes out residual oils and mineral deposits. For espresso machines with a cleaner function, follow the manufacturer’s instructions to cycle cleaning solutions through the system.
Pro Tip:
If your machine has a steam wand, purge steam into a damp cloth or rag after cleaning to clear milk residues. Use a dedicated brush to clear any milk crusts or clogs from the tip and internal pipes.
Wipe and Reassemble
Finish by wiping all external surfaces with a damp cloth. Pay special attention to control panels and switches. Once everything is dry, reassemble parts, refill water reservoirs, and run a test shot to verify cleanliness and performance. Regular, targeted cleaning preserves the flavor profile of your coffee and extends your machine’s lifespan.
Think All Espresso Machines Are Equal? Think Again
Many home baristas believe that any espresso machine will do, but in reality, not all machines are created equal. A common misconception is that more expensive equals better quality, but this isn’t always true. Factors like boiler type, pressure stability, and group head design play crucial roles in brewing performance. Choosing the right espresso machine requires understanding these nuances rather than chasing the latest model or price tag.
Milk Frothers: You Don’t Need a Fancy One to Get Perfect Microfoam
It’s tempting to think that only high-end milk frothers can produce café-quality microfoam, but that’s a myth. Many beginners overlook the importance of technique over equipment. A simple hand-held or basic automatic frother can achieve excellent results if used correctly—warm your milk gently, hold the wand at the right angle, and pay attention to your frothing motion. Remember, the quality of your milk and steaming technique often matters more than the frother’s price. Master the art of frothing with the right method, not the gear.
High-End Coffee Grinders Guarantee Consistency? Not So Fast
A common myth is that premium grinders automatically deliver perfect, consistent grounds. However, many enthusiasts overlook that even top-tier grinders require regular maintenance and proper dialing. Burr alignment issues, chattering, or static buildup can all cause inconsistency, regardless of price. Furthermore, grind size calibration is vital; a grinder set incorrectly won’t produce optimal results. For detailed insights, check out how to select and maintain your grinder.
Why Do Inconsistent Shots Keep Happening, Despite Using Premium Gear?
The secret lies in understanding the subtleties of your equipment. Factors like tamper pressure, distribution technique, and machine temperature stability often trip up even experienced users. Investing in high-quality gear is beneficial, but neglecting routine calibration and cleaning can negate its advantages. Regularly checking your machine’s pressure and temperature, for example, can prevent shot variability. Remember, equipment maintenance often outweighs initial investment. Here’s why your puck gets soggy and how to fix it.
In conclusion, debunking these myths allows you to optimize your setup and truly elevate your coffee game. Don’t assume that best gear alone guarantees perfect brews; technique, maintenance, and understanding nuances are equally, if not more, important. Have you ever fallen into this trap? Let me know in the comments and share your experiences.
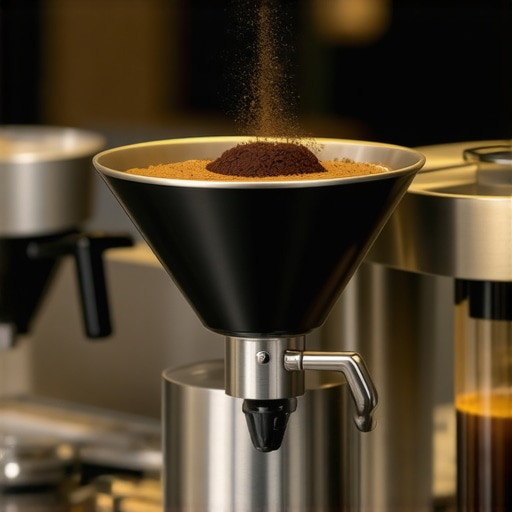
Maintaining your home espresso gear is an ongoing process that ensures consistent quality and longevity. Over the years, I’ve refined my toolkit to include a handful of specialized tools that make cleaning, calibration, and troubleshooting straightforward. For example, a high-quality dosing funnel prevents coffee grounds from flying everywhere, keeping my workspace tidy and my grinders calibrated. Another staple is a calibrated burr cleaning brush, which reaches into the tight spaces of my grinder to remove static and residual coffee particles—crucial for achieving consistent grind size over time.
Regular calibration is essential, especially for grinders. I use a zero point tool to verify grinder settings every few weeks. This small step prevents unwanted variation and ensures that my shots stay consistent. On the espresso machine side, a reliable group head cleaning kit simplifies deep cleans, which I perform monthly—important for maintaining optimal pressure and extraction quality.
Tools alone won’t improve your coffee; understanding how to leverage them is key. Incorporate routine checks like verifying portafilter gaskets or purging steam wands while referencing detailed guides such as this beginner’s manual. As equipment technology advances, I predict more smart calibration tools integrated via apps will emerge, allowing even novices to perform professional-level maintenance at home. In particular, smart pressure gauges connected via Bluetooth are becoming more affordable and precise, providing real-time feedback during pulls.
How do I maintain my gear over time?
The secret lies in a consistent routine. After every brew session, I purge my steam wand and wipe down all surfaces. Weekly, I perform a thorough grinder calibration and clean all removable parts with warm water and mild detergent. Monthly, I use specialized cleaning solutions for my espresso machine’s group head and replace worn seals. Using tools like magnetized dosing funnels and dull burr tests helps catch potential issues early.
For long-term results, keep a maintenance log. Tracking when you last deep cleaned your boiler or replaced filters prevents costly repairs down the line. As the market shifts, expect the development of integrated app-controlled maintenance alerts that remind you when essential tasks are due, streamlining your routine.
Don’t overlook software-based solutions; many high-end espresso machines now include firmware updates that improve temperature stability or pressure control. Regular updates and firmware maintenance go hand-in-hand with physical upkeep to ensure your gear performs at peak efficiency. To keep your setup running smoothly, I recommend adopting a dedicated cleaning and calibration schedule—think of it as preventive care for your investment.
If you haven’t already, try the advanced tip of using a small static elimination hack during grinding sessions; it’s a game-changer for ensuring dust-free grounds and uniform doses. Maintenance might not be glamorous, but it’s the secret weapon behind every exceptional cup of coffee.
Through my journey in nurturing my home espresso setup, I’ve uncovered vital lessons that go beyond simple cleaning routines. These insider nuggets have profoundly transformed my coffee experience, and I believe sharing them will help you elevate your craft as well.
What I Wish I Knew When I Started Tending My Espresso Equipment
- Every detail matters—From tamper pressure to grinder calibration, small adjustments can make a huge difference. Ignoring the nuances often leads to bitter shots and lingering frustrations. The slightest variation in puck prep or grind size can alter flavor profiles; thus, cultivating a meticulous routine is essential.
- Routine maintenance is an act of love—Skimping on cleaning might seem like a time-saver, but it’s an investment in consistency. Regular deep cleans prevent rancid oils from tainting your brew, ensuring each cup remains fresh and vibrant.
- Don’t underestimate the power of tools—High-quality brushes, calibration gauges, and even simple magnets can streamline your maintenance and troubleshoot issues before they escalate. Having the right toolkit means less guesswork and more brewing time.
- Understanding your gear deepens your connection—Learning how components like group heads, gaskets, and shower screens work together cultivates a sense of mastery, turning maintenance into a meditative ritual rather than a chore.
- Patience and curiosity go hand in hand—Experimenting with different cleaning solutions, grind settings, or tamp techniques continuously refines your skills. Every tweak is an opportunity to discover new flavors and improve workflow.
Tools and Resources That Keep My Coffee Sharp
- Dosing funnels: They prevent grounds from flying everywhere, making calibration and cleaning cleaner and more precise.
- Burr cleaning brushes: Reaching into tight spaces, they are vital for maintaining grind consistency over time.
- Zero point calibration tools: Regular checks help keep your grind size spot-on, ensuring ideal extraction for each shot.
- Group head maintenance kits: Simplify deep cleaning routines that sustain pump performance and brew quality.
Your Next Step Toward Espresso Excellence Awaits
Embracing these lessons and tools transforms home brewing from a daily chore into a satisfying craft. Remember, every meticulous step you take ensures each espresso shot is a masterpiece—full of flavor, aroma, and joy. The journey toward coffee mastery is ongoing, but with patience, curiosity, and the right maintenance, you’ll find yourself savoring results that rival your favorite café.
So, what small change will you make today to improve your home espresso routine? Share your plans below, and let’s brew greatness together!