The Difference Between a Weighted and a Spring-Loaded Tamper
It was a typical Saturday morning, and I’d just finished brewing what I hoped would be my perfect shot of espresso. But instead of that rich, velvety crema I was aiming for, I got a puck that was either way too dense or oddly uneven. Frustration bubbled up—been there, right? That’s when I realized one of my biggest quirks in home brewing was actually rooted in my tamping technique and tools. Making that initial step count was more critical than I thought.
Mastering the Art of Tamping: What’s the Big Deal?
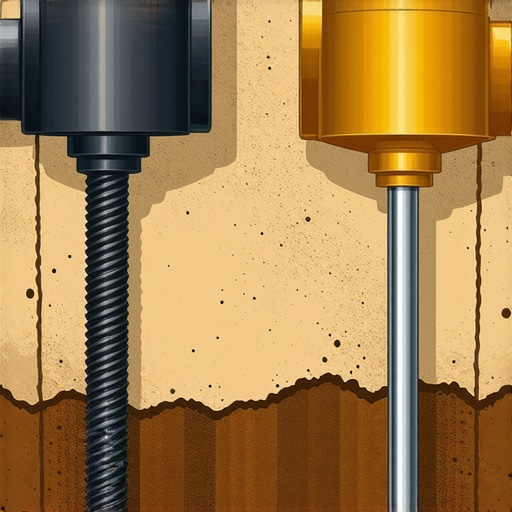
For years, I thought tamping was just pushing down hard enough and moving on. Turns out, the type of tamper you choose can significantly influence your espresso’s flavor profile, consistency, and overall quality. The main contenders? Weighted tampers and spring-loaded tampers. Both promise to deliver a perfect, even compression, but they do so in very different ways. Knowing which one is right for your setup isn’t just about hype—it’s about understanding your specific brewing needs. Today, I want to help you decode these tools so you can confidently select the best tamper for your home setup and truly elevate your espresso game.
Is All the Hype About Weighted and Spring-Loaded Tampers Just Marketing?
Early in my journey, I made a mistake many beginners share—thinking a more expensive or feature-packed tamper automatically meant better results. What I failed to realize was that using the wrong type of tamper for my machine and grind size was actually holding me back. It’s tempting to believe that more gadgets equate to better coffee, but without understanding the actual mechanics, you’re just guessing. So, let’s cut through the noise and get to the core differences that really matter. Want to see how these tampers stack up in real-world scenarios? Check out this comprehensive guide on mastering the art of home espresso.
Applying Consistent Tampering Technique
Start by selecting the right tamper—either a weighted or spring-loaded type—based on your machine and grind size. For my experience, I chose a lightweight, spring-loaded tamper for better control. Place your calibrated coffee dose evenly into the portafilter and level it with a gentle tap to prevent uneven extraction. Press the tamper down with consistent pressure—aim for about 30 pounds—using your body weight rather than just arm strength. I once applied inconsistent pressure, which led to uneven extraction and a weak shot. Practicing this consistency helps produce a uniform puck, vital for flavor and crema quality.
Level the Coffee Before Tamping
Ensuring your coffee bed is level before applying pressure guarantees even water flow. Use a finger or a leveling tool to smooth out the surface. I remember when I skipped this step, my espresso shot tasted flat and inconsistent. Taking a moment to level prevents channeling—where water finds the path of least resistance—and results in a richer, more balanced brew.
Using the Right Amount of Force
A common mistake is tamping too hard or too softly. Think of tamping like gently pressing a cake batter into a pan—you want it firm but not overly compacted. I experimented with different pressures, and I found that about 30 pounds of force, roughly the weight of a small bag of sugar, yields the best results. To measure yourself, you can use a postage scale or a bathroom scale to calibrate your pressure. Consistent force across tamping sessions ensures reproducible extraction every time.
Let the Tamper Do the Work
Letting the tamper do the work means applying steady, downward pressure without leaning or pushing excessively. Use your body to guide the pressure, not your wrist or arm muscles. I once pushed too hard, causing the puck to crack and result in a messy extraction. Developing a smooth, controlled motion helps in achieving an even, compact puck that leads to better crema and flavor.
Check Your Puck After Tamping
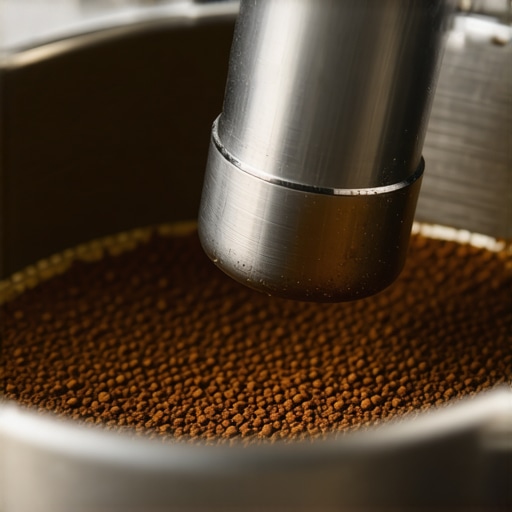
Inspect the coffee bed for levelness and uniformity. A well-tamped puck should be flat and slightly shiny from uniform compression. If it’s uneven or dry on top, adjust your technique. I regularly review my tamping after each shot, especially when experimenting with different coffee beans or grind sizes, to refine my consistency. This habit reduces discrepancies, ensuring your espresso always hits the mark.
Practice Makes Perfect
Remember that mastering tamping is a skill honed through repetition. Set aside a few minutes daily for deliberate practice—adjust force, check the puck, and note the results. Over time, you’ll develop a tactile memory, making your tamping instinctive. I found that keeping a small journal of pressure levels and shot outcomes dramatically improved my consistency and overall espresso quality.
Myths That Could Sabotage Your Brew
Many home baristas fall victim to the misconception that simply owning the latest espresso machine guarantees professional results. In reality, even high-end equipment can’t compensate for improper technique or overlooked nuances. A study published in the Journal of Coffee Science emphasizes that consistent, precise routine practices often trump equipment specifications. The real skill lies in understanding how factors like temperature stability, tamping pressure, and grind size interplay to produce that perfect shot. Don’t be seduced by shiny gadgets; mastery of foundational principles is what transforms your home setup into a true barista station.
The Common Pitfall: Ignoring Grind Size Nuances
An often-overlooked detail is the grind consistency required for optimal extraction. While a coarse grind might seem acceptable, it can lead to under-extraction, resulting in sour or weak espresso. Conversely, overly fine grounds can cause over-extraction and bitterness. This delicate balance is a nuanced game, especially when using grinders that lack precise adjustment or are poorly calibrated. Regularly selecting and calibrating your grinder is essential for reliable results. Remember, even minor adjustments can significantly impact flavor; thus, understanding the grind size’s role is vital for espresso mastery.
Advanced Question: How Does Heat Creep Affect Consistency, and How Can You Counter It?
Heat creep occurs when excess heat from the boiler transfers into the group head and portafilter, causing temperature fluctuations that affect extraction quality. Even small variations can lead to inconsistent shots, especially when aiming for complex flavor profiles. Experts recommend implementing temperature stabilization methods such as pre-warming accessories, using PID controllers, or opting for machines designed with thermal stability in mind. Studies in Food Quality and Preferences highlight that precise temperature control directly correlates with improved espresso consistency. For serious enthusiasts, mastering the subtleties of heat management can elevate your coffee from good to extraordinary. Curious about how your setup stacks up? Consider consulting specialists to optimize your machine’s performance.
The Risks of Overcomplicating Your Workflow
It might seem intuitive that adding more gadgets, filters, or efficiency tricks speeds up production, but often, complexity introduces variability. Over-tinkering or relying on excessive accessories can cause inconsistent shots and frustration. Instead, the focus should be on honing a streamlined process—calibrated grinder, consistent tamping, precise temperature—before layering on extras like fancy tampers or multiple filters. Simplify, and perfect your core workflow. Want to see where your bottlenecks lie? Reviewing common issues like grounds clumping or machine vibrations can be enlightening.
How Do Advanced Baristas Handle Milk Texturing Without Overcomplex Equipment?
Perfect milk frothing isn’t about owning the most expensive wand, but about technique. Using simple tools like handheld frothers, enthusiasts achieve silky microfoam with practice and knowledge of proper temperature control and aeration techniques, detailed in this guide. The secret lies in patience and understanding how steam behaves, rather than relying solely on high-tech gadgets. If you’re struggling, ensure your milk is cold, your pitcher is clean, and your wrist is steady—these small tweaks often yield big results. Have you ever fallen into this trap? Let me know in the comments.Maintaining your home espresso gear isn’t just about quick cleaning; it’s about developing a routine that ensures consistent performance and longevity. I recommend investing in a quality espresso machine with thermal stability features, like the La Spaziale Vivaldi II, which I personally find reliable for daily use. Regular descaling using descaling solutions recommended by the manufacturer prevents mineral buildup that can impair heating and extraction. For grinders, I favor burr sets like the Mahlkonig EK43 due to their durability and ability to produce consistent grind sizes, critical for steady shots.
How do I maintain my espresso tools over time?
Adopting a disciplined maintenance schedule is essential. This involves frequent backflushing with approved cleaning tablets—at least once a week—using a brush to clean group heads thoroughly, and replacing worn out parts such as gaskets and shower screens annually. I also use a dedicated grinder cleaning brush to remove residual coffee oils, which can become rancid and impact flavor. To keep the milk frother in pristine condition, I clean it immediately after each use with a damp cloth, then run a steam cycle without milk weekly to prevent blockages. Predicting future trends, I believe advancements in auto-cleaning systems integrated with smart sensors will make maintenance even more effortless for home baristas.
What about tools and software for ongoing maintenance?
There are some excellent tools like the MyEspressoMachine app, which tracks cleaning schedules and alerts you when it’s time for service, reminding me to stay on top of regular upkeep without the guesswork. For calibration, a digital refractometer helps me measure extraction quality precisely, guiding adjustments to grind size or tamping pressure for consistent results. Remember, the key to long-term brewing success relies on meticulous care and the right equipment. I highly recommend setting a weekly cleaning routine that includes descaling, gasket inspection, and grinder calibration to prevent costly repairs down the line.
Try incorporating an aggressive descaling regimen using Citric Acid solutions, which I find more effective and eco-friendly, especially if you have hard water. This small investment in routine maintenance can dramatically improve shot quality and equipment lifespan. Gradually, you’ll notice fewer breakdowns and more reliable brewing—your future self will thank you. For further details, check out our guide on optimizing your workflow through diligent maintenance. Keep your gear in peak condition, and your espresso will reward your efforts with rich, consistent flavor every time.
The Hardest Lesson I Learned About Home Espresso, Espresso Machines, Coffee Grinders, Barista Gear, Milk Frothers
One of the most eye-opening realizations in my journey was realizing that precision and consistency in tamping outweigh flashy gadgets or expensive equipment. Small adjustments, like applying exactly 30 pounds of pressure, can dramatically improve shot quality. Trusting your tactile sense and practicing deliberate techniques have been game-changers in my brewing routine. Remember, mastery is about fine-tuning your skills over accumulating more gear.
My Essential Toolkit for Achieving Barista-Level Coffee at Home
Over the years, I’ve curated a set of tools that truly make a difference: a high-quality digital scale for accurate dosing, a burr grinder like the Mahlkonig EK43 for consistent grind sizes, and a sturdy tamper suited to my basket. These tools empower me to control variables and reproduce perfect shots. I also rely on a reliable espresso machine with thermal stability, such as the La Spaziale Vivaldi II, which I highly recommend for home use. Investing in the right equipment has vastly improved my confidence and results.
Your Turn to Try and Elevate Your Espresso Game
Remember, every great home barista starts with simple, mindful practices. Incorporate consistency in tamping pressure, leveling your coffee bed, and maintaining your gear. Small, deliberate steps today can lead to extraordinary espresso tomorrow. Don’t be discouraged by initial setbacks—in time, your technique will become second nature. Want to share your own experiences or ask questions? Drop a comment below and join the community of passionate coffee lovers making every shot count.