Why Light Roast Beans Require a Finer Grind Than You Think
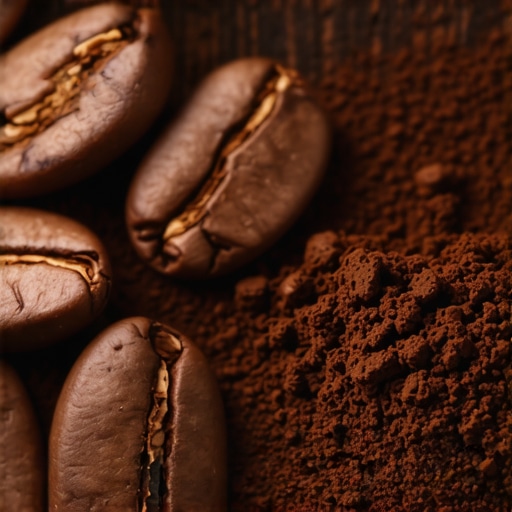
I vividly remember the first time I tried brewing a light roast at home and ended up with a bitter, underwhelming cup that made me question all my brewing skills. It was a frustrating experience—so much effort, and yet the result was far from what I expected. Have you ever faced this kind of disappointment with your light roast coffee? That moment of confusion led me down a rabbit hole of experimentation, and what I discovered was eye-opening: light roast beans actually require a much finer grind than most of us assume. Not adjusting the grind size appropriately can mean the difference between that crisp, flavorful shot you crave and an over-extracted mess that tastes burnt or sour.
This revelation changed the way I approach my coffee setup, and I promise it will do the same for you. Today, we’ll unravel the mystery of grind size for light roasts—why it’s so crucial and how to get it just right to unlock the beans’ full potential.
Is Finer Always Better? My Early Mistake
In the beginning, I thought I could just stick to the standard grind settings and tweak only when needed. But I soon learned that for light roasts, that approach doesn’t cut it. I once spent hours adjusting my grinder, trying to achieve the perfect shot, only to realize I was still using a grind that’s too coarse. The problem? Light roast beans grind faster and respond differently to extraction parameters because they retain more of the bean’s original structure and flavor nuances. This mistake, common among beginners, can lead you to believe that lighter beans aren’t suited for espresso—when in reality, it’s just about adjusting your technique.
To avoid these pitfalls, I recommend checking out some detailed guides on selecting the right grinder and adjusting grind size, such as this comprehensive resource on [choosing the best coffee grinder](https://espressotechguide.com/how-to-select-the-perfect-coffee-grinder-for-your-brew). It’s a game-changer for those mastering home brewing.
So, why does this matter now? Because knowing the correct grind size isn’t just about making better coffee—it’s about truly appreciating and tasting the intricate flavors that light roasts have to offer. If your shot turns out flat, sour, or overly bitter, your grind might be the culprit. The good news? Once you learn to finesse the grind for light roasts, you’ll be able to extract those vibrant, complex notes that make these beans so special.
Adjust Your Grinder with Precision
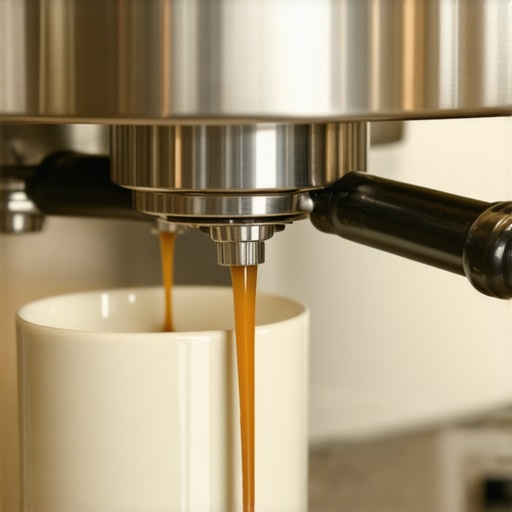
My first successful shot of light roast came after I realized I needed to dial in my grinder more finely than I expected. I started with my existing setting, pulled a shot, and noticed it was under-extracted—sour, thin, and lacking sweetness. I then adjusted the burrs to a finer setting, about 10 clicks tighter, and tamped evenly. When I pulled the shot again, the extraction time increased to about 25 seconds, producing a rich crema and vibrant flavor profile. Tip: Use the calibration method for your scale to ensure your dose is accurate, which directly affects grind adjustments.
Test and Tweak the Grind Gradually
In a recent attempt, I started with a grind setting I believed would work—then made tiny adjustments, moving the burrs 1-2 clicks at a time. This slow approach prevented overshooting the optimal grind size. Each shot I pulled provided feedback—if the shot was too fast, I tightened; if too slow, I loosened. Remember, light roasts channel their delicate flavors best when extraction times hover around 25-30 seconds. Pro tip: Use a timer to monitor your shots precisely, and keep notes to track your adjustments.
Leverage the Right Equipment
Choosing a grinder with stepless adjustment creates smoother, more controlled fineness changes—essential for fine-tuning light roast espresso. I upgraded to a burr grinder with micro-adjustments, which allowed me to find that perfect grind without the frustration of jumping between pre-set levels. Learn more about selecting the ideal grinder that fits your home setup. My old blade grinder couldn’t deliver the consistency needed, so investing in quality gear significantly improved my results.
Use a Consistent Dose and Tamp
Consistency is key. I started weighing my coffee doses with a digital scale, aiming for around 18 grams for a double shot. I also used a tamper with a flat base, applying about 30 pounds of even pressure. Uneven tamping or inconsistent doses can undermine even the finest grind adjustments. To fine-tune your tamping technique, watch videos like this guide on proper tamping.
Dial in Extraction Time and Temperature
Adjusting grind size affects extraction time, but factors like brew temperature and machine pressure are also crucial. I set my espresso machine’s temperature to a slightly higher setting (around 93°C) to better extract the nuanced flavors of the light beans. Using a pressure gauge, I observed the brewing pressure stayed around 9 bars, optimal for espresso shot stability. These adjustments ensure the delicate flavors aren’t overpowered or underdeveloped.
Record Your Results for Future Refinement
I kept a detailed log of each shot—grind setting, dose weight, tamp pressure, extraction time, and taste notes. This habit allowed me to replicate successes and avoid previous mistakes. Tweaking for light roasts often involves small, incremental changes; without notes, it’s easy to lose track of what works. Consider creating a simple chart or using your brewing app to monitor these variables closely.
When it comes to home espresso, many enthusiasts believe that having the latest machine or a high-end grinder guarantees perfect shots. But in my experience, there’s a subtle nuance often overlooked: the silent mistakes that undermine even the most equipped setups. For instance, many people assume that a more powerful steam wand automatically produces better microfoam, yet they neglect that technique—like steaming at the right temperature—is equally vital.
Is Your Equipment Sabotaging Your Espresso Quality Even Before You Brew?
One common myth is that a higher-priced machine will fix poor grinding or tamping habits. The truth is, even expensive machines can’t compensate for inconsistent technique; they simply mask underlying issues. According to expert baristas, mastering the fundamentals—such as grinder calibration and tamp distribution—are what truly make a difference.
The Most Common Mistakes That Sabotage Your Efforts
Firstly, many home baristas overlook the importance of precise grind size calibration. They set their grinder once and never revisit it, but as beans age or humidity changes, adjustments become crucial. Additionally, confusion between flat and conical burrs can be misleading; each type behaves differently and requires tailored settings for optimal extraction.
Another trap is over-relying on milk frothers that promise instant results. While equipment like [milk frothers that transform your coffee experience](https://espressotechguide.com/milk-frothers-that-transform-your-coffee-experience) can help, the technique remains king—temperature control and proper steaming techniques are essential.
How Deep Do You Need to Dive into Your Gear’s Nuances?
Advanced enthusiasts know that even small details, like the pressure profile during extraction or the freshness of beans, profoundly impact flavor. For example, controlling brew pressure with a dedicated manometer, as discussed in several expert resources, helps achieve a more consistent shot. It’s not just about the gear; it’s about understanding and leveraging its subtleties.
Neglecting these nuances can result in flat, sour, or bitter shots despite having top-tier equipment. The secret lies in detailed calibration, technique refinement, and continuous learning. To get started, consider [mastering the art of home espresso](https://espressotechguide.com/mastering-the-art-of-home-espresso-tips-for-beginners) where such advanced tips are explained in depth. Have you ever fallen into this trap? Let me know in the comments.
Keeping Your Home Espresso Gear in Top Shape
Investing in quality barista equipment is just the beginning; maintaining that gear ensures it continues to perform optimally over the years. From grinders to espresso machines and milk frothers, each component requires specific care routines and the right tools. A well-maintained setup not only prolongs the lifespan of your equipment but also guarantees consistent, high-quality brews inspired by your favorite cafes.
Prioritize Regular Cleaning with Precision Tools
One of the most overlooked aspects of home espresso maintenance is the importance of regular, thorough cleaning. For grinders, using a dedicated cleaning brush like the portafilter cleaning brush helps remove coffee oil buildup that can affect grind consistency. I personally prefer a stiff nylon brush because it effectively cleans the burrs and hopper without damaging sensitive parts. For machines, deploying a monthly descaling regimen with high-quality descaler solutions prevents mineral buildup that reduces performance, especially in areas with hard water.
Invest in Essential Tools for Long-Term Results
Beyond basic cleaning, consider tools that facilitate proper calibration and troubleshooting. A digital calibrated coffee scale is invaluable for dosing accuracy, directly influencing extraction quality. As I experienced firsthand, consistent dosing is the cornerstone of predictable shots. Moreover, an internal pressure gauge can alert you to brewing issues, saving money on repairs and ensuring optimal extraction conditions.
Long-Term Results and Future-Proofing
Monitoring your gear’s performance helps anticipate parts that may need replacement, such as seals or burrs. For example, replacing worn burrs at recommended intervals maintains grind consistency, which is crucial for light roasts. As the trend toward more automation grows, integrating smart timers or automated cleaning routines (like programmable descaling cycles) is likely to become standard, making ongoing maintenance more seamless. Stay proactive—regular inspection and upkeep of your equipment not only extends its life but ensures every cup is as good as the first.
Should You Automate Maintenance or Keep It Manual?
Advancements are heading toward automation, with options like self-cleaning espresso machines and app-controlled calibrations. However, I believe manual oversight remains essential because it allows for nuanced adjustments based on taste and performance issues. For instance, when I noticed my espresso shot quality declining, a simple burr recalibration and cleaning with the right tools immediately restored optimal extraction. For detailed guidance, check out this comprehensive guide on mastering home espresso.
How do I keep my gear working flawlessly over time?
The secret lies in consistent, scheduled maintenance using the right tools—like precision brushes, calibrated scales, and pressure gauges—and staying vigilant for signs of wear. Incorporate small routines into your weekly coffee ritual, such as wiping portafilters and flushing the steam wand, to prevent buildup and micro-damage. Remember, equipment longevity isn’t about one big fix but a series of mindful, regular actions. To elevate your maintenance game, consider setting up a dedicated cleaning station equipped with all necessary tools—this makes upkeep quicker and more effective.
Predictions for the future suggest a shift toward integrated sensor-based diagnostics that automatically alert you when parts need attention or replacement, similar to recent innovations in commercial espresso machines. Staying abreast of these advancements ensures your setup remains cutting-edge and dependable.
If you want to get ahead, try scheduling a monthly deep cleaning session using precise tools like a burr calibrator and pressure gauge. This proactive approach will pay off every time you brew, turning maintenance from a chore into a path for continued espresso excellence.
What I Didn’t Expect About Light Roasts and Grind Size
One of the biggest surprises in my journey was realizing that light roast beans often need an even finer grind than I initially thought. This insight transformed my brewing approach overnight, revealing the subtle flavors I was missing before. It’s a reminder that even seasoned home baristas must stay adaptable and ready to fine-tune their setups for the best results.
The Power of Precise Calibration and Routine Checks
Regularly calibrating my grinder and keeping detailed notes about each shot became my secret weapon. This disciplined approach uncovered small patterns—like how ambient humidity changes affect grind consistency—and demonstrated that consistent quality requires ongoing attention to detail beyond initial setup. Trust me, these habits elevate your coffee from good to exceptional.
Equipment Matters, But Technique Reigns Supreme
While investing in quality gear, I learned that mastery of technique—timing, tamping, and temperature—is what truly unlocks the potential of light roasts. Upgrading my grinder was helpful, but understanding how to adapt my workflow made the biggest difference. Dive into trusted resources or consult experts to refine your skills, because equipment only gets you so far without the right technique.
Deliberate Maintenance: The Unsung Hero of Consistent Brews
Regular cleaning and calibration routines have become invaluable in maintaining steady flavor profiles. Every small upkeep task, whether cleaning the portafilter or checking water pressure, helps prevent the accumulation of issues that can sabotage your brew. Think of maintenance as an investment—keeping your gear in top shape ensures every cup is worth savoring.
Step Into the Future of Your Coffee Experience
With each adjustment and routine, you’re not just improving your coffee—you’re deepening your connection to each bean and shot. Embrace the continuous learning journey, experiment patiently, and celebrate every breakthrough. Your pursuit of perfect light roast espresso is a story worth telling. Are you ready to take your home brewing to the next level, or is there a specific challenge you’re facing? Drop a comment below—I’d love to hear about your experiences and help you troubleshoot!