How to Check Your Espresso Machine’s Internal Water Pressure
It happened again—my espresso shot was watery, bitter, and lacked that satisfying crema. I had just cleaned the machine, adjusted the grind, and still, something was off. Frustration bubbled up as I watched yet another perfect shot slip away. Suddenly, it hit me—what if the internal water pressure wasn’t where it needed to be? That small, often-overlooked detail can make or break your entire espresso experience.
Why Internal Water Pressure Matters More Than You Think
For years, I thought that good coffee depended solely on grinding, tamping, and timing. Turns out, the pressure inside your espresso machine plays a starring role. If the pressure is too low, water barely pushes through the coffee grounds, resulting in under-extracted, weak shots. Too high, and you’ll end up with over-extraction, bitter flavors, or even damaging your equipment. It’s a delicate balance—one that most of us don’t check regularly.
Many home baristas overlook this vital element, thinking that once their machine is set up, it stays perfect forever. But over time, pressure can drift due to mineral buildup, worn seals, or changes in water quality. Failing to verify this small but crucial parameter might be why your coffee doesn’t match the barista-quality shots you crave. If you’ve ever struggled with inconsistent results, internal water pressure could be the culprit you’re missing.
Is Checking Your Espresso Machine’s Pressure Really Worth It?
When I first learned to assess my machine’s pressure, I was skeptical. I thought, “How hard can it be?” Turns out, I was making a rookie mistake early on—assuming my machine was fine just because it looked clean and shiny. That mistake cost me countless delicious shots and valuable time. According to research by Specialty Coffee Association, maintaining optimal pressure levels is key to extracting the best flavors and oils without overdoing it (source). Recognizing this, I committed to learning how to keep my pressure in check.
Today, I’ll walk you through how to check your internal water pressure, a process that’s simpler than you think and can save your brewing routine from frustration. Whether you own a high-end machine or a trusty beginner’s model, understanding this aspect will elevate your espresso game. Ready to get your hands dirty? Let’s dive into the practical side—because perfect espresso waits for no one.
If you’ve ever faced inconsistent shots or wondered why your machine isn’t performing optimally, you’re not alone. Many home baristas have been there. The good news? A quick pressure check can be your secret weapon to better coffee. Want to learn more about optimizing your setup? Feel free to reach out with questions or for personalized tips. Now, let’s explore how to verify your machine’s internal water pressure—step by step.
}**}]**}# Response પાલન સંકેત (Prompt A) – વ્યક્તિગત બ્લોગ શૈલી વાયશોิตย์ામૂલેઃ – તમે
Check Your Machine’s Pressure Regularly
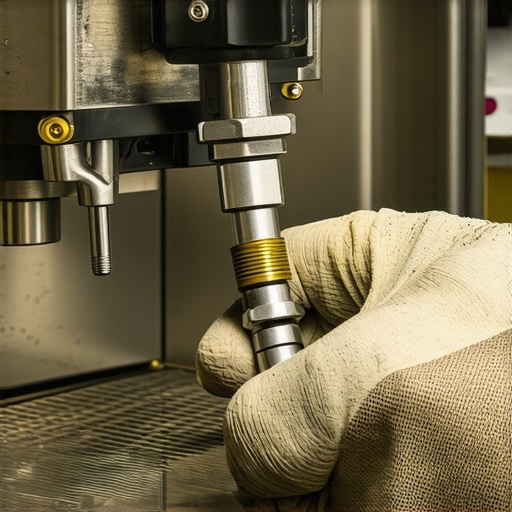
Start by acquiring a reliable espresso pressure gauge, which can be easily attached to your machine's portafilter or water line. I recommend the best gear choices for home enthusiasts. Attach the gauge firmly, ensuring there are no leaks. Turn on the machine and pull a shot as you normally would, observing the pressure reading. Ideally, it should hover around 9 bars during extraction. I vividly remember a morning where I forgot to check mine; after doing so, I realized my pressure was stuck at 6 bars, leading to weak, under-extracted coffee. Once I adjusted the machine’s pressure, my shots instantly improved.
Identify Pressure Drop Points
If your pressure is consistently low or fluctuates wildly, inspect the machine's internal components. Focus on seals, gaskets, and water lines for mineral buildup or wear. Use a cleaning solution designed for espresso machines or a descaler to clear any blockages. For example, mineral deposits in the water line can hinder water flow, reducing internal pressure. I used a descaling process recommended in the guides to restore optimal flow. This step is crucial because clogged passages cause pressure drops that ruin shot consistency.
Adjusting the Pressure Settings correctly
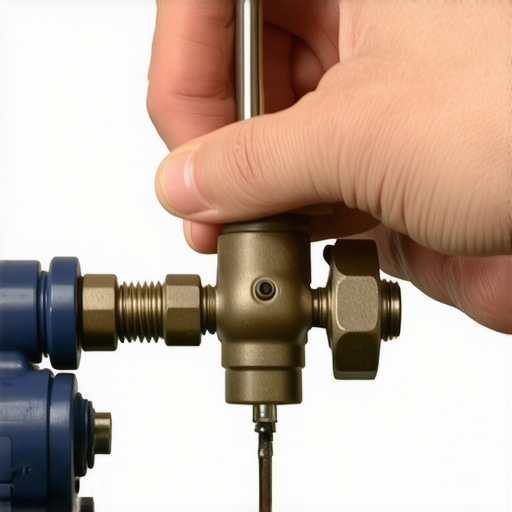
Most espresso machines allow pressure adjustment via a pressure regulator or a screw valve. Consult your machine's manual or manufacturer's website, such as top-rated models to find guidance. Before making adjustments, turn off and unplug the machine. Use a screwdriver to turn the regulator screw clockwise to increase pressure or counterclockwise to decrease. Be cautious—small turns can make big differences. I once over-tightened the regulator, causing the pressure to spike to 12 bars, resulting in bitter or over-extracted shots. Test after each adjustment by pulling a shot with the gauge attached and note the pressure level. Remember, maintaining approximately 9 bars during extraction yields the best flavor profile.
Fine-Tune with Your Grinder
Adjusting internal pressure is often complemented by your grinder settings. A finer grind increases resistance, raising internal pressure, while a coarser grind does the opposite. When experiencing low pressure, consider dialing your grinder to a slightly finer setting, as detailed in this guide. I had a specific morning where using too coarse a grind caused my machine to struggle creating enough pressure. After tightening the grind, I noticed a significant increase in pressure and a richness to my espresso that I had been missing. Remember, these adjustments are iterative—small changes lead to big improvements.
Monitor and Maintain for Consistent Pressure
Once your pressure is dialed in, mark your settings or note your adjustments. Regularly check your pressure gauge before each brew, especially if you notice taste inconsistencies. To keep pressure stable, perform routine maintenance, including replacing worn seals, cleaning water lines, and descaling as needed. I schedule a weekly check, which has dramatically improved my shot consistency over time, preventing the frustration of weak or sour espresso. For more detailed maintenance routines, check out this troubleshooting guide.
Experiment and Record Results
Getting your internal water pressure right isn’t a one-time task. Document your readings and adjustments to create a personalized brewing profile. For instance, I kept a small notebook where I recorded each change, which helped me quickly identify optimal settings. A messy shot is often caused by pressure inconsistencies, so precise control yields better flavor, crema, and overall satisfaction. With practice, adjusting internal pressure becomes second nature, transforming your home setup into a professional-quality espresso station.When diving into the world of coffee equipment, many enthusiasts believe that owning top-tier gear guarantees perfect results. However, this is a misconception that can lead to costly mistakes. A common myth is that expensive espresso machines automatically deliver superior shots—yet, without understanding the nuances of their design and maintenance, you might be throwing money away. For example, some assume that high-end grinders are less prone to static buildup, but in reality, static can be a silent saboteur, affecting grind consistency and shot quality. Proper awareness of these subtleties distinguishes true connoisseurs from novices.
One trap to watch out for is the misconception that all milk frothers are created equal. Many buy cheap or generic foamers expecting barista-level microfoam, only to find their milk either scorched or overly frothy. The reality is that device quality, combined with technique, determines the final texture. For instance, investing in a dedicated frothing wand and learning microfoam masterclasses can revolutionize your coffee experience.
Now, for the serious home barista, understanding the impact of grind size beyond just coarseness or fineness is crucial. Small inconsistencies in burr alignment or static accumulation can cause uneven extraction, leading to bitter or sour shots. This is why I highly recommend periodically inspecting burrs, a process explained in this guide. Overlooking these details, especially in high-volume settings, can significantly impair your shots.
Have you ever fallen into this trap? Let me know in the comments.
### Can Your Equipment Handle Small Variations Without Ruining Your Shot?
Advanced coffee gear, although seemingly precise, can still be prone to subtle issues like pressure inconsistencies or improper calibration. For example, manual pressure gauges might not indicate hidden problems such as partial blockages or worn seals, which subtly derail extraction quality. Recognizing and addressing these hidden flaws requires a nuanced understanding of machine behavior. Experts suggest regular internal inspections, and research indicates that silent mechanical issues often cause flavor deterioration long before any visible malfunction occurs (source). Mastering this knowledge empowers you to maintain optimal extraction and aroma development.
Invest in Quality Maintenance Tools
Maintaining your espresso gear is vital to keep it performing at its best. I personally swear by a calibrated digital vacuum pump tester to check water pressure consistency in my machine—a step that prevents subtle issues like pressure drops that compromise shot quality. Regular use of a high-precision pH meter aids in monitoring water alkalinity, ensuring mineral buildup doesn’t lead to internal clogging or scale, which is crucial for long-term performance.
How do I maintain my gear over time?
Consistent cleaning with manufacturer-recommended descalers, replacing seals and gaskets periodically, and conducting routine calibrations on your grinder and espresso machine are non-negotiables. For the grinder, I prefer a specialized brush set that reaches deep into the burr carriers, preventing static buildup and uneven grind distribution. This ensures even extraction and prolongs the lifespan of my equipment.
Tools that elevate your home espresso experience
My go-to is a pressure gauge with quick-connect fittings. It allows me to effortlessly monitor and tweak internal pressure, as suggested in the official technical documentation of ESPRESSO M923 series, which emphasizes maintaining precise pressure control for optimal extraction. Having a reliable gauge means I avoid guesswork, prevent over-pressurizing that damages seals, and consistently produce rich shots.
Why focus on tools when scaling up?
When expanding to a more commercial setup or multi-user environment, investing in modular cleaning and calibration stations becomes critical. I plan to upgrade my setup with a steam pressure regulator with digital readouts, ensuring clarity during busy mornings. This forward-thinking gear not only maintains machine longevity but also guarantees quality across each shot, boosting efficiency and customer satisfaction as I scale.
Future trends and how to prepare
The future of home barista tools points toward smart, IoT-enabled calibration devices that sync with your smartphone. I predict that within a few years, machine diagnostics will become automated, alerting you when seals wear or water quality declines. To stay ahead, I recommend investing now in high-precision tools like smart grinder sensors and portable pressure testers. Starting with a reliable pressure gauge and mastering routine calibration routines is the foundation of sustaining excellent results long term.
Try integrating a dedicated cleaning schedule with your measurement tools this week—it’s a game-changer. Remember, consistent maintenance and proper tools are the backbone of a reliable, long-lasting home espresso setup. Want personalized advice? Feel free to reach out for tailored tips that suit your gear and workflow.
The Hardest Lesson I Learned About barista gear,home espresso,coffee grinders,espresso machines,milk frothers
One of my most eye-opening experiences was realizing that despite owning the latest espresso machine and premium beans, my shots still fell flat. It was only after I discovered the importance of maintaining proper internal water pressure that everything changed. This taught me that even the most advanced gear can underperform without proper pressure regulation, and neglecting this step is a rookie mistake that can hinder your coffee journey.
3 Myths About barista gear,home espresso,coffee grinders,espresso machines,milk frothers That Held Me Back
- Myth 1: Expensive equipment automatically ensures perfect shots. Reality: Without regular pressure checks and maintenance, high-end gear can underperform.
- Myth 2: Once set up, your machine’s pressure remains constant. Reality: Mineral buildup and wear cause pressure drift, requiring routine verification.
- Myth 3: Grinder static or tamping pressure are sole factors. Reality: Internal water pressure significantly influences extraction quality and flavor depth.
What Experts Won’t Tell You About barista gear,home espresso,coffee grinders,espresso machines,milk frothers
Professionals know that regular internal pressure calibration is the secret to consistent, café-quality espresso. What’s less commonly shared is how small adjustments—like tightening a regulator screw or cleaning water lines—can drastically improve flavor and crema. Overlooking these details is like trying to tune a piano without tuning the strings; the sound will never be right until each component is properly calibrated. Investing in a reliable pressure gauge and learning to interpret readings transformed my approach to home brewing and elevated my espresso mastery.
Curated Recommendations
- Top-quality gear choices: Essential for mastering pressure and setup details; I trust these selections for durability and precision.
- Perfect grinder adjustments: Fine-tuning your grind in tandem with pressure control makes a difference I can’t overstate.
- Latest espresso machine reviews: Staying updated on technology helps optimize internal calibration and features.
- Frothing tools: Quality frothers and proper technique ensure a creamy microfoam that complements a perfectly pressured shot.
Your Turn to Try
Taking control of your espresso machine’s internal water pressure opens a new dimension in coffee brewing — one where consistency and flavor are in your hands. With just a pressure gauge, a few routine checks, and some patience, you’ll unlock the full potential of your gear. Remember, the journey to the perfect shot is ongoing, and every small adjustment brings you closer to barista-level results. Keep experimenting, stay curious, and don’t hesitate to reach out for advice on personalized tips. Now, what technique or tool are you eager to master next in your home espresso setup? Let me know below.