The best way to store open bags of specialty coffee beans
I remember the first time I opened a bag of specialty coffee beans, excited to brew that perfect cup. But within days, I noticed the aroma fading, the flavors dulling. It was a lightbulb moment—my storing methods were sabotaging my brew. I realized that even the freshest beans can lose their magic if not stored properly. If you’ve ever guessed that your coffee was past its prime, only to find it tasted flat or stale, you’re not alone. The good news is, a few simple steps can preserve that vibrant flavor and aroma we all crave.
Why Proper Storage Matters More Than You Think
When it comes to coffee, freshness is king. Once beans are roasted, they begin to oxidize and lose their delightful nuances. According to a study published by the Specialty Coffee Association, beans start to significantly degrade in flavor within a week of opening the bag. That’s why how you store your beans right after opening can make or break your brewing experience.
But here’s the catch: many home baristas underestimate the importance of proper storage, thinking that a typical kitchen cabinet or even the fridge is enough. Early on, I made the mistake of keeping my beans in the transparent bag they came in, exposed to sunlight and air. The result? A cup that tasted more like cardboard than the rich, fragrant espresso I was aiming for.
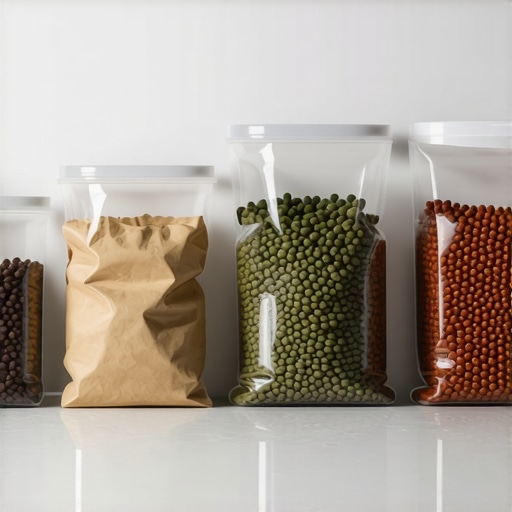
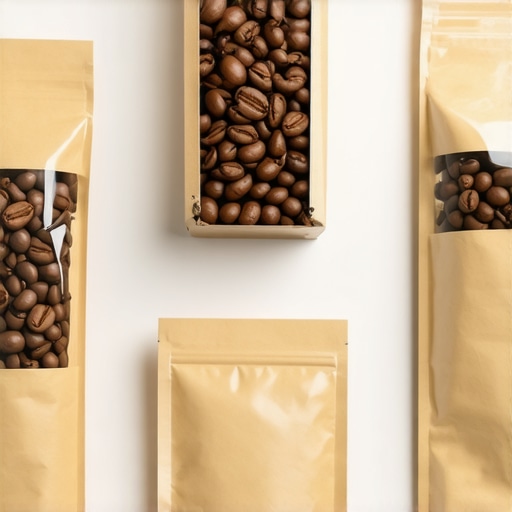
Keeping beans airtight and away from light is crucial. I found that investing in a dedicated, opaque coffee container with a valve—something like those discussed in our guide on [how to keep your beans fresh](https://espressotechguide.com/why-your-coffee-puck-is-wet-and-sludgy-every-time)—can make all the difference. This prevents oxygen from spoiling the beans while allowing excess gases to escape.
Have you faced the frustration of stale-tasting coffee just days after buying or opening your favorite blend? If so, consider swapping out your storage method. It might be time to ditch the old container or the cardboard box and upgrade to something designed specifically for coffee. Not only will your taste buds thank you, but your overall coffee experience will reach new heights.
Now that we’ve established why proper storage matters, let’s explore practical techniques to keep your roasted beans fresh and flavorful for as long as possible. Trust me, taking these simple steps will elevate your brew and make every cup feel like a barista masterpiece.
Set Up Your Burr Grinder Correctly
First, ensure your grinder is clean and properly calibrated. Remove your burrs periodically using the method outlined in this guide to prevent old coffee oils from affecting flavor. Adjust the grind size to a medium-fine setting for espresso—too coarse and you’ll get under-extraction, too fine and you risk clogging your portafilter. When grinding, watch for consistency; a dull burr set can retain powder, undermining your shot. Pro Tip: Use the cork trick to distribute grounds evenly in the basket, ensuring uniform tamping. Practicing this step until it becomes second nature will improve shot clarity dramatically.
Master Dose and Tamping Techniques
Before tamping, weigh your dose precisely—aim for 18-20 grams—using a digital scale that turns off slowly or stays on during the shot to avoid inaccuracy. Place the basket on a level surface, then distribute grounds evenly with a distribution tool or by tapping gently to break clumps. Tamping pressure should be firm, around 30 pounds, but consistent; avoid over-tightening which can cause channeling. Tip: Use a tamper with a diameter matching your basket size to prevent unpressed edges; see this article for details. A proper tamp creates a uniform puck, leading to even water flow during extraction, critical for flavor clarity.
Perfect Your Extraction Parameters
Set your espresso machine to the optimal temperature—note that light roasts require higher temperatures for proper extraction; see this guide. Use a dedicated clean towel to wipe the portafilter sealing surface, ensuring a tight seal. Lock in the portafilter firmly, avoiding overtightening that can strain your machine’s gasket. Pull a shot, timing it between 25-30 seconds; if it’s too fast or slow, adjust grind size accordingly. Key tip: Always pre-heat your portafilter with hot water—not only does this prevent temperature shock, but it also ensures stable extraction, as described in this article.
Monitor and Adjust Regularly
Keep track of your shots by noting time, flavor, and crema quality. Use your machine’s pressure gauge to check for proper pressure—ideally between 9-10 bars during extraction. If you notice discrepancies, review your grind adjustment or tamping force. Regularly descale your equipment following the steps outlined in this guide to prevent buildup that impairs pressure and heat consistency. The more diligent you are with these core techniques, the closer you’ll get to barista-level espresso every time.Many home baristas assume that investing in high-end equipment automatically guarantees perfect espresso and milk froth, but that’s a misconception. A frequent oversight involves believing that a premium grinder or espresso machine alone can compensate for poor technique or improper maintenance. In reality, equipment nuances—such as burr alignment, dose distribution, and even water chemistry—play critical roles that are often underestimated. For instance, even the best grinder can underperform if the burrs are dull or misaligned, leading to inconsistent grounds and extraction issues. Moreover, many forget that the presentation of coffee tools impacts your workflow; a cluttered station hampers focus and results in mistakes. Another common myth is that milk frothing depends solely on the frother itself; however, temperature control, milk type, and pitcher shape significantly influence foam quality. Advanced enthusiasts are often surprised to learn that tiny adjustments—like flattening the tamping surface or pre-heating the portafilter—yield better shots than merely upgrading to pricier gear. Studies from the *Specialty Coffee Association* highlight that even minor maintenance lapses can lead to flavor degradation over time, emphasizing the importance of routine cleaning and calibration. You might think that complex techniques are necessary for advanced coffee making, but in fact, understanding the subtle impacts of grind size and extraction time is often overlooked by beginners. Do you fall into any of these traps? Let me know in the comments! For those interested in optimizing puck preparation, check out [the only 3 tools you actually need for perfect puck prep](https://espressotechguide.com/the-only-3-tools-you-actually-need-for-perfect-puck-prep) to streamline your workflow and boost consistency.Ensuring your espresso setup remains in top shape requires the right tools and a structured maintenance routine. I personally swear by a few specific items that have transformed how I care for my equipment. First, a high-quality grinder calibration kit, like the Baratza Calibrator, helps me quickly check and adjust my burr alignment, preventing uneven grinding that can impact shot quality. Regularly, I use a cleaning brush with stiff, brass bristles—this allows me to remove coffee oils and grounds from hard-to-reach areas of my grinder and espresso machine without disassembling the entire unit. For descaling, I rely on a specialized descaling solution like Dezcal, which dissolves mineral buildup effectively, especially in my commercial-style machine.
For ongoing monitoring, a digital pressure gauge paired with my machine’s portafilter helps me fine-tune extraction pressure, critical for consistent flavor. Investing in a quality tamping station, such as the Kruve Tamping Mat, keeps my tamping consistent by preventing slipping and uneven pressure application. These tools, combined with routine schedules—like cleaning the group head weekly and replacing worn gaskets—keep my gear performing at its peak.
Looking ahead, I believe smart, connected espresso machines with built-in diagnostics will become more affordable, offering real-time alerts for maintenance needs. This trend will greatly reduce downtime and long-term repair costs, making home barista work even more accessible.
### How do I maintain my equipment over time?
Adopting a disciplined cleaning schedule and using precise tools can extend your machine’s lifespan considerably. Regular descaling not only prevents scale build-up but also improves temperature stability, directly impacting shot quality. For example, following the advice in this guide on flushing your group head maintains optimal heat, preventing costly gasket failures.
To keep your grinder performing at its best, inspect burrs monthly and replace them when the test indicates dullness. This small investment in time ensures your grounds are always consistent, which translates into better-extracted espresso.
Lastly, always use tools designed for your specific equipment, and don’t overlook the value of routine inspections. Pay attention to unusual noises, temperature fluctuations, or pressure irregularities—these can often be caught early with simple diagnostics, saving you from major repairs down the line.
Lessons Learned from a Coffee Gear Enthusiast
One of the most profound lessons I discovered is that no matter how high-end your equipment is, neglecting routine maintenance can sabotage your brewing goals. Regularly calibrating my grinder and descaling my espresso machine transformed my shots from decent to extraordinary, revealing nuances I didn’t know existed. Additionally, I realized that even small tweaks—like adjusting tamping pressure or grind size—had outsized impacts on flavor and consistency. These insights taught me that mastery isn’t about owning the most expensive gear, but about understanding and caring for what you have.
My Arsenal of Trusted Coffee Tools
Over time, I curated a set of tools that have been instrumental in elevating my coffee craft. First, a high-precision digital scale ensures I dose accurately, leading to more consistent extractions. My burr calibration kit from Baratza is invaluable for maintaining a uniform grind, preventing flavor variability. I also swear by a stiff-bristled cleaning brush, which keeps my grinder free of residual oils—a key factor in preserving bean freshness and taste. Lastly, a reliable descaler like Dezcal helps me keep scale buildup at bay, ensuring steady temperature and pressure during brewing. These tools, combined with routine checks, have empowered me to produce barista-quality espresso at home.