How to Clean Coffee Oil Out of a Plastic Hopper Without Scratching the Surface
Ever spilled coffee grounds into your grinder and immediately panicked, fearing you’d scratch that pristine plastic hopper beyond repair? I’ve been there. One morning, as I scrutinized my breakfast brew, I realized my plastic hopper had developed a stubborn, sticky film of coffee oil. It was a lightbulb moment—how was I supposed to clean it without damaging the surface?
Those oily residues not only look unappetizing but can also affect your coffee’s flavor and machine longevity. I knew I had to find a way to clean thoroughly but gently—a challenge many home baristas face. Luckily, after some trial, error, and chatting with experts, I discovered effective methods that won’t scratch or degrade your plastic parts.
In today’s post, I promise to share proven tips to remove coffee oil from your plastic hopper safely, using materials you probably already have at home. So, if you’re tired of that dull film hampering your brew quality, stay with me.
The Importance of Gentle Cleaning for Your Coffee Gear
Coffee enthusiasts often overlook the significance of proper cleaning, especially when it comes to plastic components. Coffee oils are hydrophobic and tend to cling stubbornly to plastic surfaces, creating a layer that can spoil subsequent brews. It might seem harmless, but this build-up can lead to off-flavors and even promote mold if left unchecked. Maintaining your equipment isn’t just about appearance—it’s about the taste and the longevity of your gear.
One mistake I made early on was using harsh chemical cleaners that seemed effective but ended up dulling the plastic or causing tiny surface scratches. These micro-scratches become havens for more oils and grime, compounding your cleaning woes. Over time, I learned that gentle, natural methods outperform aggressive scrubbing. For instance, barriers like plastic hoppers are delicate; using abrasive pads or metal tools can irreparably scratch their surfaces.
If you’re wondering whether these cleaning steps are worth the effort, consider this fact from the Specialty Coffee Association: Regular maintenance of grinder parts, including plastic hoppers, can extend equipment lifespan and preserve coffee quality. Curious about other maintenance hacks? Check out [this guide on choosing the best barista gear](https://espressotechguide.com/choosing-the-best-barista-gear-for-coffee-enthusiasts).
Before we get into the specific cleaning techniques, I want to ask—have you ever struggled with stubborn coffee oil stains on your grinder or hopper? If so, you’re not alone, and the solution is simpler than you might think. Ready to get your hopper gleaming without a scratch? Let’s dive into the how-to’s that will keep your coffee setup in top shape while protecting its surface integrity.
Start with Warm Water and Dish Soap
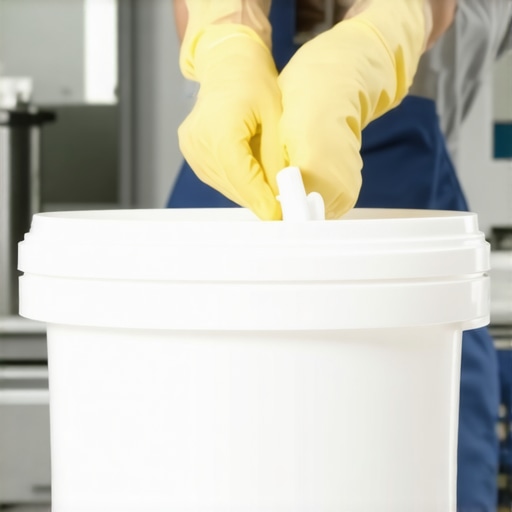
Fill a basin or sink with warm water and add a few drops of mild dish soap. Place the plastic hopper inside and let it soak for 10-15 minutes. Gently swirl it around to loosen the oily residue. I once tried this after a particularly oily brew session, and the grime started to lift almost immediately. Rinse thoroughly with clean water to remove soap residue.
Use Baking Soda for Stubborn Oil
For persistent oils, create a paste using baking soda and water. Apply this paste to the interior surface of the hopper, focusing on oily spots. Use a soft cloth or a non-abrasive sponge to gently scrub the surface. Baking soda’s mild abrasiveness helps lift oil without scratching. I remember tackling a really sticky film that refused to budge; this method made the surface look almost new.
Employ White Vinegar as a Natural Cleaner
Mix equal parts white vinegar and water in a spray bottle. Spray the solution onto the plastic surface, ensuring it reaches all oily areas. Let it sit for 5 minutes, then wipe with a soft cloth. Vinegar’s acidity breaks down coffee oils effectively. After using this, I noticed a significant reduction in greasy film and an improvement in the hopper’s appearance.
Rinse and Dry Carefully
After using ANY cleaning method, rinse the hopper thoroughly with warm water to remove any remaining residues. Dry it completely with a clean towel or let it air dry in a well-ventilated area. Avoid reassembling the hopper while it’s damp to prevent mold growth. Once dry, inspect for any leftover oily spots; repeat cleaning if necessary.
If Oil Remains, Consider Replacing Parts
If stubborn oil persists despite cleaning, it might be time to consider replacing the plastic hopper. Continuous buildup can compromise the material’s integrity over time. Check with your manufacturer or local supplier for compatible replacements. Regular cleaning routines help prevent this issue from recurring, ensuring your grinder stays in top shape and your coffee tastes fresh.
Remember, always handle plastic parts gently to avoid scratches or cracks. Avoid using harsh chemicals or abrasive tools that can damage the surface. Protect your investment and enjoy consistently great brews with these safe cleaning techniques.
When it comes to crafting perfect espresso, many enthusiasts focus on the obvious—grind size, tamping pressure, or even water temperature. But even seasoned home baristas often get caught up in misconceptions about their equipment, especially concerning milk frothers, espresso machines, and grinders. Let’s dig deeper into these subtleties that can make or break your brew.
### Don’t Fall for Simplistic Assumptions About Milk Frothers
A common myth is that all milk frothers are created equal. While many believe that spending extra on a fancy frother guarantees better microfoam, in reality, the key lies in understanding how different frothers create and stabilize foam. For example, inexpensive handheld frothers can produce excellent microfoam if used correctly, but many ignore the importance of pitcher angle, milk temperature, and steaming technique.
Moreover, some owners think that natural oils in milk don’t significantly affect foam stability. Yet, the presence of milk fats and proteins plays a crucial role in forming fine microbubbles. Skipping proper cleaning routines can cause buildup that impairs foam quality over time. To truly elevate your frothing game, focus not just on equipment but also on technique and routine maintenance—small details that experts swear by.
### Why Your Espresso Machine Might Be Sabotaging Your Shots
Many home baristas overestimate the importance of high-end espresso machines, thinking that the best equipment will automatically produce perfect shots. However, an often overlooked nuance is the importance of understanding each machine’s unique characteristics—including pump pressure stability and temperature profiling.
For instance, some machines have a temperature fluctuation during pre-infusion, which can lead to uneven extraction without you realizing it. This is critical because subtle temperature variations influence solubility and extraction yield, directly affecting flavor.
A common trap is neglecting routine calibration of portafilter baskets and tamper pressure, leading to channeling and inconsistent shots. Additionally, relying solely on machine pressure gauges can be misleading; experts recommend frequent shot-tasting and using external tools like flow meters for accuracy.
### Coffee Grinders: More Than Just Burrs and Grind Size
Many enthusiasts assume that if they buy a decent burr grinder, they’re good to go. But the real nuance lies in understanding static build-up and grinding chamber design. Static can cause coffee grounds to cling stubbornly to the chute or dispersing channel, resulting in uneven dosing.
Furthermore, inconsistent grind distribution within the chamber can lead to channeling during extraction, a subtle flaw that dramatically alters flavor clarity. Regularly adjusting the grind consistency, cleaning the chute, and ensuring a uniform grind pack are critical advanced practices that even pros swear by.
### Is Your Gear in Top Shape or Sabotaging You?
The most overlooked aspect of home espresso mastery is gear health. Worn-out seals, scale buildup, or misaligned components silently sabotage your brewing process. For example, a slightly chipping gasket can cause pressure drops, leading to sour or under-extracted shots.
Do you regularly inspect and service your equipment? Many people ignore routine maintenance until a complete breakdown occurs, but preventive care keeps your gear running smoothly and tasting optimal.
### Wrapping Up
Mastering the art of brewing at home involves more than just the basics. From understanding the composition of milk proteins to regularly calibrating your machine’s nuances, these details collectively influence your results. Remember, even minor adjustments rooted in a deep understanding of your equipment’s inner workings can elevate your coffee to professional quality.
Have you ever fallen into this trap? Let me know in the comments. For expert advice on selecting the best gear to suit your brewing style, check out our [comprehensive guide on choosing the right barista equipment](https://espressotechguide.com/choosing-the-best-barista-gear-for-coffee-enthusiasts). Keep experimenting and refining—your perfect brew is worth it.Maintaining your coffee gear isn’t just about cleaning—it’s about fostering a routine of precision and knowledge that prolongs equipment life and enhances your brew quality. One essential tool I consistently rely on is a calibrated digital scale, such as the **Hario V60 Scale with timer**. This device allows me to measure coffee doses and extraction times with pinpoint accuracy, ensuring consistency across shots. Unlike analog scales, its precise digital readouts and built-in timer help me refine my technique systematically, which is crucial for dialing in espresso shots. I personally calibrate mine monthly using certified weights, a practice that keeps measurements accurate and prevents drift over time.
Another indispensable tool is a **blow-out kit** for cleaning grinder burrs and grinder chambers. I’ve found that static build-up and coffee residue often cause inconsistent grinds, affecting flavor extraction. Using compressed air—like the **Garage Boss 10-Gallon Oil-Free Compressor**—I can comfortably blow out fine particles deep within the grinder without disassembling everything. This not only saves time but also preserves the integrity of your grinder’s burrs. Regular maintenance, including sharpening or replacing worn burrs, extends your grinder’s lifespan and maintains grind consistency.
For espresso machines, **descaler solutions** such as **Urnex Dezcal** are vital. I follow manufacturer guidelines, but I also recommend performing a descaling routine every 3-6 months, depending on water hardness. Scaling causes temperature fluctuations and inconsistent pressure, which can lead to sour or bitter espresso. I also utilize a **plastic scraper** to gently clean group head screens and seals daily to prevent buildup that affects extraction.
Long-term results hinge on disciplined upkeep—imagine brewing with a clean, well-maintained machine that heats evenly and grinds consistently. Additionally, software tools like **Acaia Coffee’s Brewmaster app** help me log shots, adjustments, and tasting notes, fostering continuous improvement.
Peering into the future, I predict integrated IoT-enabled maintenance alerts embedded within high-end espresso machines will become standard—prompting users when descaling or burr replacement is due, much like vehicle maintenance notifications. Until then, regular manual checks are your best bet.
### How do I maintain my tools over time?
Simple routines are key: set a schedule for descaling, burr sharpening or replacement, and hardware cleaning. Keep calibration tools like certified weights ready for periodic checks, and never neglect daily cleaning of portafilters and baskets. Investing in quality cleaning supplies, such as **Puly Caff** cleaning tablets, ensures that maintenance is effective and safe for your equipment.
Remember, consistency in tool maintenance directly translates to better brew quality and longer equipment life. As a next step, try incorporating a monthly burr cleaning session with compressed air and see how much more uniform your grinds become. For specific product recommendations and detailed maintenance routines, visit our [contact page](https://espressotechguide.com/contact-us). Proper care isn’t just about preserving your gear; it’s about elevating your entire brewing experience—think long-term, and your coffee will thank you.
The Hardest Lesson I Learned About Coffee Gear
Before I discovered the importance of gentle cleaning, I tried aggressive scrubbing and harsh chemicals on my plastic hopper, which only made the oily film worse and damaged the surface over time. The lightbulb moment was realizing that patience and natural solutions outperform brute force—sometimes less is more in coffee maintenance.
What I Wish I Knew About Equipment Longevity
Regular calibration with trustworthy tools like certified weights and frequent burr cleaning with compressed air has saved me hundreds of dollars and hours of troubleshooting. Knowing that small, consistent maintenance routines preserve your gear’s precision is a game-changer that many enthusiasts overlook.
How Deep Technical Knowledge Transformed My Coffee
Understanding subtle machine behaviors—like temperature fluctuations or pressure instability—and addressing them proactively has drastically improved my shot quality. I’ve learned that investing time in learning your machine’s quirks delivers better results than blindly buying new gear.
My Essential Toolkit for Home Coffee Excellence
- Digital Calibrated Scale: Precise measurement is the backbone of consistency. I trust my trusted barista gear guides for choosing tools that last.
- Compressed Air for Burr Cleaning: Regularly blowing out static and residue keeps grinds uniform, improving extraction. I rely on reliable, oil-free compressors as recommended by experts.
- Descaling Solutions: Preventing scale buildup with products like descalers keeps water flow consistent, ensuring perfect shots every time.
- Maintenance Logs and Apps: Using digital tools like the Brewing Log Apps personalizes my routine and helps track what works best.
Ready to Elevate Your Coffee Experience
Your journey with coffee gear is uniquely rewarding, and each small improvement adds up to exceptional brews. Embrace mindful maintenance, invest in quality tools, and keep learning. Your coffee deserves nothing less. Curious about the latest equipment or maintenance tips? Visit our contact page to connect with fellow enthusiasts and experts. Keep experimenting, and you’ll find that mastery is within reach—with every perfect shot inspiring you to push further.