The Reason Your Grinder Is Retaining Too Much Coffee
I remember the moment vividly—my espresso shot was a disaster. Instead of the rich, velvety crema I craved, I got a sputter of sour, under-extracted brew that made me wonder if I’d wasted my morning. The culprit? My grinder had started retaining too much coffee, causing inconsistent doses and ruined shots. It was frustrating, especially since I’d invested so much into my setup, aiming for that perfect home brew.
Why Your Grinder Is Holding Too Much Coffee and Why It Matters
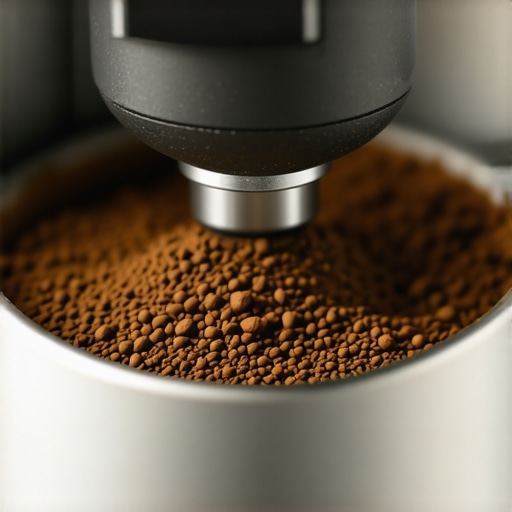
Imagine grinding fresh beans, expecting that perfect pour, only to find your machine acting up—clogged, uneven doses, or coffee grounds spilling everywhere. These issues often boil down to one thing: excessive retention in your grinder. When your grinder holds onto excess coffee, it not only hampers your shot consistency but can also lead to stale beans affecting flavor and aroma. Plus, it increases waste, making every morning feel like a costly experiment.
The good news? This problem is more common than you might think, and with a little troubleshooting, you can get back to that sweet spot of perfect grind size and dose. I’ve been there, and over time, I discovered that many issues stem from simple causes—misaligned burrs, dirty components, or worn-out seals. Addressing these can dramatically improve your grind performance.
Before diving into solutions, it’s worth recognizing that some retention is normal. However, if you notice your grinder is retaining more than a gram or two, it’s time to investigate. For more detailed info on choosing the right equipment to match your needs, check out this guide to [top-rated espresso machines for coffee lovers in 2025](https://espressotechguide.com/top-rated-espresso-machines-for-coffee-lovers-in-2025). It helped me select machines better suited to my brewing style, reducing unnecessary issues.
Now, let’s get into what might be causing your grinder to hang onto too much coffee and, more importantly, how you can fix it. Trust me, once sorted, your shots will be cleaner, more consistent, and way more enjoyable.
Is Fixing Retained Coffee Worth the Effort?
I remember early on, I worried that a messy grinder was just part of the game—something I’d have to accept. But neglecting the problem only made it worse. Early in my journey, I made the mistake of ignoring regular cleaning and adjustment, which worsened retention over time. Now I know better: a little maintenance goes a long way. If you’re skeptical about fixing your grinder, I get it. But believe me, a well-tuned grinder transforms your entire coffee experience, saving money and frustration in the long run. Curious about how to perfect your grind? You might find this guide on [matching grind to brew method](https://espressotechguide.com/how-to-select-the-perfect-coffee-grinder-for-your-brew) helpful.
Next up, we’ll walk through specific steps to identify and fix the cause of excess retention, so your grinder runs smoothly and your shots taste divine.
Disassemble and Clean Your Grinder Regularly
Start by unplugging your grinder and removing the hopper and burrs. Use a soft brush or a vacuum to clear out loose coffee grounds and dust. Focus on the burr chamber, chute, and behind the burrs where residue tends to hide. I once neglected this step, leading to clogged pathways that increased retention; after a thorough cleaning, my grinder’s performance improved immediately. Regular maintenance ensures minimal buildup and consistent dosing.
Inspect and Realign Burrs Carefully
Remove the burrs for a visual inspection. Use the manufacturer’s guide to check if the burrs are aligned correctly—a misalignment causes uneven grinding and higher retention. A quick test is the “chalk test”: lightly color the burrs with a non-permanent chalk marker and rotate; if the marks don’t align, adjustments are needed. I once realized my burrs were slightly offset after doing this, which caused inconsistent doses. Realigning the burrs is crucial for uniform particles and less coffee to stick around.
Adjust Grind Settings for Better Flow
Experiment with finer or coarser settings, depending on your brewing method. For espresso, a finer grind may increase retention if the burrs are slightly misaligned. Moving the grind setting also helps clear any minor clogs. I recall fine-tuning my grinder to match my espresso machine’s pressure, reducing retained grounds and improving shot clarity. Always make small adjustments and test repeatedly to find the sweet spot.
Replace Worn Seals and Gaskets
Check for worn or damaged seals around the burr chamber and chute. Old gaskets can cause gaps where grounds get stuck, increasing retention. Replacing these parts is inexpensive and simple; consult your grinder’s manual or contact [our support team](https://espressotechguide.com/contact-us) for guidance. I replaced a cracked gasket, which immediately decreased the amount of retained coffee and made dosing more predictable.
Implement Proper Dosing Techniques
Use a dosing cup or scale to measure your coffee beans precisely before grinding. Avoid overloading the hopper, which can cause grounds to jam or build up. I once overloaded my hopper, leading to clogs; switching to smaller doses and regular refilling kept my grinder clear. Consistent dosing improves flow and reduces excess retention over time.
Perform Weekly Deep Cleaning
At least once a week, use grinder cleaning tablets or grind rice to absorb oils and remove residual oils and grounds. Run the cleaner or rice through the grinder, then wipe down all accessible parts. I do this ritual every Sunday, and it keeps my grinder running smoothly, minimizing retention issues. This practice extends the lifespan of your burrs and ensures flavor purity.
Evaluate Your Grinder for Wear and Age
If retention persists despite maintenance, consider whether your grinder is worn out. Burrs lose sharpness and alignment over time, causing uneven grounds and extra residue. Upgrading to a newer model—as recommended in the latest gear guide—might save you time and frustration. I replaced my old burr grinder after two years, and my shots became cleaner, with less waste.
While many home baristas proudly showcase their fancy espresso machines and gleaming grinders, there’s often a disconnect between equipment hype and actual brewing mastery. A prevalent misconception is that expensive gear automatically guarantees perfect espresso. In reality, even top-tier machines can produce lackluster shots if the user overlooks fine-tuning and maintenance. For instance, a study published by the Specialty Coffee Association emphasizes the importance of consistent grinder calibration over mere machine price point, highlighting that proper grind adjustment is often more critical than the machine’s brand.
Another misconception surrounds milk frothers. Numerous enthusiasts believe that upgrading to a more expensive frother will inherently improve microfoam quality. However, the true game-changer lies in technique, temperature control, and understanding milk behavior, not just the device’s price tag. You might find this detailed guide on [milk frothers that transform your coffee experience](https://espressotechguide.com/milk-frothers-that-transform-your-coffee-experience) helpful for mastering stance, steam wand positioning, and milk choice.
When it comes to coffee grinders, many assume that burr material—steel vs. ceramic—significantly impacts taste. While it’s true that durability varies, the critical factor is grind consistency. A grinder with poorly aligned burrs, regardless of material, can cause inconsistent extraction and bitter or sour flavors. Regularly inspecting and realigning burrs using the ‘chalk test’ can avert these issues and improve shot uniformity. For advanced trouble-shooting, check out [how to align your burrs using the marker method](https://espressotechguide.com/how-to-align-your-grinder-burrs-using-the-marker-method).
Finally, a common trap is believing that espresso machines are “set and forget.” Many owners neglect regular descaling, screen cleaning, or gasket inspections, which can lead to pressure loss and inconsistent shots. Such oversights are especially critical with machines that utilize vibratory pumps or rotary pumps, where internal components are sensitive to water quality and buildup. To get the most from your investment, embrace routine maintenance detailed in [mastering the art of home espresso](https://espressotechguide.com/mastering-the-art-of-home-espresso-tips-for-beginners).
But what about the nuances that even experienced enthusiasts tend to overlook? For example, adjustable pressure profiling or pre-infusion techniques are often dismissed by casual users but can dramatically elevate flavor extraction and body. Advanced espresso aficionados understand that small adjustments in brew pressure and flow rate influence the final shot’s acidity, sweetness, and balance. These are subtle skills built over time but essential for true mastery. As noted by industry expert Scott Rao, mastering pressure management allows for greater consistency and flavor control, turning espresso from a simple drink into a craft.
Have you ever fallen into this trap of misconceptions or overlooked critical nuances? Let me know in the comments. Remember, understanding these hidden factors makes all the difference between a good shot and a great one.Maintaining your home espresso setup requires the right tools and a proactive approach to upkeep. I personally swear by a high-quality calibration scale, like the Acaia Lunar, which provides precise measurements to ensure consistent dosing. This small investment has drastically improved my shot consistency and reduced waste. Additionally, using a dedicated cleaning brush set, such as the Barista Hustle Cleaning Brush Kit, makes it easy to reach into tight spots like the group head and grinders, preventing stubborn buildup that can impair performance.
Regular descaling is vital, especially if you live in hard water areas. I recommend descaling every two to three months using a specialized solution like Urnex Dezcal, followed by thorough rinsing, to prevent mineral buildup that can clog valves or affect temperature stability. For vacuum sealing beans, I trust my FoodSaver for maintaining freshness and avoiding mold growth, which ensures that I always brew with optimum flavor.
To keep everything running smoothly over time, I perform monthly maintenance checks—tightening loose fittings, inspecting seals, and replacing worn gaskets. Having a set of replacement seals and gaskets on hand, such as those from Espresso Parts, allows me to address minor issues before they become significant problems. Furthermore, investing in a good-quality burr grinder timer, like the Baratza Sette’s digital timer, helps me ensure consistent grind time, reducing variability due to static or burr wear.
How do I keep my machine and gear working long-term? Stay ahead with routine inspections, scheduled cleaning, and the right tools. As the industry evolves, so do the tools—future developments may include smarter sensor integrations that alert you when calibration or cleaning is needed, or even IoT-enabled maintenance systems. For now, selecting durable, easy-to-maintain equipment—like a rotary pump espresso machine—can make a lasting difference. If you’re looking for a reliable upgrade, check out the top-rated espresso machines for 2025 to find models designed with longevity in mind.
One advanced tip I recommend is investing in a TDS (Total Dissolved Solids) meter to regularly test your water quality. Maintaining optimal mineral content not only prolongs your machine’s lifespan but also ensures the best flavor extraction. Try incorporating this into your routine, and you’ll notice a significant improvement in both machine performance and coffee richness. Want to get serious about your maintenance routine? Contact us for personalized recommendations on tools and schedules that suit your specific setup.
Lessons I Wish I Learned Sooner About Home Espresso and Gear
One of the most valuable insights I gained was that consistency beats equipment quality for the average home barista. I once believed only the priciest espresso machines could produce great shots, but I realized proper maintenance and calibration are more impactful. Also, I underestimated the importance of regular grinder cleaning; a simple routine saved me from many shot disasters. Finally, patience is key—rushing adjustments or dismissing small inconsistencies often leads to bigger issues down the road. These lessons have genuinely elevated my coffee experiences and can do the same for you.
My Go-To Tools to Elevate Home Espresso
I rely heavily on a digital scale like the Espresso Scale, which helps me dial in shots with precision. For cleaning, I trust the Deep Cleaning Brush Set—it keeps my grinder and machine free of oils and blockages. Additionally, a good water filtration system ensures my machine’s longevity, reducing descaling frequency. Lastly, the Burr Alignment Kit has been indispensable for maintaining grind consistency. These tools have transformed my approach, helping me consistently produce fantastic espresso at home.
Fuel Your Passion: Take Action Today
Embarking on the journey to perfect your home espresso isn’t just about the equipment—it’s about cultivating a mindset of care and curiosity. Small, consistent tweaks and ongoing learning lead to extraordinary results. Remember, the thrill of pulling that perfect shot is within reach, especially when you combine proper maintenance, the right tools, and a willingness to experiment. Don’t wait—start today to elevate your coffee game and enjoy every sip with confidence. Whether you’re troubleshooting retention issues or dialing in your grind, each step brings you closer to barista-level mastery. Your best espresso is just a few adjustments away. Are you ready to take that leap and transform your home brewing experience?