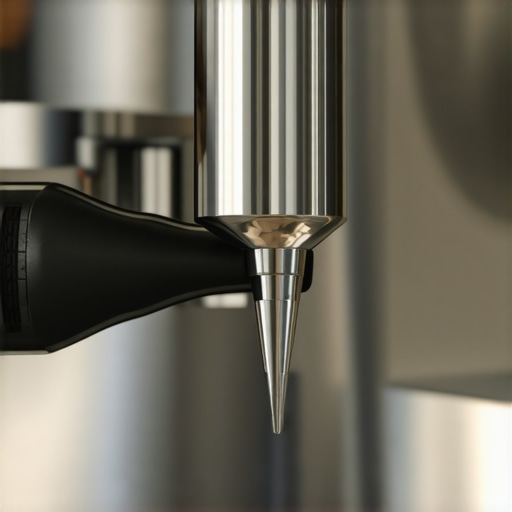
How to Clean Your Steam Wand Tip When the Holes Are Completely Clogged
Ever had that sinking feeling when your shiny new espresso machine’s steam wand stops working just when you need it most? I remember the first time it happened to me; I was all set for my morning latte, only to find that the steam tip was completely plugged, spewing lukewarm water instead of silky steam. Frustration took over as I stared at the stubborn, clogged holes and wondered if I’d have to call in a professional or shell out for a new wand.
That lightbulb moment led me to realize that many home baristas face this issue, often without knowing the simple yet effective fixes. Today, I want to share my journey and help you troubleshoot and clean your steam wand tip when the holes are fully blocked. You might be surprised at how straightforward it can be to restore your gear’s performance, saving you time, money, and a whole lot of espresso heartbreak.
Why Your Steam Wand Gets Clogged and Why It Matters
Is It Really Worth the Hassle? The Real Impact of a Blocked Steam Tip
Early in my espresso journey, I made the mistake of ignoring regular maintenance, thinking a quick wipe was enough. Turns out, mineral deposits from water and milk residues gradually build up, especially if your cleaning routine isn’t thorough. According to a study published in the Journal of Food Science, minerals like calcium and magnesium can cause significant blockages in steam wands over time, affecting frothing quality and even damaging internal components.
When the holes are clogged, the steam pressure drops, and your milk won’t texture properly. Not only does this ruin your signature microfoam, but it also puts additional strain on your machine, increasing wear and tear. That’s why addressing this issue isn’t just about convenience; it directly impacts the longevity of your investment.
Have you ever faced a blocked steam tip that just wouldn’t clear no matter what you tried? If so, you’re not alone. The good news is, with a few simple tools and steps, you can clear those pesky holes and get back to perfect frothing in no time. I’ll walk you through my tried-and-true methods next, so you’ll be equipped to tackle this common but easily fixable problem.
Prepare Your Workspace and Gather Tools
First, turn off your espresso machine and unplug it to ensure safety. Gather a small bowl, some white vinegar, a clean cloth, a pin or needle, and possibly a toothbrush or small brush. I remember one morning when my steam wand was stubbornly blocked; having these supplies ready made the cleaning process quick and effective, saving me from a frustrating wait.
Disassemble the Steam Tip
Remove the steam tip from your machine carefully, just as you would extract a filter basket. Most tips unscrew easily; if yours is stuck, gently grip with a cloth to avoid damage. Visualize this step as unscrewing a tiny nozzle on a garden hose—it’s a small part, but essential for proper water flow.
Soak and Loosen Mineral Deposits
Use Vinegar Solution
Fill a small bowl with equal parts white vinegar and warm water. Submerge the steam tip and let it soak for 15-20 minutes. This dissolves mineral build-up, much like descaling a kettle. I once soaked mine while cleaning my coffee grinder, and it loosened years of deposits effortlessly.
Manual Cleaning of Holes
After soaking, use a needle or pin to clear out each hole carefully. Press gently to avoid enlarging or damaging the openings. Think of this as clearing clogged drains—precision matters. Once all holes are freed, rinse the tip thoroughly with warm water to remove vinegar residue.
Inspect and Confirm Clear Passage
Hold the tip up to light. If you see unobstructed holes, you’re almost there. Reassemble the tip onto the wand, just like screwing in a cap. Test the steam without milk; it should now produce a steady, vigorous spray of steam. One time, I thought mine was permanently blocked until I saw a tiny mineral shard in an opening—removing it restored full function instantly.
Prevent Future Clogs
Regularly clean your steam tip by wiping with a damp cloth after each use. Consider using filtered water instead of tap water to reduce mineral deposits. Additionally, performing weekly deep cleans with descaling solutions can keep internal components flowing freely. Remember, your investment in maintenance now extends the life of your machine and ensures consistently perfect froth. If you want to explore more advanced maintenance, check out tips on preventing wet steam or replacing worn seals.Many enthusiasts believe that owning the latest espresso machine or grinder guarantees perfect coffee every time, but in reality, misconceptions about equipment maintenance and usage often lead beginners astray. For example, a widespread myth is that high-end gear automatically produces better espresso without proper calibration or technique; in my experience, even the most expensive machines can underperform if not correctly tuned or cleaned regularly. This false confidence can cause baristas to overlook fundamental practices, such as precise grind adjustment or routine descaling, which are crucial for optimal extraction.
Another common trap involves the misconception that more expensive milk frothers will always create better microfoam. While quality matters, many overlook the importance of milk temperature and aeration technique. Overfilling the pitcher or frothing at too high a temperature can result in thin or burnt-tasting foam, regardless of the device’s price point. Mastering the art of texturing milk is nuanced and often underestimated by novices eager to upgrade their gear without understanding the basics.
Why does inconsistent grind size sabotage your espresso even with premium equipment?
Understanding the intricacies of grind size, dose, and tamping pressure is vital; even minor deviations can cause channeling or under-extraction. Advanced coffee professionals emphasize that equipment calibration is just part of the equation—dialing in these variables through systematic adjustment yields superior shots. According to William Ristenpart, a leading researcher in coffee extraction at UC Davis, small changes in grind consistency directly impact brew clarity and balance. Therefore, investing in a grinder with uniform burrs and maintaining it diligently is far more impactful than simply purchasing the most touted model.
Beware of placing your trust solely in gear and neglecting routine maintenance, like cleaning brewer components or replacing worn seals. An overlooked issue is ignoring condensation buildup inside the machine, which can lead to internal corrosion or electrical problems over time. Regularly inspecting and servicing your equipment, even if it appears to be functioning normally, prevents costly breakdowns and preserves the quality of your espresso.
To master your setup, review comprehensive guides such as Mastering the Art of Home Espresso. This resource highlights that understanding your equipment’s nuances and routine upkeep are foundational to brewing excellence, surpassing mere investment in top-tier gear. Embrace these advanced insights, and you’ll realize that expert-level espresso is as much about technique and maintenance as it is about equipment selection. Have you ever fallen into this trap? Let me know in the comments.Keeping your espresso setup in tip-top shape requires more than just periodic cleaning. Investing in the right tools and understanding maintenance routines can dramatically extend the lifespan of your equipment and ensure consistently excellent results. One of my go-to tools is a high-precision digital caliper. I use it to measure burr alignment in my grinder, which is crucial for maintaining grind consistency, directly impacting shot quality. Regularly calibrating your grinder with a caliper ensures uniform particle sizes, reducing channeling and under-extraction, and can be done using methods outlined in our guide on [how to calibrate your grinder](https://espressotechguide.com/how-to-adjust-your-grind-size-based-on-the-humidity). For cleaning, a dedicated ultrasonic cleaner has been a game-changer, especially for intricate parts like group gaskets and shower screens. Ultrasound cleans micro-crevices effectively, preventing buildup that can cause temperature inconsistencies or leaks. I recommend a reliable model like the iSonic P435, which many baristas swear by for thorough maintenance. Over time, internal components can wear or become clogged, so keeping spare seals, valves, and screens on hand allows for quick swaps instead of waiting for repairs. Additionally, investing in a quality knock box and tamping mat preserves your portafilter’s condition, avoiding unnecessary damage. Technology is also improving; I’ve recently adopted coffee-specific cleaning software like *SmartDescaler*, which monitors your machine’s usage and reminds you when to descale based on water hardness and session count. This proactive approach prevents mineral buildup before it impacts performance. Looking ahead, smart sensors integrated into home espresso machines could soon provide real-time diagnostics and maintenance alerts, making gear care even simpler.”
What about long-term maintenance practices? Here’s what I do to keep everything running smoothly
Regularly inspecting and replacing worn gaskets and seals prevents leaks and pressure drops. I schedule biannual deep cleans for my boiler and internal piping, using descaling solutions recommended by manufacturers—trust me, matching your descaler to your water hardness is vital, as explained in our [descaling guide](https://espressotechguide.com/why-your-coffee-puck-is-cracking-and-how-to-prevent-mid-shot-channeling). It’s also worth getting familiar with your machine’s internal schematics, especially if you’re comfortable with minor disassembly, to spot early signs of corrosion or wear. Always use filtered water to minimize mineral deposits; I personally prefer reverse osmosis filtered water, which reduces scaling and prolongs internal parts’ life. Keeping your tools organized on a dedicated tray or drawer not only speeds up routine maintenance but also helps prevent losing critical small parts. Experimenting with a maintenance schedule tailored to your usage frequency and local water quality—say, quarterly deep cleaning and monthly inspections—can make a significant difference. Over time, these habits save money and prevent unexpected breakdowns. For additional insights, consider consulting the detailed recommendations in our [comprehensive maintenance resource](https://espressotechguide.com/mastering-the-art-of-home-espresso-tips-for-beginners). For a next-level challenge, try integrating a portable ultrasonic cleaner into your routine — a small investment that yields big gains in gear longevity.
Lessons That Changed My Barista Game
One of the most eye-opening experiences was discovering how overlooked routine maintenance truly is; it’s tempting to believe high-end equipment just works without fuss, but I found that neglecting simple cleaning routines can sabotage even the most sophisticated machines. Additionally, I realized that micro-adjustments in grind size and tamping pressure often have outsized impacts on flavor, far beyond what the manuals suggest. The most profound lesson was understanding that patience and consistency in care create a domino effect, improving both your brew’s taste and your machine’s longevity. Lastly, I learned that embracing DIY troubleshooting and maintenance not only saves money but deepens my appreciation for the craft—transforming frustration into empowerment and elevating my home espresso experience.