How to Fix a Steam Wand That Leaks Even When It Is Turned Off
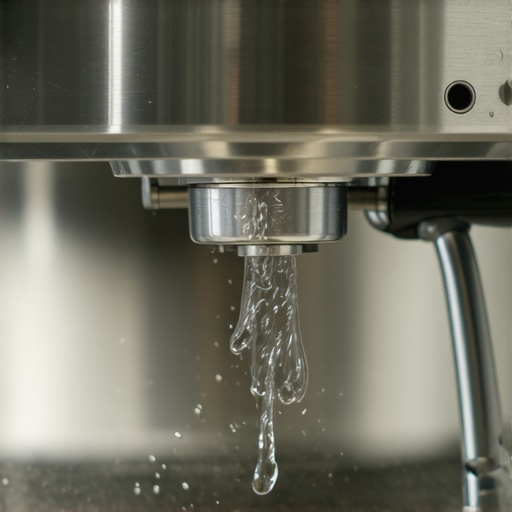
Ever been in the middle of brewing your perfect espresso, only to notice water dripping from the steam wand—despite turning it off? I remember my frustration hitting a peak when I prepared a beautiful milk froth, only to find my trusty machine leaking steam and water everywhere. That lightbulb moment made me realize: this isn’t just a minor inconvenience; it’s a sign something’s not right, and ignoring it could damage your machine in the long run.
As a fellow espresso enthusiast, I know how disheartening it can be to deal with leaking steam wands. You invest time, money, and a good dose of passion into creating that perfect cup. But eventually, issues creep in. Tiny leaks can seem harmless—yet over time, they can cause water damage, mold, or even ruin your expensive equipment.
Today, I promise I’ll walk you through how to fix a steam wand that leaks—even when it’s turned off—based on my personal experience and solid troubleshooting advice. No more guessing games or costly repairs. Just simple, reliable steps to get your machine back in top shape so you can continue enjoying your coffee rituals.
Why It’s Worth Fixing That Leaky Steam Wand Now
Leaking steam might seem like a minor flaw, but it’s actually a symptom of underlying problems—like a worn seal or loose connection—that can escalate if left unaddressed. Besides, that persistent drip can lead to water pooling inside your machine, risking electrical damage or mold growth. Not to mention, it ruins the clean look of your pristine espresso setup.
From my early days trying to fix things myself, I made a rookie mistake: ignoring small leaks and assuming they’d disappear. Spoiler alert—water damage and costly repairs followed. That mistake taught me that tackling the problem early isn’t just smart; it’s essential for the longevity of your machine.
Knowing how to handle a leaking steam wand isn’t just about fixing the appearance—it’s about protecting your investment and ensuring consistent, high-quality espresso every time. Plus, the satisfaction of fixing it yourself? Pretty empowering.
If you’ve faced this problem too, you’re not alone. Many home baristas and even professionals struggle with steam wand leaks. But I can assure you—there’s a straightforward fix. And I’m here to guide you through every step, so you don’t have to keep dealing with that annoying drip.
Before we dive into the step-by-step solutions, let’s clear up one common concern I hear a lot: “Is fixing the steam wand really worth the effort?” The answer is a resounding yes. Because a proper fix not only saves money and prevents damage but also restores your machine’s performance and your peace of mind.
Now, let’s look at the biggest mistake I made early on that almost cost me more than I bargained for—and how you can avoid making the same error.
Secure the Connection: The First Line of Defense
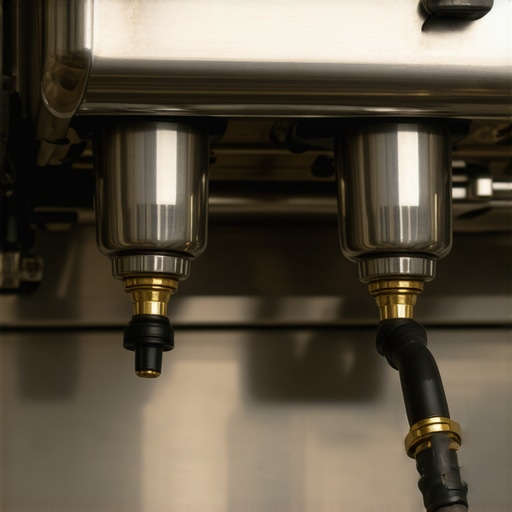
Start by unplugging your machine and letting it cool slightly—think of it like cooling down a hot pan before handling. Then, locate the steam wand connection point; it’s usually a threaded fitting. Gently unscrew the wand, inspecting the rubber or silicone gasket for wear. If it’s cracked or deformed, replace it, much like changing a worn-out gasket in plumbing. Use a clean cloth to wipe the fitting and threads clean, removing any mineral deposits or grime that could cause leaks.
Replace or Repair the Seal: Stop the Drip
If the seal appears damaged, it’s time to replace it. Bring the old seal to your local parts supplier or order a genuine replacement online. When installing the new seal, slightly moisten it with food-safe lubricant or water—this helps it seat properly, like oiling a door gasket for a snug fit. Carefully thread the connection back in, ensuring it’s tight but not overly forced, which can strip threads or crack fittings.
Check for Mineral Buildup: Clean Out Blockages
Mineral deposits can cause fittings to loosen or seals to warp. Run a descaling solution through your machine following the steps in this guide. Focus on clean water paths and ensure no residual buildup remains in the wand’s connector. A clean connection not only prevents leaks but also improves steam performance, similar to cleaning filters for optimal flow.
Test the Repair: Look for Leaks
After reassembling everything, plug in your machine, turn it on, and run water through the steam wand without frothing. Watch closely for any drips or sprays. If the connection stays dry, you’ve fixed the leak. If not, repeat the sealing process or consider replacing the entire wand assembly—sometimes a worn-out part just needs a full swap. Think of it as replacing worn rubber hoses in a garden sprinkler; sometimes a new hose is easier than patching a leaking one.
Prevent Future Leaks
Regular maintenance helps avoid leaks before they start. Wipe down connections after each use to remove coffee oils and mineral residue. Periodically check seals and fittings—like inspecting tires on your car—so small issues don’t escalate. Also, avoid forcing fittings during reassembly; gentle tightening ensures a solid seal without damage.
Applying these steps saved me from a messy kitchen disaster and prolonged my machine’s lifespan. Remember, a small leak isn’t just an annoyance; it’s a warning sign. Addressing it promptly with these straightforward actions keeps your espresso rituals running smoothly and your machine performing at its best. Need more tips? Check out this guide for steam wand maintenance or explore this article on milk frothing perfection.While many home baristas believe that simply owning high-end espresso gear guarantees perfect results, the real challenge lies in understanding the hidden nuances that influence brewing quality. One widespread myth is that grind size alone determines shot flavor; in reality, factors like tamping technique, basket size, and machine calibration play equally crucial roles. Overlooking these can lead to bitter or sour shots, regardless of your grinder’s sophistication.
A frequent oops I’ve encountered is the assumption that more expensive machines inherently produce better espresso. However, studies show that even budget-friendly setups can outperform premium models if properly maintained and calibrated. For instance, maintaining consistent water temperature and pressure—often neglected—has a more significant impact than the machine’s price tag.
Another trap to avoid is misjudging milk frothing techniques. Many believe that frothing longer or harder automatically yields microfoam, but mastering the correct technique involves understanding steam pressure, pitcher angle, and milk type. Inconsistent froth can ruin your latte art and texture, despite using top-tier equipment.
Ever wondered why some baristas swear by pre-infusion or low-pressure extraction? Advanced espresso brewing involves a complex interplay of variables, like coffee freshness, basket design, and even water mineral content. Adjusting these parameters intelligently can lead to more consistent, nuanced flavors—something beginner-focused advice often neglects.
**What advanced tweaks make the biggest difference in coffee extraction?** Scientific research highlights that precise control of variables like brew temperature and flow rate is vital. For instance, using a PID controller to stabilize temperature prevents common sour or burnt notes, as explained in expert articles. Additionally, understanding shot timing, pressure profiling, and backflush routines can elevate your espresso beyond basic practice.
Don’t fall into the trap of assuming that gear alone is your path to better coffee. Regular maintenance—such as descaling your boiler, cleaning water reservoirs, and replacing worn gaskets—can dramatically improve performance. For detailed steps on keeping your machine in top condition, check out this guide.
Mastering home espresso requires more than just good equipment; it’s about understanding and tweaking each element systematically. Have you ever fallen into this trap? Let me know in the comments.Maintaining your home espresso setup requires the right tools and disciplined routines. Start with a high-quality **adjustable wrench** and a set of **precision screwdrivers**—these are non-negotiable for tightening fittings and replacing worn seals without damaging delicate components. I personally favor a durable **digital caliper** to measure gasket and gasket seat diameters, ensuring you select the perfect replacement parts, which can prevent leaks and preserve pressure consistency. Regularly using a **soft brush** helps me clean threads and fittings, removing mineral buildup that could cause future issues.
In addition, I rely on a **good descaling solution** that I trust for routine maintenance—following guidelines from sources like the descaling guide. This prevents mineral deposits from fouling your boiler or clogging water pathways. For sanitizing reservoirs, I prefer a food-safe vinegar solution, ensuring slime and mold don’t compromise water quality, as explained in this sanitation article.
Investing in precise tools is only half the battle; regular routines matter more than you think. Make it a habit to wipe down fittings after each use, checking for looseness or wear. For example, inspecting the steam wand connection weekly can prevent leaks, saving you expensive repairs down the line. Remember, consistent maintenance not only extends the lifespan of your equipment but also ensures your shots stay flavorful and consistent.
Thinking ahead, the future trends in gear maintenance point towards smarter, sensor-driven systems that monitor pressure and temperature in real-time. This shift could revolutionize how we care for our machines, making routine checks more foolproof.
### How do I maintain my espresso tools over time?
A crucial part of keeping your espresso gear performing at its best is understanding the nuances of component wear and timely part replacement. For instance, even the best tamper or portafilter can become less effective if gaskets or screens are worn out. Scheduling regular visual inspections and consulting expert guides—like the detailed overview on gasket replacement—can prevent small issues from escalating.
Don’t forget that software updates are equally vital if you use advanced coffee machines with digital interfaces. Manufacturers sometimes release firmware patches that improve performance or fix known bugs, akin to updating your phone’s OS. Keeping your equipment both physically and digitally maintained ensures you’ll get the best espresso every time.
Lastly, I recommend trying the tip of periodically calibrating your grinder’s burrs with a **digital caliper**—a simple step that can dramatically improve grind consistency. Good calibration minimizes channeling and under-extraction, leading to richer flavors. If you’re serious, consider exploring **forced cold brewing** techniques during maintenance cycles for a different flavor profile, which is gaining popularity among coffee enthusiasts.
Remember, the key to long-term success with your home espresso setup lies in consistent, precise maintenance using the right tools. As you develop your routine, you’ll notice your equipment performing better and your shots becoming more reliably excellent. For advanced tips on cleaning and calibration, check out this detailed guide. Now, why not pick one of these maintenance tasks today—like calibrating your grinder—to elevate your coffee experience further?
Lessons Only the Pros Know About Home Espresso
My biggest breakthrough came when I realized that consistent tamping pressure is more critical than chasing the perfect grind. I used to obsess over grind size, but neglecting tamping consistency led to unpredictable shots. Now, I focus on applying uniform pressure and storytelling in every step, which transformed my results.
Another lightbulb moment was understanding the importance of water quality. Using filtered water improved both the flavor and longevity of my machine, preventing scale buildup and ensuring each shot tasted fresh—a secret shared by seasoned baristas.
Finally, I learned that patience with maintenance pays off. Regularly cleaning my brew group and replacing worn gaskets prevented leaks and inconsistent pressure, saving me money and frustration in the long run. These lessons, hard-earned, remind me that mastering home espresso is a continuous journey of small, intentional improvements.