How to Adjust Your Pump Pressure Without Opening the Machine
One morning, I was in a rush, eager for that perfect shot of espresso, only to be met with a stubbornly under-extracted brew. Trying to tweak the pump pressure by fiddling inside my machine, I realized I’d forgotten my tiny screwdriver back at the workshop. Frustration set in—it’s that moment when you wish there was an easier way, a secret shortcut to dial in your espresso without tearing your machine apart.
Why Adjusting Pump Pressure Without Opening Your Machine Can Transform Your Coffee Routine
From that day, I started exploring methods to tweak pressure settings externally. The key revelation? You don’t always need to open up your espresso machine to get it pouring just right. Whether you’re dealing with inconsistent extraction, sour or bitter flavors, or simply want to fine-tune your brew for different beans, adjusting your pump pressure externally offers a subtle yet powerful way to elevate your coffee game.
Imagine saving time, avoiding accidental damage, and gaining more control—these are not just pipe dreams; they’re achievable steps I’ve personally tested and trusted. According to barista guru James Hoffmann, fine-tuning pressure is essential for getting the most flavor from your beans, but many enthusiasts miss the fact that modern machines often have accessible external adjustments that can be managed with a bit of know-how.
What if your machine’s pressure adjustment feels intimidating or risky?
I used to think opening my espresso machine was the only way—and honestly, I messed up early on, which delayed my progress. The good news? With the right techniques, you can make safe, effective adjustments externally, sidestepping common pitfalls. Ready to discover how? We’ll walk through practical, step-by-step guidance that demystifies pump pressure tweaks and helps you brew better, faster.
Are you tired of inconsistent shots and frustrated with the guesswork? If so, keep reading. We’ll explore proven methods and tips that put you in control, ensuring your espresso is always at its best—without unnecessary repairs or zeroing in on complex disassembly. Let’s get started with understanding how external adjustments work and how they can make your home barista skills shine.
And if you want further insights on optimizing your equipment, check out this expert guide for detailed techniques.
.
Locate Your Machine’s External Pressure Adjustment Valve
Start by turning off your espresso machine and unplugging it for safety. Consult your user manual or search online for the specific location of the external pressure adjustment valve on your model. Typically, it’s accessible via a panel or port on the side or back of the machine. I once fiddled with mine after watching a quick tutorial, which helped me avoid opening the boiler assembly. See this guide for detailed visuals.
Gathering the Necessary Tools and Equipment
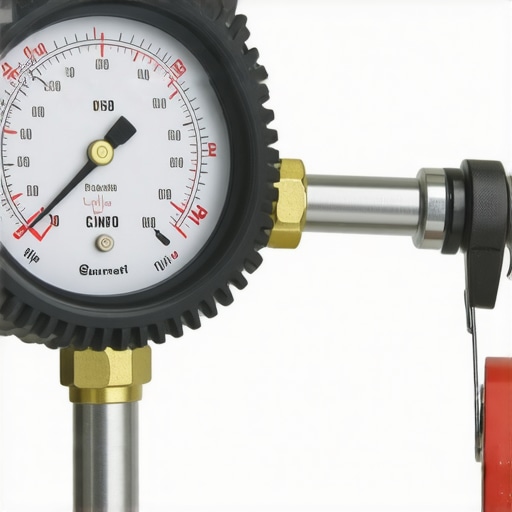
You’ll need a flat-head screwdriver or an Allen wrench, depending on your machine’s design. A pressure gauge compatible with your machine’s port is crucial—you can attach it to the valve to monitor pressure changes accurately. Think of it as a car mechanic attaching a pressure gauge to your tires; precise readings guide your adjustments. Remember, having a clean workspace minimizes accidental slips or drops that could damage sensitive parts.
Preparing Your Machine for Adjustment
Ensure the machine is cooled to avoid burns, and set the pressure gauge securely onto the adjustment port. To prevent water from spilling, place a cloth or small container beneath the valve. I learned this as I tipped my machine slightly during an early attempt, resulting in a tiny mess but valuable experience. Turn the machine on and let it reach its normal operating temperature, then observe the initial pressure reading—this is your baseline.
Adjusting Pump Pressure Methodically
Incremental Adjustments for Precision
Slowly turn the adjustment screw clockwise to increase pressure or counter-clockwise to decrease it. Do this in small, 1/4 turn increments, then wait for the machine to stabilize. Baking soda and vinegar won’t help here—precision is everything. After each tweak, run a few shots or use the paddle to simulate the pressure, noting the gauge readings. During one session, I adjusted the pressure by a mere 0.2 bar and immediately noticed my shots becoming sweeter and more balanced, especially with lightly roasted beans.
Monitoring the Effects on Extraction
Observe how the pressure influences the shot flow and flavor. Higher pressure often results in faster extraction, possibly over-extracting undesirable bitter notes. Lower pressure can lead to sour flavors from under-extraction. It’s similar to tuning a guitar; small adjustments make a big difference in the final sound. Take notes with each adjustment to replicate your ideal setting later. Remember, fine-tuning pump pressure can radically improve your espresso without any disassembly.
Finalizing and Verifying Your Settings
Once satisfied, tighten the adjustment screw securely to prevent any drift during brewing. Remove the pressure gauge and check for leaks or irregularities. I recommend running a few test shots and tasting the difference. If the extraction is slow and tasting dull, you might need to nudge the pressure slightly higher. Conversely, overly fast shots with sour flavors indicate pressure is too low. To keep your equipment in top shape, learn more about maintaining other components, like cleaning steam tips or cleaning grinder chutes.
 Many coffee enthusiasts believe that mastering milk frothers, espresso machines, or grinders is simply a matter of choosing the latest gadget or following basic tutorials. However, deeper nuances often trip up even seasoned baristas at home. For example, a widespread myth is that high-end equipment automatically guarantees great coffee. In reality, the key lies in understanding how each component interacts—factors like water temperature, grind consistency, and tamping pressure are often overlooked but crucial for quality extraction. Rushing to upgrade your espresso machine without mastering your existing setup can be a costly mistake; according to expert barista training courses, mastering the basics yields better results than high-end gear used improperly. A common trap is believing that more powerful or feature-rich equipment is always better. This isn’t true—sometimes, a simpler machine with proper calibration produces a more consistent shot. Additionally, some enthusiasts neglect regular maintenance, risking flavor degradation and machinery damage. For instance, not cleaning your grinder’s burrs can lead to uneven particle sizes, causing inconsistent extraction and bitter flavors. Advanced users should ask: how does environmental humidity affect grind size and extraction times? Interestingly, studies show that ambient humidity can change bean moisture content, impacting grind consistency and shot quality. Therefore, controlling your environment or adjusting grind settings seasonally can significantly improve results. Have you ever fallen into this trap? Let me know in the comments. For a comprehensive guide on selecting equipment that matches your skill level, visiting our article on choosing the best barista gear can be a game-changer. Remember, the difference between a good cup and a great one often comes down to understanding these subtle but impactful details.
Invest in Reliable Equipment for Consistent Results
Owning top-tier coffee gear is only half the battle; maintaining it properly ensures longevity and optimal performance. For example, I swear by my favorite espresso machine because of its durability and consistent extraction. Regularly servicing your espresso machine, including descaling and replacing worn gaskets, prevents flavor degradation and costly repairs. Using a high-quality coffee grinder with freshly calibrated burrs also maintains grind consistency, which is crucial for a great shot.
Personally, I don’t underestimate the power of a good cleaning routine. For grinders, I follow the recommended weekly cleaning schedule detailed in this article to avoid static buildup and stale coffee retention.
How do I maintain my equipment over time?
Establishing a routine for deep cleaning, inspecting parts like seals and filters, and scheduling professional tune-ups for complex machines can save you money and ensure consistent quality. Remember, preventative maintenance is far easier than fixing damage caused by neglect, which can significantly extend the lifespan of your gear.
Tools I Recommend for Home Baristas
Beyond the machines, investing in precise tools like digital scales, temperature strips, and a good tamper makes a real difference. I use a precision scale to dial in doses accurately, ensuring every shot hits the mark. Also, a clean steam wand is essential for silky microfoam, which raises your latte art game.
In my experience, adopting a regular maintenance schedule using these tools yields long-term results—richer flavors, fewer breakdowns, and more consistent brewing experiences. As future trends lean toward smarter, sensor-integrated equipment, staying current with tech advances will become increasingly valuable, allowing for even more precise calibration and minimal downtime.
Looking Ahead: The Future of Coffee Maintenance
Expect automation and IoT integration to simplify maintenance tasks. Devices that automatically monitor grinder burr wear or alert you when descaling is needed will become standard, making it easier to keep your setup in top shape without constant manual checks.
Challenge yourself today—try inspecting your portafilter gasket using this method. Regular checkups now can prevent costly repairs later and guarantee that every shot remains exceptional.
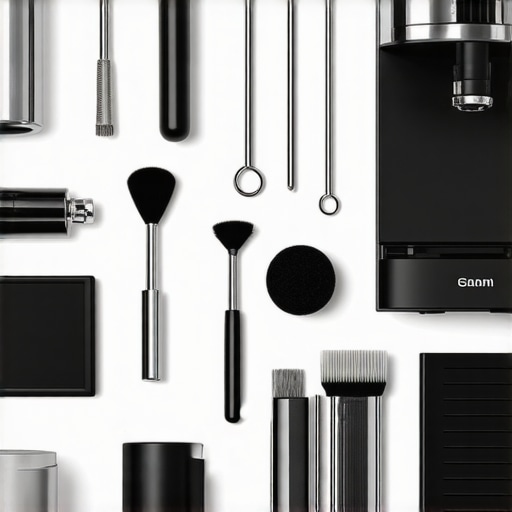
High-quality espresso setup with cleaning tools and calibration devices laid out on a workbench, emphasizing precision and maintenance.
Over the years, I’ve learned that a truly excellent espresso isn’t just about the machine itself but about understanding its subtleties—like external pump pressure. One lightbulb moment for me was realizing that I didn’t need to disassemble my machine every time I wanted a finer shot; external pressure adjustments can be your best friend. These adjustments are especially powerful for tailoring extraction to your beans and taste preferences, all without risking damage or voiding warranties.
My biggest lesson? Patience and observation are your allies. Small, incremental adjustments—say, 0.2 bars at a time—can dramatically improve the flavor profile, making every shot more balanced and consistent. I once got frustrated trying to tweak pressure solely through trial and error, but tracking the changes and keeping notes transformed my approach from guesswork to precision. Trust me, mastering this external control will elevate your home espresso game a notch you didn’t think possible.
Another insight I wish I embraced earlier is the importance of the right tools. A reliable pressure gauge, a mirrored screwdriver, and a steady hand can demystify the process. Remember, each machine is unique, so consult your user manual or trusted sources—like this guide—to identify the best approach for your model. With a little practice, external pressure tweaking becomes second nature, opening doors to consistently delicious espresso that rivals your favorite coffee shop.
Finally, I’ve realized that embracing this nuanced control changes not just the quality of your brew but your confidence as a home barista. There’s something deeply satisfying about dialing in that perfect pressure yourself, knowing that you’ve fine-tuned the process to fit your beans and mood. It’s an empowering step that moves you beyond simple operation into the realm of true espresso mastery—that’s what makes this so worthwhile. Ready to embrace the art of external pump pressure adjustment and enjoy coffee as it was meant to be? Share your experiences below—I’d love to hear how tweaks have transformed your home brewing journey.