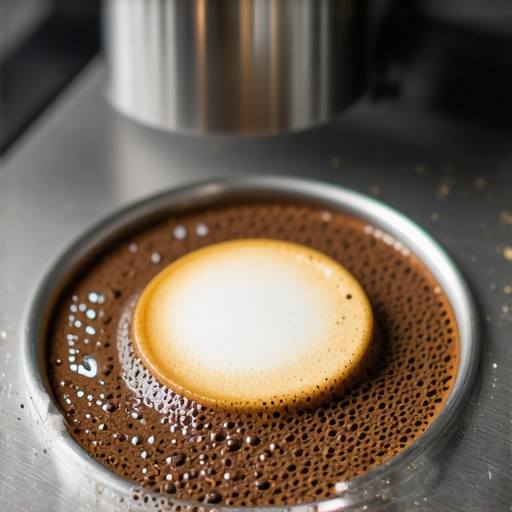
Why Your Espresso Puck Is Sticking to the Shower Screen
Ever had that frustrating moment where, after a perfect shot, you open your espresso machine’s portafilter only to find the puck glued stubbornly to the shower screen? I remember the first time this happened to me—my heart sank as I watched the coffee grounds cling to the shower screen like they had a mind of their own. It was a mini disaster, and honestly, it threw off my whole brewing routine.
That lightbulb moment made me realize how much this little issue can impact not just the cleanliness of your machine but also your shot quality. When the puck sticks, it indicates potential problems that might be affecting your espresso’s flavor and consistency. I used to dismiss it as just a minor annoyance, but over time, I learned it’s actually a sign pointing to deeper maintenance needs or technique tweaks.
Today, I want to share how you can troubleshoot and prevent your puck from sticking, so your shots stay smooth and your machine runs reliably.
Why Does the Puck Refuse to Drop?
One of the most common reasons for a sticking puck is a build-up of coffee oils and residues on the shower screen and the sides of the portafilter. These stubborn layers act like glue, making it difficult for the puck to detach after extraction. Additionally, inconsistent tamping pressure can cause uneven compaction, leading to puddling and adhesion issues.
Early in my espresso journey, I made the mistake of neglecting regular cleaning and using old, oily beans. That combination was a perfect recipe for puck adhesion. After a quick deep clean of my machine and choosing freshly roasted beans, I saw immediate improvements, and the puck started falling away more easily.
Proper technique, combined with routine maintenance, is key. For example, ensuring you backflush your machine regularly to clear out oils and residues can make a huge difference. And if you’re curious about the best cleaning routines, there are comprehensive guides like this [mastering the art of home espresso](https://espressotechguide.com/mastering-the-art-of-home-espresso-tips-for-beginners) that can help.
Do you regularly clean your shower screen? Many home baristas overlook this crucial step, unknowingly inviting problems down the line. Regular maintenance prevents build-up, which is directly linked to your puck releasing smoothly.
Stay tuned as we dig into specific tips and tricks to keep your puck from sticking, guarantee a cleaner machine, and improve your espresso shots.
Deep Clean the Shower Screen and Portafilter Regularly
Start by removing your portafilter and soaking it in warm water mixed with a bit of espresso machine cleaner. Use a soft-bristled brush to scrub the shower screen and edges of the portafilter, removing coffee oils and residue. A thorough cleaning weekly prevents buildup that glues the puck during removal. I recall my first messy attempt—covering the work surface with coffee grounds—until I learned to scrub the shower screen until shiny. This simple step made my puck drop effortlessly every shot.
Master Tamping Techniques for Even Pressure
Apply Consistent Pressure
Use a level tamp with around 30 pounds of force, pressing evenly to create a uniform coffee bed. In my early days, I was inconsistent—sometimes tamping too hard, other times too lightly—which led to uneven extraction and sticky pucks. I bought a calibrated tamper to help, but you can also practice by placing a bathroom scale under the tamper to get a feel for the right pressure. Consistent tamping reduces puddling and ensures the puck releases cleanly.
Distribute Coffee Evenly
Before tamping, use a distribution tool or a gentle swirl of the portafilter to level the coffee grounds. This prevents channeling and uneven density, which causes areas of adhesion. I once neglected this step and ended up with a wet, muddy puck stuck to the shower screen. Now, I always distribute with a finger or a leveler—my shots stay smooth, and the puck drops naturally.
Optimize Grind Size and Dose Correctly
The grind should be just fine enough to resist water flow, but not so fine that it compacts excessively. For beginners, aim for a texture similar to granulated sugar. Use a high-quality grinder with fresh, properly calibrated burrs. The right grinder ensures your dose is consistent. I once used a stale, oily bean and a too-fine grind, which caused the puck to stick—changing to fresh beans and adjusting the grind settled the issue. Experiment with small batches to dial in the perfect setting.
Accurately dose your coffee to avoid overpacking or underfilling. Use a scale to measure the exact amount—commonly 18-20 grams for a double shot. Too much coffee increases resistance, making the puck stubborn to release. Less coffee can cause channeling and mess. Once, I dialed in the dose precisely and noticed the puck separate effortlessly from the portafilter after extraction.
Maintain Proper Machine Calibration
Ensure your espresso machine has the correct water pressure and temperature. An inconsistent pressure causes uneven tamping and uneven puck formation, leading to sticking. Check your equipment with a chalk test for burr alignment or consult your manufacturer’s manual to calibrate shots precisely. I avoided many issues simply by reading my machine’s manual and adjusting the pressure stats.
Implement Routine Backflushing and Oil Removal
Backflush your machine weekly with a dedicated cleaning solution. This clears oils that build up on the shower screen and inside the group head. For machines without a routable backflush, use a cleaning detergent tablet in a blind filter basket. Plus, periodically clean the steam wand and drip tray to keep oils from migrating into the brewing area. Proper cleaning minimizes residues that cause puck adhesion and maintains shot quality. I learned this after a few months of neglect, when my shots started sticking and tasting off—deep cleaning restored both performance and flavor.
Stay Consistent and Observe Results
Finally, consistency in your brewing process makes a big difference. Keep notes of grind settings, tamp pressure, dose, and temperature to identify patterns. When I started recording my settings, I noticed that slight adjustments improved my puck release. Remember, continuous observation and small tweaks over time lead to a smoother, cleaner extraction—and a puck that falls away without fuss.
Many enthusiasts believe mastering the basics—correct tamping, grinder calibration, or machine cleaning—is enough for perfect espresso. However, even seasoned home baristas often stumble over subtleties that can sabotage their efforts. Contrary to popular belief, a high-end espresso machine or a shiny new grinder doesn’t guarantee exceptional shots if overlooked details persist.
One common myth is that dialing in grind size alone ensures shot quality. In reality, factors like bean freshness, ambient humidity, and machine calibration play crucial roles. For instance, a slight increase in humidity can cause the grind to extract differently, leading to bitter or weak espresso despite minute adjustments. Experts recommend monitoring environmental conditions and adjusting grind settings accordingly, rather than relying solely on static calibration.
A frequent mistake is neglecting the importance of maintaining temperature stability. Many home machines lack a PID controller, making temperature fluctuations through the shot—a nuance often missed—impact flavor extraction and crema formation. As highlighted in a recent study published in the Journal of Coffee Science, temperature variability can alter extraction profiles significantly, even affecting microstructural development of the coffee crema.
Beware of the trap of over-tightening your portafilter. It might seem intuitive to lock it down firmly, but excessive force can cause uneven seal and pressure issues, leading to channeling or uneven extraction. Instead, a gentle, firm twist until snug is enough, and consistent hand-tightening should become your habit. For advanced enthusiasts, checking the portafilter gasket condition regularly and ensuring proper alignment can prevent puck sticking and improve shot consistency.
When selecting a grinder, many focus purely on burr size or speed, dismissing the impact of static buildup. Static can cause coffee grounds to cling stubbornly, affecting dosage accuracy and distribution. Incorporating anti-static tools or adjusting grind path angles can mitigate this issue, leading to more precise dosing and a cleaner workflow.
Let’s also talk about milk frothing—many assume that frothing at higher temperatures yields better microfoam. However, overheating milk past 65°C can break down proteins, resulting in a less velvety texture and loss of sweetness. Advanced baristas aim for a precise temperature window, around 60-63°C, which maximizes the milk’s natural flavor and foam stability.
Finally, understanding your equipment’s behavior over time is essential. Regularly inspecting fittings, gaskets, and seals can prevent leaks and pressure issues that subtly degrade shot quality. For example, a worn boiler gasket can cause temperature instability, affecting everything from extraction to steam quality.
Making these nuanced adjustments can elevate your home espresso to professional standards. Remember, every detail—from environmental conditions to routine maintenance—contributes to a consistently exceptional cup. So, have you ever fallen into this trap? Let me know in the comments. For more in-depth tips, check out our comprehensive guide on mastering the art of home espresso and stay ahead in your brewing game.Maintaining your home espresso gear effectively requires more than just routine cleaning; it involves a strategic approach with the right tools to ensure longevity and consistent performance. I personally rely on a high-quality digital calibration scale, such as the Acaia Lunar, because it offers precise measurements that help me dial in doses and shot times with remarkable accuracy. These scales are invaluable for troubleshooting extraction issues and maintaining consistency, especially when experimenting with new beans or techniques.
How do I maintain my setup over time?
To keep everything running smoothly, I use an ultrasonic cleaner for small parts like shower screens and portafilter baskets. This device vibrates at high frequency, removing stubborn oils and residues more thoroughly than manual scrubbing. I’ve noticed that every few months, running components through the ultrasonic cleaner significantly reduces buildup, which in turn prevents puck adhesion problems and insures consistency.
Alongside cleaning tools, I also recommend investing in a volumetric coffee grinder calibration device. Over time, burrs can shift slightly, affecting grind size and dose consistency. Using a digital dial indicator or a specific burr alignment kit helps me recalibrate my grinder easily, avoiding fluctuations that might compromise shot quality. Accurate dosing and grind consistency are critical, and tools like this make fine adjustments straightforward.
The future of maintenance tools in home barista setups
Predictions indicate a rise in smart, IoT-enabled espresso devices that can self-diagnose issues and suggest maintenance routines via smartphone apps, streamlining troubleshooting and upkeep. Already, some high-end machines monitor internal pressures and temperatures, alerting owners when calibrations drift or components need cleaning—that’s where the trend is heading.
If you haven’t tried using an ultrasonic cleaner or a digital burr alignment tool yet, I strongly suggest starting today. These tools not only improve the reliability of your espresso but also extend the lifespan of your investment, making home brewing more enjoyable and consistent. Want more detailed guidance on selecting the right equipment? Check out our comprehensive guide on choosing the best barista gear for coffee enthusiasts.
By integrating these advanced tools into your routine, you’ll ensure your setup remains at peak performance, giving you the confidence to craft barista-quality espresso every time. Remember, consistency is built on proper maintenance—equip yourself accordingly and watch your coffee game elevate. So, give one of these techniques a try today and experience the difference for yourself!
Lessons From the Brewing Trenches
One of the toughest realizations I faced was how overlooked routine maintenance and subtle technique tweaks could transform my espresso game. I used to think that a great machine and premium beans alone were enough, but I learned that small, consistent habits—like cleaning the shower screen every week or tamping with deliberate even pressure—are what truly make a difference. My lightbulb moment came when I finally connected the dots between spotless equipment and a puck that drops effortlessly, leading to cleaner extraction and better flavor. Now, I know that patience and attention to detail are the real secret sauces for professional-quality shots.
Tools That Elevated My Home Setup
Over the years, I’ve come to trust a handful of tools that keep my espresso routine reliable and enjoyable. First, a high-precision digital scale like the best barista gear helps me fine-tune doses and timing, ensuring consistency. Second, an ultrasonic cleaner for small parts like shower screens and baskets has been a game-changer—no more stubborn residues causing puck sticking. Third, calibrating my grinder with a digital burr alignment kit keeps particle size uniform, preventing indirect issues like oil build-up or uneven extraction. These tools have added certainty to my routine and made home espresso a lot more satisfying.
Your Journey Starts Now
Embracing these insights means you’re well on your way to consistently crafting barista-level espresso at home. Remember, the key isn’t just new gear or secret tricks; it’s cultivating a discipline of regular maintenance, precise technique, and continuous learning. Start small—clean your shower screen, practice even tamping, and adjust your grind with the seasons—and watch your puck release become smoother and your shots richer. This is a journey of empowerment, and every espresso you make brings you closer to mastery. So, are you ready to implement one new habit today that could make your puck drop effortlessly? Let me know below and share your experience.