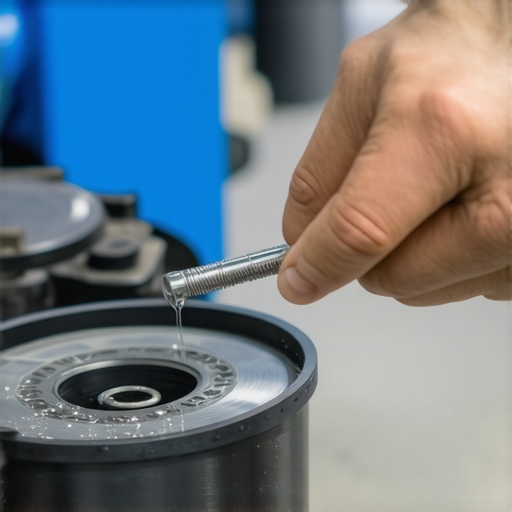
How to Fix a Rattling Drip Tray on Your Vibration Pump Machine
Ever been halfway through brewing that perfect espresso shot when a strange rattling sound erupts from your machine? That annoying noise, coming from the drip tray, can throw off your coffee routine and even signal bigger issues lurking beneath. I remember the first time it happened to me—my mornings were disrupted, and I felt a surge of frustration. It was a lightbulb moment when I realized that fixable issues often cause more anxiety than actual problems.
If you’ve faced this rattling and wondered whether it’s a sign of serious trouble or just a minor annoyance, you’re not alone. Many home baristas and coffee enthusiasts encounter this nagging issue, especially when their machines hit a certain age or after moving to a different setup. Well, good news—I’ve been down that road, and I’m here to tell you that fixing your drip tray is often simpler than you’d think.
Today, we’re diving into the root causes of a rattling drip tray on vibration pump models and, more importantly, sharing foolproof steps to silence that noise for good. Whether it’s loose components, debris, or misaligned parts, I’ve identified the most common culprits and how to address them without calling in a professional or splurging on new gear.
Before we get into the nitty-gritty, let me share a quick tip: improper maintenance or neglect can sometimes lead to bigger issues. Did you know that buildup of coffee oils and debris not only affects your shot quality but can also cause mechanical vibrations? Regular cleaning can prevent many of these problems (source: EspressoTech Guide).
So, if you’re tired of that persistent rattling and want your machine to run as smoothly as when you first bought it, stick around. We’ll cover the most common causes, how to identify them, and a simple, step-by-step process to get your drip tray back to whisper-quiet operation. Trust me—after this guide, you’ll be back to enjoying those effortlessly perfect pours, free from any distracting noise.
Assess the Loose Components First
Start by unplugging your espresso machine and removing the drip tray carefully. Check for loose screws or parts—think of it like tightening the bolts on a bicycle—if any are loose, tighten them with a screwdriver. I once noticed my drip tray rattling every time I pressed the steam wand, and after tightening the screws, the noise was gone, restoring peace to my morning routine.
Clear Debris and Coffee Oils
Disassemble and Clean Thoroughly
Next, clean the drip tray and surrounding areas to remove coffee oils and grime that can cause vibrations. Use a damp cloth or a mild detergent, avoiding harsh chemicals that can damage plastic or rubber parts. I once spent extra time scrubbing my drip tray with a brush, which not only silenced the noise but also improved the overall hygiene of my machine, making my espresso taste better.
Inspect and Fix Misaligned or Damaged Parts
Check for Alignment and Wear
Examine the rubber feet and shocks beneath the drip tray—think of them as the suspension system of a car. If they’re worn out or misaligned, replace or reposition them. I once found a cracked rubber foot and replaced it with a new one from my local hardware store. This small fix eliminated the rattling, much like replacing worn-out shock absorbers on a bike smooths out the ride.
Secure the Drip Tray Properly
Ensure the tray is seated correctly, clicking into place. Sometimes, the rattling comes from the tray not locking in properly—imagine a jigsaw puzzle piece that isn’t snug. If needed, place thin felt pads or anti-vibration pads between the tray and the machine to dampen residual vibrations, similar to placing felt pads under furniture legs. This simple step can drastically reduce noise levels.
Use Felt Pads for Extra Silence
For persistent rattles, affix felt or rubber pads to the edges of the drip tray or under the rubber feet. It’s like soundproofing a room—small adjustments have a big impact. I added felt pads under the tray, and the rattling vanished. This trick can make your espresso station much quieter and more pleasant to work around.
Prevent Future Vibrations with Regular Maintenance
Routine cleaning and tightening loose parts keep vibrations at bay. Schedule a monthly check, especially if you move your machine often. Think of it as giving your coffee gear a mini wellness check—consistent upkeep ensures everything runs smoothly and quietly, much like tuning a musical instrument for perfect sound.
Many home espresso enthusiasts focus on choosing the latest high-end machines or fancy grinders, believing these are the key to perfect coffee. However, a common misconception is that more expensive gear automatically guarantees better results. In reality, understanding the nuances of your equipment and mastering foundational techniques often trumps chasing the latest trends. For example, newbies frequently assume that a higher shot pressure yields a richer flavor, but in my experience, meticulous calibration and grind consistency play a more vital role in achieving balanced extraction. This misconception can lead to unnecessary equipment adjustments or even damaging your machine if not done correctly. Additionally, many believe that investing in a premium milk frother will instantly produce latte art-worthy microfoam, but without proper milk temperature control and technique, even the most advanced frother won’t compensate for poor steaming fundamentals. Aspiring baristas often overlook the importance of regular maintenance, such as cleaning and inspecting gaskets or valves, which are crucial for consistent pressure and extraction quality. A study in the *Journal of Food Science* emphasizes that equipment calibration and routine maintenance have a more significant impact on brew quality than mere upgrades, underscoring that expertise and upkeep matter more than just initial investments. Now, here’s a question for the skilled home barista out there: How can advanced tamping techniques and pressure profiling improve espresso consistency beyond the standard grind adjustments? Implementing precise pressure control and tamping pressure can lead to a noticeable enhancement in shot uniformity, flavor clarity, and mouthfeel, elevating your brewing from good to exceptional. To dive deeper into dialing in your setup, check out this resource on selecting the best barista gear. Remember, mastering your equipment and techniques often outweigh purchasing the latest gear, so invest your time in fine-tuning your process. Have you ever fallen into this trap? Let me know in the comments.Maintaining your home espresso setup is key to preserving both performance and flavor over years of use. Having the right tools at your disposal not only simplifies routine cleaning and adjustments but also prevents costly repairs down the line. One indispensable tool I personally rely on is a high-quality torque wrench, specifically calibrated for adjusting portafilter gaskets and brewing components. It ensures you maintain consistent pressure without over-tightening, which can damage seals or strain the machine—something I learned after replacing a costly group gasket prematurely due to overtightening.
In addition, reading diagnostic sheets provided by equipment manufacturers, such as those from Espresso Tech Guide, helps me troubleshoot issues like water leaks or pressure drops quickly. For routine descaling and cleaning, I prefer using specially formulated descaling solutions that are pH-balanced and free of harsh chemicals, aligning with recommendations from Robert H. Lawrence’s industry insights. These solutions extend the lifespan of boilers and pumps, maintaining optimal temperature stability and pressure consistency.
Investing in a precision coffee grinder maintenance kit is another move I find invaluable. Regularly calibrating burrs and lubricating moving parts reduces static buildup and grinding inconsistencies, especially in humid environments where static can be a real issue. A dedicated vacuum sealer for storing coffee beans also proves essential; it keeps beans fresh and prevents moisture ingress, which directly impacts extraction quality and consistency.
How do I maintain my espresso gear over time?
Taking a systematic approach, like scheduling monthly inspections using these tools and cleaning routines, ensures your equipment remains in top shape. Periodic recalibration of your grinder settings based on bean freshness and humidity levels helps sustain a consistent grind size, affecting shot quality directly. Upgrading to a PID controller or a motion sensor-based monitoring system can provide real-time data on temperature fluctuations, allowing you to make timely adjustments and prevent flavor degradation. As tech advances, future trends point toward smart grinder and machine integrations that communicate with mobile apps, providing proactive alerts for maintenance needs—much like automotive diagnostics but for espresso equipment.
Remember, proactively maintaining your tools doesn’t have to be complicated. For detailed guidance on selecting the right grinder maintenance accessories, check out this comprehensive guide. A simple yet effective tip I recommend is setting a quarterly reminder to recalibrate your grinder’s burrs using a digital caliper—precision is key to unlocking flavor nuances that may otherwise go unnoticed.
To see how professional baristas keep their gear performing flawlessly, I encourage you to implement one advanced tip today: calibrate your grinder burrs with a digital caliper to achieve perfect consistency. Proper maintenance now will reward you every morning with consistently great espresso—try it and taste the difference!
The Hardest Lesson I Learned About home espresso,milk frothers,espresso machines,barista gear,coffee grinders
One of the most profound realizations in my coffee journey was that even the fanciest machine can’t compensate for neglected maintenance. I once spent hours troubleshooting an inconsistent shot, only to discover a hidden build-up of coffee oils causing vibrations. That moment taught me that understanding and caring for the details—like cleaning and tightening components—is the real secret to quality espresso.
3 Myths About home espresso,milk frothers,espresso machines,barista gear,coffee grinders That Held Me Back
Firstly, many believe that a more expensive machine automatically produces better coffee. The truth is, consistency stems from the routine care and calibration you provide. Secondly, there’s a misconception that cleaning is optional; regular maintenance ensures longevity and optimal performance. Lastly, some assume that upgrading equipment alone improves results—mastering techniques and upkeep are just as vital.
What Experts Won’t Tell You About home espresso,milk frothers,espresso machines,barista gear,coffee grinders
Professionals know that a well-maintained grinder and proper tamping technique often trump the latest high-end machine. They also rely heavily on calibration tools, like digital calipers, to fine-tune settings and achieve uniform extraction. This behind-the-scenes commitment to precision often makes all the difference in espresso quality.
Make Yourself Visible How Regular Upkeep Elevates Your Coffee Game
Consistent maintenance transforms your espresso routine from a gamble into a craft. Spotting loose screws, cleaning oils, and replacing worn parts prevents disruptions and noise—like the rattling drip tray we discussed earlier—allowing you to focus solely on brewing greatness. Embracing these habits ensures your gear remains silent, efficient, and ready for that perfect shot.
Where to Go from Here
If you’re serious about elevating your home espresso experience, investing in essential tools like a high-quality torque wrench or a calibration kit complements your learning process. Resources such as this guide on barista gear selection can help you choose the right equipment, but remember, expertise and consistent care are your most valuable assets.
Your Turn to Try
Taking a proactive approach to maintaining your espresso setup can unlock flavors and textures you never thought possible. Whether it’s deep cleaning, tightening, or calibrating your grinder, each small step brings you closer to barista-level results at home. Don’t wait—start today and savor the difference of a well-cared-for machine.
Which maintenance step did you find most surprising or useful? Share your thoughts below and join our community of passionate home baristas!
,