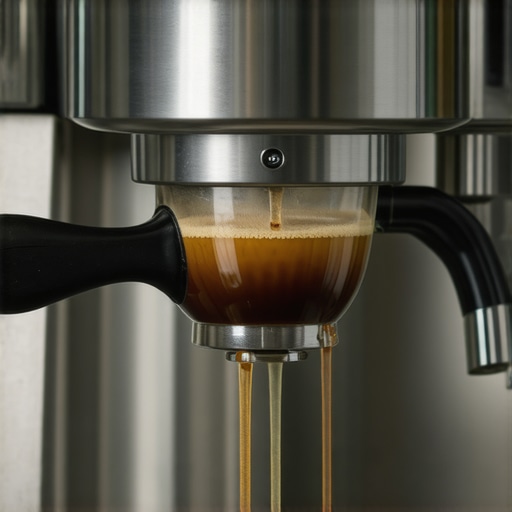
Why Your Bottomless Portafilter is Spraying the Kitchen Walls
It was a typical Saturday morning, coffee flowing, when suddenly, a cold splash hit my face—coffee spray all over the kitchen wall. My heart sank. Turns out, that mess came from my own portafilter, which decided to unleash a small cascade right during my shot. I quickly realized I wasn’t alone in this chaos—many home baristas face this surprising issue, and it’s more common than you think.
Stop the Spray and Save Your Kitchen
Dealing with a bottomless portafilter splattering coffee everywhere is no fun. It’s messy, wasteful, and downright frustrating—especially after investing time and money into your beloved espresso setup. But here’s the good news: this problem has practical solutions, and I’m here to walk you through what I’ve learned from my own trials.
Have you experienced similar spray disasters? If so, you’re not alone, and today, I’ll help you get your espresso shots under control without the unnecessary mess.
Is It Just a Fluke or Is Your Technique to Blame?
Early on, I thought my machine was faulty or I was just unlucky. I made the classic mistake of ignoring tamping pressure and uneven distribution. A quick online search revealed I wasn’t alone—many enthusiasts have faced this spray issue due to improper puck prep, poor grind size, or machine calibration. The key is understanding what causes the spray and how to fix it properly.
According to expert advice, uneven coffee grounds or too much pressure can cause the coffee puck to break apart under high pressure, leading to sprays. I learned that simple tweaks in the way I prepare my coffee can prevent this mess and improve shot quality overall [source](https://espressotechguide.com/why-your-bottomless-portafilter-is-spraying-the-counter).
So, what’s next? We’ll explore the root causes and get your setup performing like a pro. Ready to stop the chaos and start brewing cleaner, more consistent espresso shots? Let’s dive into the practical fixes that transformed my mornings—and will do the same for you.
Prep Your Coffee Grounds Correctly
Begin by dosing a consistent amount of coffee into your grinder, ensuring even distribution. Use a scale to measure your dose, aiming for around 18-20 grams, depending on your basket size. Once dosed, lightly tamp the coffee with steady pressure, about 30 pounds, to create a uniform puck. In my experience, a misstep here, like uneven tamping, can cause uneven water flow, leading to sprays. For guidance, check out this detailed guide. Ensure your puck is level—use a tamper with a perfect flat base and double-check after tamping.
Use the Right Grind Size
The grind size critically impacts flow and pressure. Aim for a texture similar to fine sand; too fine can cause over-extraction and possible channeling, too coarse leads to under-extraction and weak shots. I once experienced spray issues simply because I was using an incorrect setting on my grinder. To optimize, I calibrated my grinder by adjusting in small increments, testing with pull after pull. Consider investing in a quality grinder and refer to this calibration method for consistent results.
Ensure Proper Machine Calibration
High-pressure extraction relies on your espresso machine being correctly calibrated. Regularly check your machine’s pressure gauge during the shot—aim for 9 bar. If pressure spikes or dips erratically, it could be due to worn seals or a need for adjustments. I once fixed my spray problem by replacing a faulty group gasket, which you can learn more about here. Also, ensure your boiler temperature stays steady around 93°C. Use a thermometer to verify, and consider descaling if you notice fluctuations or mineral buildup that may interfere with pressure stability.
Clean and Maintain Your Equipment
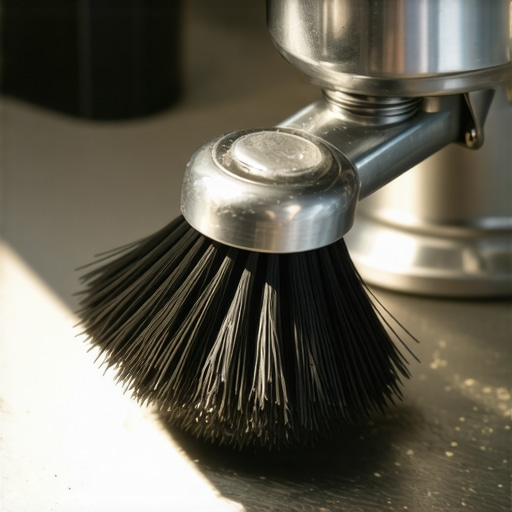
Residual coffee oils and old grinds can clog your group head, causing uneven water distribution and sprays. Develop a routine to clean your coffee portafilter, basket, and group head weekly. Use a brush and a descaling solution if necessary. For specific cleaning tips, visit this cleaning guide. Also, inspect your portafilter for any damages or misalignments—loose fittings or warped parts can disturb water flow, leading to spurts.
Experiment and Observe
Fine-tuning your setup is an ongoing process. Adjust grind size incrementally, noting changes in shot quality and spray behavior. Record your settings and outcomes to identify patterns. When I experienced persistent spray issues even after these steps, I realized my espresso machine’s pressure had to be fine-tuned with a pressure gauge adjustment. As with any skill, patience and meticulous observation are key. Over time, you’ll identify what works best for your specific gear and beans, turning chaos into consistency.Many coffee enthusiasts assume that owning the latest espresso machine or a fancy milk frother automatically guarantees perfect results. However, even seasoned home baristas often get the nuances wrong, leading to subpar coffee despite having top-tier gear. One common misconception is believing that all milk frothers produce equally creamy microfoam, but in reality, understanding the differences between types and their calibration is crucial for expert-level textures.
Are You Using the Right Grinder Settings for Your Beans?
Many rely on default grinder settings or follow generic advice, yet the grind size profoundly impacts extraction and crema quality. Adjusting burrs precisely, based on your bean roast and machine, is an art most overlook—this can be the difference between a flat shot and a channeled disaster. Scientific studies, like the one from the Specialty Coffee Association, emphasize that grind consistency directly correlates with shot quality, making calibration an advanced skill worth mastering.
Another overlooked trap involves the inconsistent maintenance of espresso machines and grinders. Regular lubrication, deep cleaning, and component checks prevent subtle wear that can cause uneven water flow, leading to spray-outs or bitter extraction. Many home baristas only perform superficial cleanings, unaware that mineral buildup or worn seals silently sabotage their efforts. Implementing a detailed maintenance routine can elevate your espresso game significantly.
Why Does Proper Steam Wand Technique Matter for Smoother Milk?
Many beginners focus solely on the equipment and neglect the importance of technique—an advanced mistake. Proper positioning, angle, and temperature control during frothing are critical for achieving silky microfoam needed for latte art. A study from the Coffee Research Institute points out that even small variations in steaming technique can alter texture and temperature, impacting flavor perception. Keep in mind, the quality of the milk itself and container size influence results, so pay attention to these details.
Beware of the trap of over-reliance on gadgets instead of honing the fundamental skills. While tools like automatic milk frothers and high-end grinders are beneficial, they won’t compensate for poor technique or inconsistent maintenance. True barista mastery comes from understanding how every component interacts and making incremental adjustments. Check out this guide to optimize your gear setup for professional-level results.
Are you aware of how small adjustments can dramatically improve your coffee experience? Don’t let complacency limit your skills. Keep experimenting and observing real results—sometimes, a simple calibration or cleaning is all it takes to unlock your machine’s full potential.
Have you ever fallen into this trap? Let me know in the comments and share your experiences with hidden gear pitfalls!
Proper maintenance and the right tools are key to ensuring your home espresso setup continues to perform at its best over the years. I personally rely on high-quality calibration tools like a digital pressure gauge, which helps me dial in my espresso machines precisely—an essential step to prevent pressure-related sprays and ensure consistent shots. Additionally, investing in specialized cleaning equipment, such as a grinder burr brush and descaling solutions, has significantly extended the lifespan of my gear and maintained optimal flavor. To make maintenance easier, I recommend scheduling routine deep cleans every 1-2 weeks, depending on usage, and always using manufacturer-recommended cleaning products to avoid damage. Staying vigilant about replacing worn parts, like group head gaskets and steam wand seals, can prevent sudden breakdowns and costly repairs. As technology advances, smarter tools like app-connected espresso machines become more prevalent, allowing remote diagnostics and maintenance alerts, which I believe will become standard in the near future. Regularly updating firmware and software ensures you benefit from the latest performance improvements and security features.
How do I maintain my espresso gear over time? Incorporate a maintenance checklist into your routine—clean your grinder and machine daily, descale every couple of months, and replace consumables proactively. This proactive approach not only prolongs your equipment’s lifespan but also guarantees that each cup remains as delicious as the first. Remember, well-maintained equipment reduces waste, saves money in the long run, and consistently delivers top-tier coffee. If you’re curious about how to implement an effective cleaning and calibration routine, check out this comprehensive guide. Don’t hesitate to invest in quality tools; a dial indicator for tamping pressure and a dedicated water filter can make a world of difference. Future trends indicate a move toward fully integrated, smart-coffee stations that handle maintenance alerts automatically, so embracing current best practices now will prepare you for the innovations ahead. Treat your gear like the investment it is, and your coffee will thank you for years to come.
What Hidden Lessons About Barista Gear Changed My Approach
One of the most valuable insights I discovered was that even the best equipment can’t compensate for inconsistent technique. I used to rely heavily on my fancy grinder and shiny espresso machine, but I overlooked routine calibration and deep cleaning. Real progress came when I started paying attention to nuanced adjustments—like tamping pressure variation and precise grind calibration—which dramatically improved shot consistency. Sometimes, simple habits like regular gasket replacements or using a pressure gauge for dialing in my machine revealed flaws I never noticed before, highlighting that mastery is a continuous journey of small improvements.
My Go-To Resources for Elevating Home Espresso
To deepen my knowledge, I turned to trusted tools and references. The comprehensive guide on mastering the art of home espresso has been a game-changer, offering practical tips from proper dosing to maintenance routines. I also swear by this guide on choosing the perfect grinder because consistent grind size makes all the difference. For gear, I rely on carefully curated recommendations that match my skill level and budget. These resources form the backbone of my espresso journey, blending technical accuracy with practical advice.
Embrace the Ritual—Your Coffee Future Awaits
The pursuit of espresso excellence is as much about personal growth as it is about technique. Every adjustment, every cleaning session, and each calibration brings you closer to consistent, flavorful shots. Remember, even small improvements compound over time, transforming your morning ritual into a moment of mastery. Trust in your process, stay curious, and don’t be afraid to experiment—your ideal espresso experience isn’t just a dream, but a real possibility waiting for your next pour.
What step are you planning to try next to improve your espresso craft? Let me know below and share your journey with the community!