Why Your Milk Foam is Too Thick for Pouring Art
I remember the first time I tried creating latte art at home. Excited, I steamed the milk, poured it into my espresso, and instead of that silky, glossy microfoam I’d seen on social media, I was greeted with a chunky, stubborn mass of foam that refused to flow smoothly. It was frustrating — like trying to paint with glue. That lightbulb moment made me realize: my milk foam was too thick, and it was ruining my pour.
Getting the Perfect Microfoam for Stunning Latte Art
If you’ve found yourself battling thick, unmanageable foam, you’re not alone. Many home baristas struggle not because of lack of effort but because of a simple, overlooked mistake: the way they steam their milk. Today, I’ll share the insights I’ve gained from personal trial and error, along with expert tips, to help you achieve that velvety microfoam ready for pouring art.
Is Thick Foam Actually Better? The Biggest Fears Uncovered
I used to think that a dense, thick foam signaled a good steaming session. Turns out, I was wrong. Over-foam can make pouring difficult, lead to uneven microfoam, and ruin your latte art attempts. One mistake I made early on was steaming at too high a temperature, which caused the milk to become overly thick and stubborn. Learning to control the steam wand’s temperature and technique was key to transforming my foam from unusable to beautiful.
Are you facing similar issues? Do your milk drinks come out with that thick layer of foam that just won’t pour smoothly? If so, don’t worry — I’ve been there, and I’m here to help you avoid the same pitfalls. For more on choosing the right equipment, you might want to explore [the best way to select the perfect coffee grinder](https://espressotechguide.com/how-to-select-the-perfect-coffee-grinder-for-your-brew). Now, let’s dive into what causes overly thick foam and how to get that creamy, pour-ready microfoam every time.
Control Your Steam Temperature with Precision
Begin by setting your espresso machine’s steam wand to a moderate temperature—around 140°F to 150°F (60°C to 65°C). I once tried steaming milk at full blast, which resulted in thick, stubborn foam. Instead, I reduced the steam power and paused frequently, feeling the milk’s temperature with my hand to avoid exceeding 150°F. The difference was night and day; the microfoam became silky and pourable. Use a thermometer or rely on the machine’s steaming gauge to keep consistent. Remember, just like tuning a guitar, precision in temperature produces harmony in foam quality.
Perfect Milk Steaming Technique
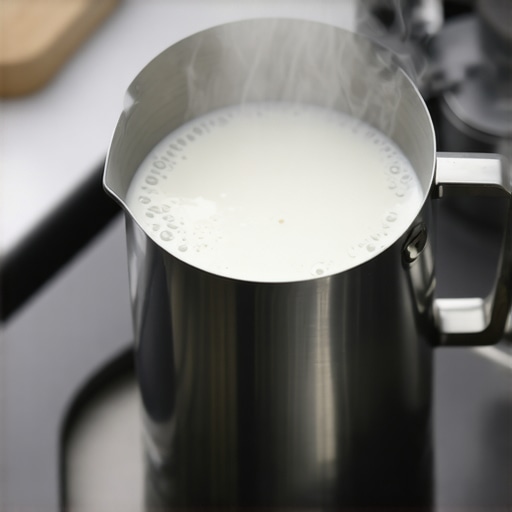
Position the steam wand just below the milk surface, creating a gentle whirlpool. As I struggled initially, I found that tilting the pitcher slightly away from the wand helps introduce air slowly. Start by pulsing the steam for a couple of seconds, then submerge the wand entirely to continue heating. Keep the pitcher at an angle and listen for a steady hissing sound, signifying stable steam pressure. I once rushed this step, and the foam turned into rubber. Patience and steady hand are key; with practice, the microfoam should be smooth and velvety, resembling wet paint.
Master the Art of Texturing Milk
Ever notice how some baristas swirl the pitcher simultaneously while steaming? I adopted this technique, moving the pitcher in small circles to evenly distribute heat and aerate the milk. It took me several tries—initially, I had milk spewing from the spout or uneven foam. Now, I focus on feeling the pitcher’s warmth and observing the milk’s surface. The goal is a glossy, paint-like foam without large bubbles. If you see large bubbles, tap the pitcher on a towel, then swirl vigorously to break them up. Microbubble formation is crucial—think of it as tiny pillow clouds ready for pouring.
Achieving the Right Consistency for Pouring
Before pouring latte art, save a few seconds to check if the foam flows smoothly from the pitcher. I once added too much foam, which caused my latte art to collapse. The secret is holding the pitcher higher, allowing the microfoam to flow in a controlled, thin stream. Practice pouring a slow, steady line—like tracing a gentle arc—until the microfoam starts to blend seamlessly into the espresso. If the foam still feels thick or stiff, gently reheat and re-texture the milk, keeping the temperature below 150°F. Remember, microfoam is delicate—treat it like liquid velvet for the best artistic results.
Experiment and Adjust for Consistency
Every machine and pitcher can behave slightly differently, so don’t hesitate to tweak your techniques. Once, I used a smaller pitcher to better control the flow, which improved my precision. Also, consider your milk type—whole milk froths differently than skim or plant-based options. Consistency comes with practice, so spend a few minutes experimenting with steam pressure, positioning, and pouring angle. Over time, you’ll learn what works best for your setup, turning a messy foam into your signature latte art. For ideas on the best milk frothers that can assist, check out this guide.Many aspiring home baristas believe that investing in the most expensive milk frothers or elaborate espresso machines guarantees perfect results. However, actual success often hinges on understanding the nuances and avoiding common pitfalls. A prevalent misconception is that top-tier equipment alone can compensate for technique errors; in reality, mastering the subtleties of grinding, steaming, and pouring is crucial. I’ve seen enthusiasts spend hundreds on equipment, only to discover that improper tamping or inconsistent grind size sabotage their efforts. A significant oversight is neglecting the importance of maintaining gear. For example, using a dirty steam tip or clogged grinder can dramatically impair performance, a fact many overlook. Regular cleaning and calibration are often more impactful than equipment upgrades.
Why Do Some Barista Gadgets Fail to Deliver Consistent Results?
The secret lies in understanding the “hidden” details—such as ensuring your grinder’s burrs are sharp and correctly aligned or verifying that your espresso machine’s pressure and temperature are stable. Experts like James Hoffmann emphasize that consistent shots depend on precise control over variables, which many beginners underestimate. For instance, a common mistake is assuming that a high-quality grinder automatically produces perfect grounds; in fact, dialing in your grinder to the specific beans and ambient conditions is vital. Additionally, many home baristas fail to recognize the impact of water quality on equipment longevity and shot flavor. Using water with high mineral content can cause scale buildup, reducing machine efficiency and consistency, a issue documented in studies on water quality’s effect on espresso extraction.
In particular, novices often overlook the significance of appropriate portafilter preparation and tamping pressure, believing that the machine will do the work. But uneven tamping or inconsistent dosing can cause channeling, leading to weak or bitter shots. The best approach is to focus on the details—regularly cleaning your group head, checking gasket seals, and calibrating grind size. To elevate your setup, consider exploring guides like this resource.
For advanced enthusiasts wanting to refine their technique further, understanding the role of pre-infusion and flow profiling can be transformative. These advanced features are often misunderstood or misused. A simple mistake like over-pressurizing the portafilter can mask channeling but won’t improve shot quality. Instead, focus on learning how to optimize pressure and temperature stability, as outlined in expert analyses.
Have you ever fallen into this trap? Let me know in the comments. Properly appreciating these subtle factors can significantly enhance your home espresso experience, turning good shots into exceptional ones.Keeping your espresso setup in top shape is essential for consistent quality and longevity. Regular maintenance routines should be part of your coffee ritual, starting with descaling your machine every three to six months, depending on water hardness. Use a descaling solution recommended by your manufacturer or a natural alternative like vinegar, but always rinse thoroughly afterward to prevent flavor transfer. Clean the shower screen and group head weekly with a soft brush, utilizing specific cleaning tools such as the Espresso Parts group head brush, which reaches tight spots and removes stubborn coffee oils. This prevents clogs and channeling, which can compromise extraction quality.
How do I maintain my grinder to keep grounds consistent over time?
A burr grinder requires periodic calibration and cleaning. I personally check burr sharpness monthly using the simple paper towel test, then adjust grind size accordingly. Dismantle the upper burr and clean the chute with a dry brush to remove coffee dust and oils that cause static and clogs. For stubborn buildup, a mixture of rice and water can be tumbled through to absorb residual oils, as recommended in industry guides. Investing in a good grinder maintenance kit ensures you replace worn parts proactively, avoiding inconsistent shots and uneven grind distribution, which often occurs with dull burrs, as emphasized by John Gordon in his espresso equipment reviews. Consistent cleaning and calibration extend the life of your gear and improve shot quality, making it a worthwhile habit.
Prediction: The Trend Toward Smarter, Self-Maintaining Machines
As technology advances, manufacturers are increasingly integrating sensors and AI to alert users when maintenance is due or parts need replacing. Future espresso machines might automatically calibrate grinder settings and descale themselves, reducing manual upkeep. Pour-over coffee enthusiasts are also adopting smart scales with app integration, allowing for precise measurements and timing. Staying current with these innovations can give you an edge—so consider exploring today’s options to future-proof your setup.
Quick Tip for Long-Term Success
Start implementing a weekly cleaning regimen; it’s the single most effective way to keep your gear performing optimally. For example, briefly running a cleaning cycle with grinder cleaning tablets or scrubbing your steam wand with a dedicated brush prevents buildup that can cause steaming issues or flavor contamination. Regular maintenance isn’t just about preventing breakdowns; it’s about ensuring every brew is as good as your first. Ready to elevate your routine? Try incorporating a monthly burr sharpness test and witness your espresso shots become more consistent. For recommended tools and detailed routines, visit this guide and stay ahead in your coffee journey.
Lessons from My Coffee Trials That Changed Everything
One of the biggest insights I’ve gained is that even minor adjustments in steaming temperature and technique can make a world of difference. I once believed that more foam meant better microfoam, but I learned that patience and control are paramount. The lightbulb moment was realizing that microfoam should be silky, not fluffy; overzealous steaming can hinder pouring finesse. Also, investing time in regular maintenance, like cleaning your grinder and descaling your machine, pays off far more than splurging on high-end gear. Lastly, embracing experimentation—trying different milk types or adjusting tamping pressure—has propelled my home espresso skills beyond expectations.
Essential Tools and Resources That Elevate Your Coffee Game
To truly master home espresso, I recommend exploring my go-to toolkit: first, a reliable thermometer helps maintain consistent milk steaming temperatures—check out this simple test for grinder tuning. A high-quality milk frother, like those reviewed here, ensures velvety microfoam every time. Additionally, investing in a good espresso scale allows precise measurement, critical for proper extraction—consider top-rated machines to streamline this process. For comprehensive guidance, I trust the detailed tutorials found in this resource, which distills complex techniques into manageable steps.
Seize the Moment and Elevate Your Barista Skills Today
Your home espresso setup holds incredible potential—by focusing on the subtleties like microfoam texture and routine maintenance, you’re already on your way to barista-level drinks. Don’t wait for perfect equipment; start experimenting, learning, and refining your technique now. Remember, every great barista was once a beginner, so embrace the journey. With patience and curiosity, you’ll soon craft coffees that not only taste exceptional but bring joyful artistry into your everyday routine. Ready to turn your home into a personal coffee haven? Dive in and make the leap today!