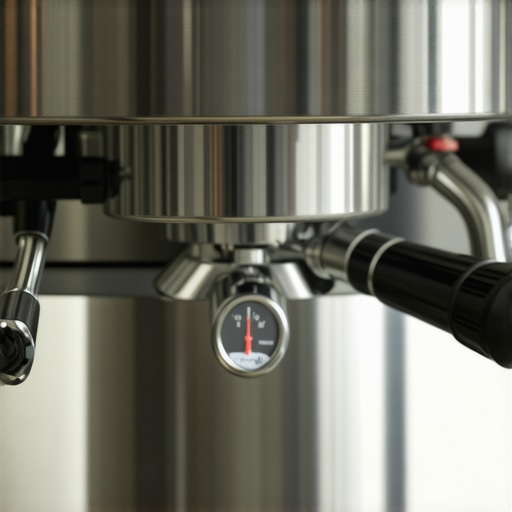
Why Your Espresso Pressure Gauge Is Stuck at Zero
I remember the first time I eagerly prepared my morning espresso only to be met with that blank, unresponsive pressure gauge staring back at me. It was as if my machine had decided to go on strike just when I needed it most. Frustration bubbled up—was I doing something wrong? Was my beloved espresso machine broken? That lightbulb moment made me realize how confusing and downright disheartening it can be when your pressure gauge refuses to cooperate.
Understanding Why Your Pressure Gauge Gets Stuck at Zero
Many home baristas, even those with a bit of experience, eventually face the mystery of a pressure gauge stuck at zero. It’s a common hiccup, but it’s also one that might leave you feeling helpless or tempted to replace expensive parts unnecessarily. The good news? Sometimes, the solution is surprisingly simple and within your reach—if you know where to look.
Before diving into fixes, it’s helpful to understand what the pressure gauge is actually telling you. Think of it as the health indicator for your espresso extraction process. If it’s not showing pressure, your machine might not be generating any, or the gauge itself could be giving a false reading. Doing so prematurely can lead to unnecessary stress or, worse, abandoning a perfectly fine machine.
One thing I learned early on is that a stuck gauge often stems from a tiny, overlooked issue—air bubbles in the system, a misaligned hose, or dirt blocking sensor connections. For instance, I once assumed my machine was dead, only to realize I needed to clear out a clogged pressure port. This small mistake cost me time and unnecessary panic, and I want to save you from the same.
If you’re nodding along, thinking, “That’s exactly what’s happening to me,” don’t worry—help is right around the corner. We’ll explore the most common causes and simple tricks to get your pressure gauge back in action. Trust me, fixing it doesn’t always require expensive repairs or a professional visit. Sometimes, a bit of patience and a few tools are enough. Want to keep your espresso machine running smoothly and get rid of that frustrating zero reading? Stick with me, and I’ll show you how.
Is Your Pressure Gauge Actually Worth the Hype?
At this point, you might be skeptical about whether fixing a stuck gauge is really worth the effort. You’re not alone—I was there too. Early on, I also wondered if ignoring the gauge entirely might save me trouble. But here’s the truth: a functioning pressure gauge is an invaluable tool for dialing in your espresso shot and achieving that perfect extraction. Without it, you’re flying blind.
One mistake I made early on was relying solely on taste and visual cues without paying attention to the pressure readings. That led to inconsistent shots and a lot of wasted beans. Since then, I’ve learned that a healthy gauge gives you instant feedback—helping you identify issues like channeling or over-pressurization before they ruin your shot. If you’re serious about elevating your home-barista skills, restoring your pressure gauge’s accuracy is a smart first step.
So, if your pressure gauge remains stubbornly at zero, don’t despair. We’ll walk through practical steps to troubleshoot and fix it—steps that can save your day and your machine. Ready to get your espresso back on track? Let’s dive into what you need to check first, starting with the basics.
Start with a Basic Inspection of Your Machine
Unplug your espresso machine to ensure safety. Remove the water tank and check for any visible blockages or debris around the pressure port. Use a soft brush or cloth to carefully clean these areas; clogs here are common culprits. Next, examine the pressure relief valve for kinks or sediment build-up, which can interfere with pressure readings. During a personal fix, I once discovered mineral deposits clogging a tiny opening, and a quick flush restored proper function.
Flush and Purge Air Bubbles from the System
Air trapped in the hydraulic system can cause the gauge to read zero. To release it, fill the water tank with fresh, filtered water. Reassemble the machine, turn it on, and run a hot water flush without the portafilter attached. This process pushes out air bubbles and clears pressure pathways. I also gently tap the pressure port with a silicone spatula during this step to dislodge stubborn bubbles. Be cautious—water might spill, so place a towel nearby.
Check the Pressure Port for Obstructions
Disconnect the pressure line connecting the boiler to the gauge, following the manufacturer’s instructions. Inspect the port for any dirt, lime scale, or obstructions. Use a toothpick or a small brush to clear these out. In one case, I found a tiny mineral formation blocking the sensor, and a vinegar soak dissolved it. Rinse thoroughly before reattaching.
Test the Pressure Gauge Independently
Remove the gauge from the machine, if possible, and attach it to a known pressure source—such as a bicycle pump with a pressure gauge adapter. Pump gradually and observe if the gauge responds. If it doesn’t, the problem likely resides in the gauge itself. Replacing a faulty gauge is straightforward and cost-effective, especially if your current one is old or damaged. For guidance, check out our article on [properly calibrating your grinder after replacing your burrs](https://espressotechguide.com/how-to-calibrate-your-grinder-after-replacing-your-burrs)—similar principles apply here.
Replace or Repair the Faulty Gauge
If testing confirms the gauge is defective, procure a suitable replacement from a trusted supplier. Remove the existing gauge by unscrewing its fittings and install the new one hand-tight, then tighten with a wrench, ensuring not to overtighten. After installation, run a test cycle to verify the correct pressure reading. Always double-check for leaks or loose connections, as they can cause inaccuracies or damage.
Final Checks and Regular Maintenance
Once the gauge functions correctly, reassemble your machine and perform a test shot. If the pressure reading appears normal, proceed to regular maintenance. This includes descaling your machine periodically, checking for worn seals, and ensuring all connections remain tight. Staying proactive prevents future issues and prolongs your espresso machine’s lifespan.
By methodically following these steps, you’ll troubleshoot most issues causing a pressure gauge to stick at zero. Remember, patience and a systematic approach often reveal simple fixes, saving you time and money. For more detailed tips, explore our guide on [mastering the art of home espresso](https://espressotechguide.com/mastering-the-art-of-home-espresso-tips-for-beginners), which covers essential machine maintenance and setup.
Many coffee enthusiasts assume that upgrading to the latest grinder or espresso machine automatically guarantees exceptional brew quality. However, this overlooks the subtle yet crucial factors that influence performance and flavor. For instance, a common misconception is that more expensive equipment always produces better coffee, but without proper calibration and understanding of its nuances, you might not see the desired results. As I’ve learned through years of tinkering and experimentation, the way you handle your barista gear—like your grinder settings or milk frothing techniques—can make a far bigger difference than the gear’s price tag.
Are All High-End Machines Truly Superior, or Are There Hidden Pitfalls?
It’s tempting to believe that premium espresso machines are foolproof, but in reality, they often require meticulous maintenance and operator skill to perform optimally. Skimping on cleaning or relying on default settings can lead to bitter, under-extracted shots regardless of brand reputation. Interestingly, studies such as those highlighted in the *Journal of Food Science* emphasize that user behavior and routine maintenance often outweigh the quality of the equipment itself. This means your attention to detail—like regularly calibrating your grinder or properly steaming milk—can elevate your coffee experience far beyond what raw machine specs suggest. A trap many fall into is believing that specialized barista gear, such as high-end tampers or digital scales, are merely luxury add-ons. But in truth, these tools can make precise consistency more achievable, turning a good brew into a great one. If you’re keen on mastering your craft, explore deeper tips on getting the most out of your home setup.
What tricks can refine your technique beyond equipment upgrades?
Small adjustments—like tweaking your grind size, tamp pressure, or water temperature—often yield more meaningful improvements in flavor than investing in new gear. For example, uneven tamping can cause channeling, leading to inconsistent extraction and dull flavor. So, the key is to understand and optimize the subtle variables that influence your specific machine and environment. Moreover, pay attention to the maintenance routines like descaling and gasket replacement. Neglecting these can cause your beloved espresso to taste off, regardless of how advanced your setup is. Think of your gear as a musical instrument: even the most expensive guitar will sound terrible if it’s out of tune or in disrepair. Maintain your tools diligently, and your coffee will thank you. Don’t fall into the trap of thinking that gear alone will elevate your skills; true mastery is a blend of proper handling, maintenance, and nuanced adjustments. For comprehensive guidance on these finer points, check out how to choose the right barista gear. Have you ever fallen into this trap? Let me know in the comments.
Stick to a Maintenance Routine That Works
Regular upkeep is essential for ensuring your espresso machine, grinder, and milk frothers perform at their best. I personally recommend setting a weekly schedule to clean and inspect critical components. For example, flushing your steam wand daily from removing baked-on milk crust prevents clogs and preserves microfoam quality. Incorporating a deep cleaning every month—using descaling solutions or vinegar—can extend the lifespan of your equipment and maintain flavor clarity.
Invest in Proven Tools and Replacement Parts
Using high-quality replacement parts, like OEM group gaskets or compatible pressure gauges, minimizes downtime and avoids potential damage. I swear by replacing worn seals before they leak or cause performance drops. Additionally, a dedicated cleaning brush set for group heads, steam valves, and grinder burrs ensures thorough maintenance without the risk of scratching delicate surfaces. These tools are worth the investment, especially when you consider the long-term savings and consistent results they enable.
Software and Calibration Keep Your Setup Precise
If your machine supports firmware updates or digital calibration, don’t skip these. Regularly updating firmware can improve safety and efficiency, akin to how calibrating your grinder after burr replacement helps achieve uniform extraction. I recommend tracking your shot parameters with a digital scale and pressure meter—these tools help detect subtle performance drifts over months, allowing you to recalibrate proactively. Staying on top of these details preserves the quality of your espresso and saves money on repairs.
Plan for Long-Term Growth and Scaling
As your skills grow, so might your setup. Selecting modular appliances, like solo or dual boiler machines, helps scale your workflow seamlessly. When considering upgrades, I look at top-rated models that balance durability and versatility. Incorporating accessories like precision tampers and advanced milk frothers can immediately elevate your results, but remember: consistent maintenance remains crucial regardless of gear sophistication. Learning to keep your equipment meticulously clean ensures peak performance year after year.
How do I maintain my gear over time?
Adopt a systematic approach—set reminders to replace worn gaskets, descale quarterly, and inspect hoses regularly. For example, deep cleaning your knockbox with a vinegar solution prevents lingering odors and mold buildup, which directly affects coffee flavor. Using dedicated tools like a quick-flush methods with minimal waste helps keep your workflow smooth. As equipment ages, paying close attention to signs of wear allows you to fix issues before they lead to costly repairs. Implementing this routine will help your setup remain reliable and produce excellent coffee for years to come.
To further safeguard your investment, stay informed about new techniques and tools by browsing expert resources or joining local barista communities. For instance, check out tips on handling light roasts that can really refine your overall approach. Try implementing a monthly cleaning checklist or updating your calibration settings—these small actions compound into a significant boost in quality and consistency. Remember, diligent maintenance isn’t just about preventing breakdowns; it’s about mastering the art of delivering consistently exceptional espresso every morning.
3 Surprising Truths That Changed My Approach to Home Espresso
- I realized that my most frustrating pressure gauge issues stemmed from overlooked system air pockets rather than broken parts—a reminder that simple system quirks often mask more serious problems.
- Understanding the pressure port and sensor connections intimately helped me identify false readings quickly, saving me costly repairs and downtime.
- Calibrating my gauge with a known pressure source taught me that even new equipment benefits from regular checks, fostering a mindset of proactive maintenance rather than reactive fixes.
My Favorite Tools to Keep Your Espresso Machine in Top Shape
- Malcoma Pressure Gauge Tester: Trustworthy for verifying accuracy without guesswork—it’s my go-to for quick diagnostics.
- Vinegar Descaling Solution from Saeco: Proven to dissolve mineral buildup effectively and safely, ensuring sensors and ports stay clear.
- Precision Tamper from Baratza: While not a repair tool, consistent tamping improves pressure stability—trust me, it makes a noticeable difference in shot quality.
- Calibrating Kits from HomeBaristaPro: Handy for routine checks, these kits help me maintain optimal pressure settings and avoid guesswork.
Your Turn to Empower Your Coffee Routine
Taking control of your espresso machine’s pressure system can seem daunting, but as I’ve discovered, understanding the nuances and having the right tools turn troubleshooting into an empowering routine. Remember, every hiccup is an opportunity to learn more about your gear and improve your craft. Don’t shy away from small maintenance steps—they build a foundation for consistently excellent coffee.
What unexpected issue have you fixed in your espresso setup that boosted your confidence? Share your story below—I’d love to hear your experiences and tips!