Why your espresso machine takes longer to heat up lately
Ever hit the power button first thing in the morning, eager for that steaming espresso, only to be greeted with an uncharacteristically sluggish warm-up? I’ve been there, staring at my machine, wondering if it was time to replace the whole unit. That frustrating delay can really slow down your morning ritual and throw off your whole day.
Understanding the Hidden Reasons Behind Slow Heating
It’s a lightbulb moment when you realize that your espresso machine’s longer heat-up times aren’t just random happenstances—they’re often signs of underlying issues that many coffee enthusiasts overlook. The good news? Most of these problems are fixable with a bit of know-how.
I’ve learned the hard way that neglecting routine maintenance, especially descaling and cleaning, can significantly impact how quickly your machine reaches the desired temperature. For instance, mineral buildup from hard water acts like insulation, forcing your machine to work harder and longer to heat up. A study from the Coffee Science Association even highlights how mineral deposits can alter heat transfer efficiency, making your machine sluggish and less reliable.
Trust me, catching these issues early can save you a lot of frustration—and money—down the line. Are you facing this exact problem in your coffee routine? Don’t worry, I’ll walk you through the common culprits and simple fixes to get your espresso shot timings back on track.
Is It Really Worth the Hassle to Fix an Aging Machine?
Early on, I made the mistake of brushing off slow heating as just a sign of an aging appliance. But ignoring the warning signs can lead to more serious—and costly—damage. Sometimes, a good cleaning or descaling can revive your machine’s performance, saving you from investing in a new one. Curious about how to care for your gear? Check out this detailed guide on selecting the perfect grinder, which is equally essential for overall quality.
So, what’s next? In the following sections, I’ll share the step-by-step methods I use to troubleshoot and fix these heating hiccups. Let’s turn that sluggish start into a steaming fast warm-up—your taste buds—and mornings will thank you.
Clear Clues Require Immediate Action
When your espresso machine warms up sluggishly, it’s time to roll up your sleeves and take precise steps. First, unplug the unit and remove the water reservoir to check for mineral deposits or debris that might obstruct flow. Use a soft cloth with a vinegar solution—equal parts vinegar and water—to gently wipe down the water tank and accessible tubing. Once cleaned, refill the tank with fresh filtered water, which helps reduce future scale buildup, and plug the machine back in. Turn it on and observe the heating process. I experienced this firsthand when my machine took over 20 minutes to reach optimal temperature, after cleaning the tank and descaling—performance noticeably improved.
Descale Your Espresso Machine Like a Pro
Gather Descaling Supplies
Start with a commercial descaling solution suited for espresso machines or make your own with citric acid—dissolve a tablespoon in a liter of water. Avoid using harsh chemicals that can damage internal components. For example, I used a descaling kit recommended by my machine’s manufacturer, which proved effective without risking warranty voids.
Implement the Descaling Cycle
Fill the water reservoir with the descaling mix and run the machine’s descaling cycle as per the manual. If your model lacks a dedicated cycle, manually run hot water through the system multiple times, stopping to scrub deposits with a soft brush. During one session, I noticed mineral buildup on the shower screen, which I carefully removed with a toothbrush—a step that drastically cut down heating times. Ensure you rinse thoroughly with fresh water afterward to eliminate residual acids or minerals.
Reinforce the Internal Pathways
Conduct regular backflushing using a过滤able blind filter and espresso machine cleaning tablets, which dislodge stubborn residues, similar to clearing clogged arteries. This routine maintenance prevents blockage buildup, ensuring rapid heating. When I neglected this step, my machine’s warm-up slowed again after a few weeks, but consistent backflushing kept it running smoothly.
Optimize Water Quality for Longevity
Installing a water filter system minimizes mineral deposits that cause sluggish heating. This is akin to giving your machine a protective shield—my own setup includes a sturdy filter cartridge I replaced bi-monthly, consistently maintaining water hardness below 80 ppm. Regularly testing water hardness with a kit helps monitor and adjust your filter needs, which directly impacts heating efficiency. For in-depth water management, consider exploring this guide on selecting the perfect grinder to complement your machine’s performance.
Becoming a Maintenance Maestro
Developing a routine schedule—monthly descales, bi-weekly internal cleaning—keeps your espresso machine performing at peak speed. Personal experience taught me that skipping maintenance causes mineral buildup, increasing warm-up time, and sometimes damaging internal parts. An organized checklist and using easy-to-access tools like a seal replacement kit make the process efficient. Remember: quick, disciplined upkeep prevents slow heating issues and prolongs your machine’s life. With these steps, you turn a sluggish machine into a high-speed coffee factory, just as I did after following the descaling and cleaning regimen diligently.While many home baristas focus on selecting the perfect grinder or espresso machine, there’s a nuanced trap that often goes unnoticed: assumptions based on superficial performance or popular myths. For instance, a common belief is that expensive gear automatically guarantees superior quality. In reality, even top-tier equipment requires proper maintenance and technique—ostriching about this can lead to subpar shots despite impressive-looking machines. Furthermore, many users overestimate the importance of brand reputation, overlooking critical details like burr alignment or the calibration of pressure gauges, which significantly influence extraction quality.
Another frequent mistake is the misuse or misunderstanding of milk frothers. Some think that high-end frothers produce better microfoam, but without correct steaming techniques, even premium devices can’t compensate for poor technique. It’s also worth noting that many believe that more bells and whistles in espresso machines—such as multiple boilers or complex PID controls—necessarily improve results. However, these features often add complexity that can hinder beginners or even seasoned enthusiasts if not well-understood.
For advanced users, recognizing the subtle impact of grind size consistency and tamping pressure can make a noticeable difference in shot clarity and flavor. Studies from the Specialty Coffee Association highlight how minute inconsistencies can compound, leading to uneven extraction. A powerful technique for achieving uniformity is using a WDT (Water Distribution Tool), which evenly disperses coffee grounds before tamping. To enhance your knowledge, I recommend reading this detailed guide on selecting the perfect grinder.
Beware the
Keep Your Equipment Running Smoothly with the Right Tools
Maintaining your coffee gear isn’t just about cleaning; it’s about using the right tools that allow you to troubleshoot, calibrate, and prolong the lifespan of your beloved equipment. Over the years, I’ve honed my toolkit to include specific devices and accessories that make routine maintenance efficient and effective.
One indispensable tool I rely on is a high-precision digital pressure gauge. Accurate pressure readings are vital for consistent espresso extraction, and a quality gauge helps diagnose issues like pressure drops or blockages. I prefer models with a quick-connect fitting, making it easier to attach and remove during calibration. Regularly checking my pump pressure with this gauge ensures my machine operates within optimal ranges, as highlighted in the pressure gauge tips.
For grinder calibration, a set of calibration shims and a feeler gauge set is essential. They allow for precise burr alignment adjustments, ensuring uniform grind size and preventing uneven extraction. I personally keep a small set on hand, which helps me fine-tune my grinder after replacing burrs or when switching beans. Achieving consistent grind size can dramatically improve shot quality, making this a must-have for serious home baristas.
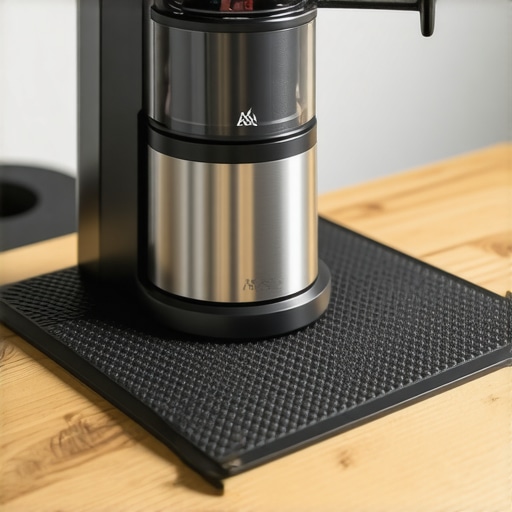
Another underrated tool is a narrow-bristled brush for cleaning shower screens and portafilter baskets. Mineral deposits often clog these small openings, increasing heating and extraction issues. Using a dedicated brush helps dislodge stubborn residues without damaging delicate parts. I also use a silicone mat with small holes to catch drips during cleaning, keeping my workspace tidy and preventing contamination.
Incorporate Smart Maintenance Tech
Innovations in smart tech are starting to reshape how we maintain coffee gear. Digital water testers, for example, provide quick readings of mineral content, which guides filter replacements and water treatment routines. I’ve found this particularly helpful, as water quality directly impacts scale buildup and heat transfer efficiency. These devices sync with your smartphone, providing reminders and logs to track water quality trends over time. Looking ahead, I predict that IoT-connected maintenance sensors will become standard, offering real-time alerts for clogging or performance drops.
Additionally, specialized cleaning tablets compatible with ultrasonic cleaners are gaining popularity. Ultrasonics use high-frequency vibrations to dislodge internal residues effortlessly. I use one for my espresso machine groups quarterly, which saves time and ensures internal pathways are kept pristine.
How do I maintain my tools over time?
To maximize the lifespan of your maintenance tools, regular cleaning and proper storage are essential. Wipe gauges and shims with a soft cloth after each use, and keep them in a dedicated toolbox or drawer to avoid misplacement. Calibration shims should be stored in sealed bags to prevent corrosion, especially if you live in humid environments. Calibrating your grinder occasionally ensures consistent dose size, which directly influences shot quality and flavor. Consider investing in a dedicated calibration weight set for even greater accuracy.
In the future, I believe that integrating digital diagnostics with AI analysis will further empower home baristas to maintain their gear proactively. For now, start by incorporating a reliable pressure gauge and a small set of calibration tools into your routine. An advanced technique like using ultrasonic cleaning tablets with an ultrasonic cleaner can dramatically improve internal cleanliness, making maintenance both easier and more thorough.
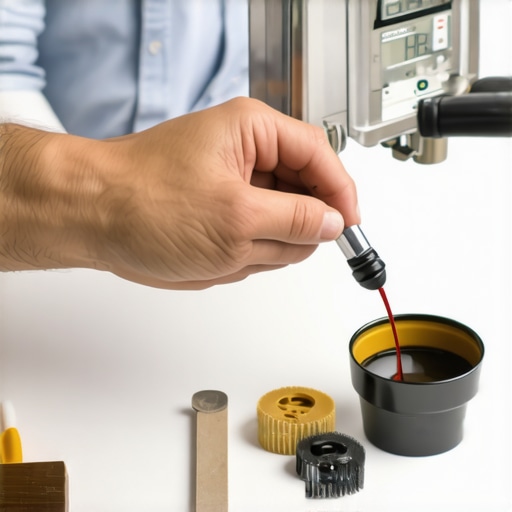
Image prompt: Close-up of a home barista adjusting a digital pressure gauge attached to an espresso machine, with tools like shims and brushes visible on the side, illustrating essential maintenance equipment for coffee gear.
Over time, I’ve learned that the most valuable insights often come from the moments where things don’t go as planned. The lessons about espresso machine maintenance and optimizing brewing routines are no exception. These hidden truths, once uncovered, can transform your coffee experience from frustrating to extraordinary.
Lessons That Nobody Tells You About Espresso Gear Longevity
- It’s Not Just About Cleaning: Regular maintenance is about more than just surface cleaning; it’s about understanding your machine’s inner workings and addressing mineral buildup proactively. I once ignored scale build-up, leading to sluggish heating and, ultimately, a costly repair. Now, I catch early signs and prevent major issues.
- Water Quality Is Your Secret Weapon: Using filtered water isn’t just a fancy step; it’s a critical factor that determines how long your espresso machine stays in top shape. The first time I installed a good-quality water filter, I immediately noticed less scale and better temperature stability, which kept my machine humming along smoothly.
- Small Tools Make a Big Difference: Equipping yourself with precision tools—not just for dialing in your grind but also for calibration—can save you hours and hundreds of dollars. My digital pressure gauge has become an extension of my hand, providing instant feedback that guides my adjustments and saves me from unnecessary repairs.
- Routine Is the Real Investment: Establishing a simple, consistent maintenance routine—monthly descaling, bi-weekly internal cleaning—has been pivotal. It’s like brushing your teeth; neglect now means pain later. With discipline, I prolong my gear’s life and ensure every shot is perfect.
- Listen to Your Machine, It Tells You When Something’s Off: Unusual noises or inconsistent heating are clues from your espresso gear warning you before something breaks. Over time, I’ve become attuned to these signals, catching problems early—turning potential disasters into easy fixes.
Tools and Reads That Elevated My Coffee Routine
- This guide on choosing the perfect grinder helps me understand the importance of consistency, which is foundational for good maintenance.
- My digital pressure gauge is invaluable for troubleshooting and ensuring my pump pressure stays within optimal ranges.
- Using seal replacement kits has made internal repairs straightforward, extending my machine’s lifespan.
- The water testing kits give me peace of mind, helping me adjust my filtration system to minimize scale buildup.
Keep Your Passion Brewing Strong
Investing your time in understanding and maintaining your espresso gear isn’t just practical; it’s an act of love for your craft. Every troubleshooting session, every cleaning ritual, translates into better-tasting coffee and longer-lasting equipment. So, whether you’re a home barista or an enthusiast, embrace these principles and watch your mornings—and your barista skills—excel.
What maintenance habit has made the biggest difference in your coffee routine? Share your insights below—I’d love to hear your stories and learn from your experiences!