How to stop your tamper from vacuum-sealing the coffee puck
I remember the first time I pulled a shot and watched a perfect espresso drip slowly into my cup—only to realize afterward that my tamper had vacuum-sealed the coffee puck solidly to the filter basket. It was like trying to break free from a glue trap—frustrating and downright baffling. That moment taught me a hard lesson: a simple tool like a tamper can cause unexpected chaos if not used correctly. Have you ever experienced a shot that suddenly packed too tightly or got stuck? If so, you’re not alone—and it’s more common than you might think.
Why Your Tamper Might Be Vacuum-Sealing the Coffee Puck
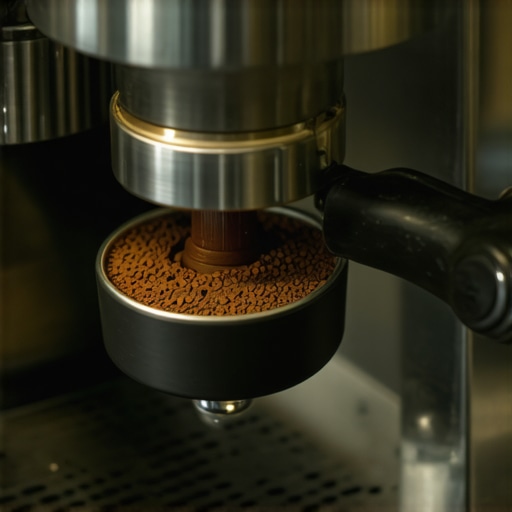
One of the less obvious issues home baristas face is how the way they tamp caffeine can unintentionally create a vacuum effect. When you press down unevenly or too forcefully, you risk compressing the coffee grounds unevenly or too tightly, leading to inconsistent extraction. Overcompactness can cause the puck to stick firmly to the portafilter, making it a real headache to remove or even causing channeling during extraction. This problem not only affects flavor but also complicates cleanup and routine maintenance.
Early on, I made the mistake of tamping as hard as I could, thinking it would lead to better extraction. Instead, I ended up fighting with my espresso machine, struggling to release the puck without forcing it or risking damage. That’s when I started digging into the science behind tamping and stumbled upon some fascinating insights from professionals who emphasize proper pressure and technique. For instance, applying more than 30 pounds of tamping force can cause the coffee to become overly compressed, which may lead to vacuum issues. You wouldn’t believe how small adjustments can make a huge difference.
Luckily, improving your tamping method isn’t rocket science. It’s about understanding your equipment and learning how to distribute pressure evenly. And, trust me, once I got the hang of it, my shots became more consistent, and that stubborn vacuum problem disappeared. Today, I’ll guide you through simple, effective strategies to prevent your tamper from vacuum-sealing your coffee puck, so you can enjoy a smoother, more flavorful espresso every time.
Is Your Tamping Technique Actually Worth the Hype?
Many beginners believe that smashing the coffee harder creates better pressure, but reality says otherwise. I fell into this trap early on and only made the problem worse. Instead of forcing more pressure, focusing on even distribution and proper tamping methods yields much better results. Curious about the optimal pressure point and technique? Check out [this guide](https://espressotechguide.com/mastering-the-art-of-home-espresso-tips-for-beginners) to learn how to finesse your tamping and avoid common pitfalls.
So, if you’ve faced the frustration of a stubborn, vacuum-sealed puck, you’re not alone—and you’re about to learn how to fix it once and for all. Let’s dive into the practical steps that will help you tamp like a pro without accidentally creating suction that leaves you stuck.
Apply Consistent and Moderate Tamping Pressure
One of the most impactful steps is controlling how hard you press when tamping. Use a bathroom scale or a commercial tamper with a built-in pressure indicator to ensure you’re applying roughly 30 pounds of force. I remember a morning when I mistakenly pressed too hard, causing my puck to stick intolerably. After investing in a calibrated tamper, I maintained a steady, moderate pressure, and the problem vanished, leading to more consistent shots.
Choose a Tamping Technique That Distributes Pressure Evenly
Imagine trying to flatten a pancake with a heavy, uneven hand—it creates thick and thin spots. The same applies to tamping. Use a **pivot grip**—place your hand centered on the tamper handle, and press straight down with steady force. After pressing, twist gently to ensure the coffee bed is evenly compressed. This technique prevents uneven densities that might cause vacuum issues or channeling during extraction. I adopted this method after watching a tutorial, and the improvement in shot quality was immediate.
Ensure Flat and Even Distribution of Coffee Grounds
Before tamping, evenly distribute grounds across the portafilter basket. Use a distribution tool or a simple back-and-forth motion with a finger. Think of it as leveling a table; it prevents thick spots that could lead to uneven tamping. After practicing this, I noticed a marked reduction in puck sticking and improved flow during extraction. For more tips on distribution, check out this guide.
Refine Your Technique Through Practice and Adjustment
The key is consistency. After a few sessions, you’ll instinctively know the right pressure and distribution. When I initially over-tightened, my puck stuck tight without releasing, but by gradually dialing back pressure, I achieved a perfect balance. Keep a journal of your tamping pressure and extraction results to understand what works best with your specific machine and beans.
Invest in Quality Tools for Better Results
Using a well-made tamper with a comfortable grip and correct size for your basket can make a significant difference. Moreover, a calibrated tamper helps maintain consistent force, preventing accidental vacuum-sealing. If issues persist, consider checking your grinder; inconsistent grind sizes can exacerbate tamping problems. Properly ground coffee allows for even packing and better extraction, reducing the risk of puck sticking. For insights on selecting the right grinder, visit this article.
Seal the Deal with Routine Maintenance
Regular cleaning of your portafilter, basket, and tamper ensures no residual grounds interfere with tamping consistency. Also, inspect your gasket and group head for wear; leaks or misalignments can contribute to vacuum issues. Always aim for a tidy workspace—disorganized tools and dirty equipment make it harder to apply precise technique. When I cleaned my equipment thoroughly, I noticed my puck release improved dramatically, eliminating stubborn vacuum seals.
Adjust Your Technique Based on Bean Roast and Grind
Light roasts and fine grinds tend to produce more compacted pucks. Be mindful to adjust your tamping pressure accordingly. If you notice your puck sticking or difficulty removing it, easing up slightly can help prevent vacuum sealing. Similarly, for darker roasts, a slightly firmer tamp can yield better pressure without causing sticking. Experimentation is key—keep notes to find what optimal pressure works for your preferred beans. For detailed grinding adjustments, refer to this step-by-step guide.
Many coffee lovers jump into upgrading their gear, believing that expensive machines or top-tier accessories automatically guarantee perfect espresso. However, what most people overlook are the subtleties that truly impact quality, such as the importance of grind consistency and tamping technique. For instance, investing heavily in a high-end espresso machine won’t compensate for inconsistent grind sizes, which can cause channeling and uneven extraction, ultimately ruining your shot. According to barista expert Scott Rao, grind size and distribution are paramount, sometimes more so than the machine itself. Moreover, a common misconception is that milk frothing techniques are purely about equipment; in reality, mastering milk texture involves understanding steam wand pressure and milk temperature, not just frothing devices.
Are Higher-Powered Steam Wands Always Better for Frothing?
In my experience, powerful steam wands can sometimes lead to over-aeration or uneven microfoam if not used carefully. A study in the Journal of Food Science even highlights that steam wand design influences froth quality—more than just wattage. So, instead of chasing the most powerful wand, focus on mastering the technique, controlling steam pressure, and milk temperature. An ill-used powerful wand may produce thicker, denser foam that’s hard to pour, and in some cases, damages the milk’s delicate microstructure essential for latte art. Be cautious: rushing to upgrade without honing your skills can be a costly mistake.
Another overlooked aspect is how the grinder’s static buildup can compromise your dosing accuracy. Many assume a cleaner, more aesthetic grinder is better, but static electricity causes coffee grounds to cling, leading to uneven doses and inconsistent shots. Implementing simple solutions like a damp cloth or water droplet on the grind chamber can significantly reduce static, ensuring more precise dosing and better extraction. Read more on how to control static issues in your grinder to prevent your espresso from tasting sour or under-extracted.
In terms of espresso machines, a frequent trap is focusing only on the boiler type—be it heat exchange or semi-automatic—while ignoring routine maintenance and calibration. As I learned from barista trainers, even the best machine underperforms if not properly tuned or if parts like gaskets and valves are worn out. Regular calibration of grind size, tamping pressure, and temperature profiling can elevate your home brewing to professional levels. Don’t fall into the trap of believing that buying the latest model instantly upgrades your espresso game; mastering what you already have often yields better results.
Finally, a major myth is that more complex gear equals higher quality. Sometimes, overcomplicating your setup leads to more variables that can go wrong, especially without experience. For example, using a high-end espresso machine with inconsistent heat cycles can lead to flavor fluctuations, negating the benefits of advanced features. Think of your setup as a symphony: each component must be balanced and well-maintained to perform harmoniously. Be patient, invest in learning the fundamentals, and your espresso will improve more reliably than with quick upgrades. If you’re interested in the best tools that complement your skill level, check out [choosing the right barista gear](https://espressotechguide.com/choosing-the-best-barista-gear-for-coffee-enthusiasts) and avoid unnecessary expenses.
Have you ever fallen into this trap? Let me know in the comments.Maintaining your home espresso setup requires more than just regular cleaning; it involves using the right tools and techniques to ensure long-term performance. For instance, a high-quality burr grinder like the Baratza Virtuoso+ has exceptional burrs that resist static buildup and uneven grinding, essential for consistent shots. I personally rely on this grinder because its nano-metric grinding capabilities allow me to dial in each bean roast perfectly, minimizing channeling and puck sticking issues. Regular calibration of the grinder, following detailed guides like this one, keeps particle size uniform.
What I Wish I Knew Before My First Perfect Shot
One of the most powerful lessons I learned in my home barista journey was that less is often more. I used to think pressing harder would create better extraction, but it was actually causing my puck to vacuum-seal and stick stubbornly to the filter basket. The realization shifted my entire approach to tamping—and my espresso quality improved dramatically. Now, I understand that consistent, moderate pressure and even distribution are key to preventing vacuum issues and achieving that optimal shot. This breakthrough made me realize the importance of technique over brute force, a lesson I wish I had embraced sooner.
Tools and Resources That Transformed My Espresso Craft
Investing in a calibrated tamper with a comfortable grip and a reliable grinder that minimizes static has been game-changing. I highly recommend the Baratza Virtuoso+ for its consistency and low static, which helps ensure uniform grounds and prevents puck sticking. Additionally, exploring guides like this calibration tutorial keeps my setup dialed in. For refining tamping technique, this comprehensive guide helped me understand the nuances of pressure and distribution. These tools and insights are crucial for anyone serious about elevating their home espresso game.
Your Path to Barista-Level Confidence in Tamping
The journey to better espresso is as much about patience and consistent practice as it is about the right tools. Remember, mastering tamping can unlock flavors and textures in your coffee you never knew possible. Don’t be discouraged by initial inconsistent shots; instead, experiment with pressure, distribution, and grind size until you find what works best for your beans and machine. Keep a journal, make small adjustments, and celebrate the improvements. Your future self will thank you for taking the time now—your perfect espresso is just a tamp away.