Why Your Puck Is Stuck to the Group Head and the Simple Flush That Fixes It
Have you ever pulled your espresso shot, only to find the puck glued firmly to the group head, refusing to drop into the Knock Box? That frustrating moment where your carefully tamped coffee seems welded in place, making you question whether your machine is malfunctioning or your skills are falling apart. I remember countless mornings where I started brewing, only to be greeted by that stubborn, unbudging puck—the kind that leaves my espresso basket messy and my patience thin.
One lightbulb moment for me came after a bit of trial and error, and surprisingly, a simple step I overlooked kept causing this issue repeatedly. Today, I want to share that revelation, so you don’t have to wrestle with your machine every time. We’ll tackle why this problem happens and, more importantly, the easy fix that can save you time and frustration.
What Makes Your Coffee Puck Stick to the Group Head?
The common culprit is moisture left behind after brewing, which leads to buildup and creates a kind of glue that bonds the puck into the basket. When you don’t clear your portafilter properly or neglect a quick flush beforehand, residual water mixes with coffee grounds, turning your freshly tamped coffee into a stubborn mass. Over time, this can cause the puck to adhere strongly, making it feel like it’s fused into the portafilter.
Early on, I made the mistake of skipping a simple step—an extra quick flush—believing my machine was underperforming. That misconception cost me time and extra scrubbing. It wasn’t until I read about the importance of cleaning and flushing that I realized it wasn’t my machine at all but my approach.
By just running water through the group head for a few seconds before pulling a shot, you significantly reduce residual moisture, preventing that adhesive effect. It’s a tiny habit, but one that can drastically improve your puck removal process and keep your machine running smoothly. And for more on how to keep your equipment in top shape, I recommend checking out how to stop your espresso machine from leaking, which ties into overall maintenance practices.
Having faced this issue myself, I know how vexing it can be. But a quick, simple flush can be your best friend here. Next, let’s look at the biggest doubts I hear about this fix and whether it’s worth trying—spoiler: it totally is.
Start with a Fast Pre-Run Flush
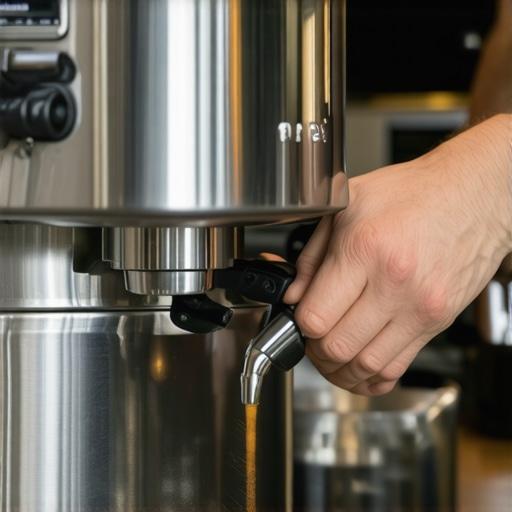
Before each shot, run hot water through the group head for about 2 seconds to clear residual moisture. This simple step drastically reduces the chances of your puck sticking. I recall one morning when I skipped this, resulting in a stubborn, wet puck that refused to drop. After adding a quick flush, the next shot was smooth, and the puck released effortlessly, saving me time and cleanup.
Clear Residual Coffee Grounds Regularly
To prevent buildup that glues the puck in place, clean your basket and shower screen daily. Use a soft brush or the paper clip trick to dislodge stubborn grounds, especially around the holes. A clean environment ensures water drains evenly and doesn’t cause moisture pooling that leads to sticking.
Adjust Tamp Pressure to Avoid Over-Compaction
Apply consistent, moderate tamping pressure—around 30 pounds. Over-tamping compresses coffee too tightly, trapping water and creating a seal that bonds the puck to the basket. I once nearly broke my tamper trying for maximum compression, causing uneven extraction and sticking issues. Aim for uniform tamping, and if you suspect inconsistencies, consider a scrubbing technique to level out the coffee bed.
Ensure Proper Temperature and Pressure Settings
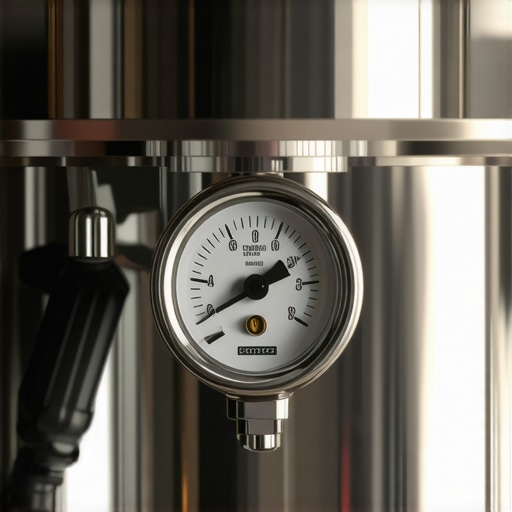
Maintain your machine at optimal temperature and pressure—generally around 200°F and 9 bars. Fluctuations can cause uneven extraction, increasing moisture retention that glues the puck. Regular calibration checks help keep your machine performing consistently, preventing moisture-related sticking. For issues related to thermal stability, see thermal recovery tips.
Take Advantage of the Paper Clip Trick for Deep Cleaning
Use a paper clip or a small brush to clear the shower screen holes weekly. Blockages restrict water flow, causing uneven saturation and moisture buildup, which leads to stubborn pucks. I started doing this after I noticed some grounds clogging the holes, and subsequent cleans kept my pucks clean and easy to eject. Check out the full guide for detailed steps.
Monitor Grind Size and Dose
An overly fine grind or excessive dose increases resistance, trapping water and causing the puck to glue. Dialing in your grinder to match your beans is crucial. Light roasts, for example, may require a slightly coarser grind; see light-roast dialing tips for guidance. Consistent dosing also helps maintain even water flow, minimizing sticking issues.
Experiment and Fine-Tune Your Routine
Try these steps one at a time, monitoring their effect. Remember, a messy puck can often be traced back to moisture issues—so consistent cleaning, regular flushing, and proper tamping are your best defenses. After implementing these, I found my puck release improved remarkably, and cleanup became quicker. Adjusting your routine is key to smooth extractions and easy puck removal.
Many home baristas operate under misconceptions that hinder their progress, often thinking that simply following basic steps guarantees perfect espresso. However, to truly refine your craft, understanding the subtle nuances and avoiding common pitfalls is crucial. For example, a prevalent myth is that high-pressure extraction alone determines shot quality. In reality, pressure profiling and shot timing play significant roles—something that expert baristas meticulously control to enhance flavor nuances, as highlighted in recent studies on pressure dynamics.
One trap I see many fall into is blindly trusting automatic grind settings. While convenient, they often overlook that grind size needs to be adjusted for different beans and roasting levels. Light roasts, in particular, may require a finer grind than standard presets suggest, and neglecting this can lead to under-extraction or sour shots, despite the machine operating within ‘ideal’ specs. For more on optimizing grind size, check out how light roasts respond differently to grinders, which can dramatically improve shot clarity.
Another sneaky mistake is neglecting machine recovery times, especially when switching between different brewing temperatures or shot profiles. Many overlook that a boiler or group head needs a brief warm-up period—usually around 10 minutes—to stabilize temperature fluctuations that cause inconsistent extraction. Experts emphasize this period to prevent ‘thermal lag,’ which negatively impacts flavor balance. For advanced enthusiasts, understanding how to manage thermal stability can be the difference between an ordinary shot and a Barista-level espresso.
Why does a slight change in grind lead to big flavor shifts, and how can I predict that?
This is a common question among serious home brewers. The answer lies in the delicate balance of resistance and extraction time. Slightly finer grinds increase resistance, leading to longer extraction and often a bitter profile if overdone, whereas coarser grinds can cause weak, under-extracted shots. A practical way to predict the impact is by experimenting with grind size in small increments and observing flow rate changes, as detailed in expert calibration guides. Additionally, investing in a high-quality scale can help monitor shot consistency—something that many overlook but is vital for fine-tuning your routine.
Understanding these nuances shouldn’t intimidate you; instead, it empowers you to troubleshoot and perfect your setup with confidence. For instance, if you’re experiencing channeling or uneven extraction, proper tamping pressure combined with a consistent dose can improve results. Remember, even experienced baristas use detailed calibration techniques, like the paper clip trick or pressure profiling adjustments, to hone their craft—so you’re in good company when you explore these depth nuances. If you want to avoid common mistakes and elevate your home espresso game, start by questioning assumptions and practicing precision.
Have you ever fallen into this trap? Let me know in the comments!
Investing in the Right Tools for Long-Term Coffee Excellence
Maintaining your espresso equipment is akin to tending a garden; with the right tools and regular care, your setup can produce consistently exceptional shots. One of my go-to investments is a high-quality digital smart scale. This isn’t just about measuring grams; it’s about fine-tuning extraction times and ensuring consistency across all your brews. I personally use the 2026 smart scale model because it offers precise feedback even at the micro-second level, which is crucial when dialing in light roasts or experimenting with pressure profiling.
Another essential is a precision grinder with RDT capabilities. Static buildup can cause uneven grounds, leading to channeling or inconsistent extraction. I recommend the latest RDT hack to significantly reduce static issues—making cleanup smoother and shots more reliable. Regularly replacing burrs with DLC-coated burrs ensures your grind remains uniform, especially critical when working with delicate beans or experimenting with finer settings.
Routine Maintenance Matters More Than You Think
Developing a maintenance routine is vital. I schedule a deep clean of the shower screen and group head weekly, using the paper clip trick to clear blockages. This small action prevents water flow issues and keeps your machine performing optimally. Additionally, I recommend a monthly boiler flush—following advice in this guide—to remove mineral buildup that can cause temperature fluctuations and scaling problems, which directly impact shot quality.
How do I maintain my espresso gear over time?
The key is consistency. Set reminders for descaling, cleaning, and calibrating components like pressure gauges and flow meters. For example, slight deviations in your machine’s thermal stability can lead to inconsistent pours. Regular calibration sessions, guided by tools like the thermal recovery technique, ensure your machine stays within optimal parameters. As technology advances, expect smarter, more integrated maintenance solutions—like IoT sensors that monitor scale buildup or component wear—making upkeep easier and more predictive.
For example, recent research suggests that updating software or firmware on your espresso machine can optimize performance and detect issues early. Staying ahead with updates, much like a mechanic tuning a high-performance car, can extend your equipment’s lifespan significantly. I encourage you to try integrating a schedule for cleaning and calibration into your routine—it’s the most effective way to keep your espresso consistently delicious.
If you’re ready to push your home setup further, start by implementing the precision calibration with your smart scale today. That small step can dramatically improve your shot clarity and flavor nuances, especially with challenging light roasts. Remember, a well-maintained machine and the right tools will make every espresso a rewarding experience rather than a frustrating chore.
The Lessons That Make Home Espresso Less Frustrating
One of the most eye-opening lessons I learned is that the tiniest habits—like a quick pre-shoot flush—can dramatically change your experience with puck removal. Realizing that residual moisture is the sneaky culprit behind stubborn pucks was a game-changer, saving me from endless scrubbing and frustration. Another insight was understanding how proper tamping pressure and regular cleaning prevent unseen buildup, making the coffee flow more consistently. Lastly, I discovered that adjusting grind size and dose isn’t just for flavor—these tweaks also influence how easily the puck releases, turning a messy mess into a smooth process. These lessons, learned through trial, error, and a few lightbulb moments, transformed my daily espresso routine into something more satisfying and less time-consuming.