Stop the Hiss: How to Fix a Leaky Vacuum Breaker Valve
Hey there, fellow espresso enthusiast! I remember the moment I first heard that annoying hissing sound coming from my espresso machine. It was late one evening, just as I was about to dial in that perfect shot. The hiss was subtle at first, almost like a tiny whisper of frustration, but soon it became a relentless leak that threatened my entire brewing session. Frustration mixed with concern—was my machine about to give out?
That little leak led me down a rabbit hole of troubleshooting, and I quickly realized I wasn’t alone. If you’ve ever faced a leaky vacuum breaker valve (VBV), you know how disruptive even a small hiss can be. It’s not just noise; it’s a sign that something’s not quite right—potentially leading to more serious issues like pressure loss or water damage. And yet, many of us ignore it, thinking it’s just part of having an espresso machine.
Today, I want to share with you a simple, reliable way to stop that persistent hiss at its source. We’ll explore how to identify if your vacuum breaker valve is leaking and walk through proven steps to fix or replace it. Trust me, once you silence that leak, your machine’s performance and longevity will thank you. Plus, you’ll save yourself from bigger headaches (and costly repairs) down the line.
Why Ignoring a Leaky Vacuum Breaker Can Cost You Big Time
A leaky vacuum breaker valve isn’t just a minor annoyance. It’s a sign your espresso setup might be compromised. The VBV plays a crucial role in maintaining proper pressure and preventing water from backflowing into the boiler or water reservoir. If it fails, you might experience inconsistent shots, pressure fluctuations, or even worse—water damage to your kitchen. Surprisingly, some home baristas overlook this tiny component, not realizing how vital it is to your machine’s health.
When I first overlooked my VBV leak, I thought a quick tightening would suffice. Turns out, over-tightening can actually cause more damage, or worse, strip threads and worsen the leak. I learned this the hard way—early mistakes I now caution others about. A better approach is understanding the signs and knowing how to address the issue properly. If you’re feeling skeptical, I get it. Who wants yet another component to replace?
Well, if you’re tired of dealing with that persistent hiss, it’s time to take action. We’ll address common causes of leaks, how to diagnose your VBV, and step-by-step fix instructions. If you’ve noticed sudden pressure drops or persistent noise, don’t ignore it. These small issues can snowball into bigger problems, potentially voiding your warranty or damaging your beloved equipment.
Let’s dive into what you need to know to make your espresso machine silent again and working at peak performance. And if you’ve ever wondered whether fixing small leaks is worth it, just remember: preventing a small problem from escalating can save you a ton of cash and frustration. Ready? Here comes the practical part to put an end to that hiss once and for all.
Detach the Water Reservoir to Access the VBV
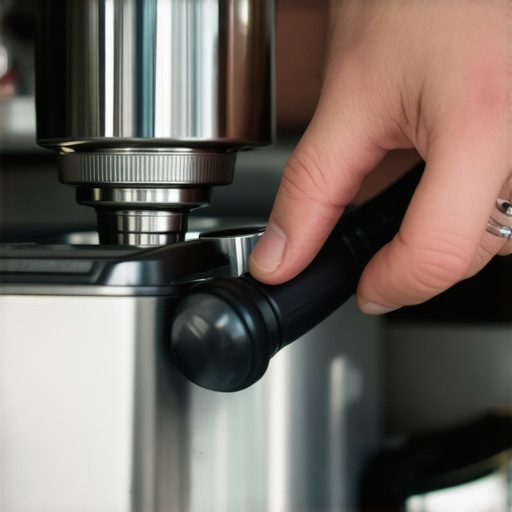
Begin by unplugging your machine and removing the water reservoir. For instance, I once spilled water on my counter when I forgot to disconnect the reservoir, so always safeguard your workspace. Carefully lift out the reservoir and place it on a towel. This step provides clear access to the vacuum breaker valve (VBV) located near the boiler connection. Cleaning your portafilter regularly helps prevent buildup that can contribute to leaks.
Identify Signs of a Leaky VBV
Look for water drips around the VBV or a hissing sound during operation. I once noticed a continuous hiss from my machine, and upon inspection, found moisture around the VBV threads. If you see corrosion or mineral deposits, these are signs that the valve’s seal is compromised. Detecting these early allows for targeted fixing before more serious damage occurs. Learn more about common leaks.
Disassemble the VBV Carefully
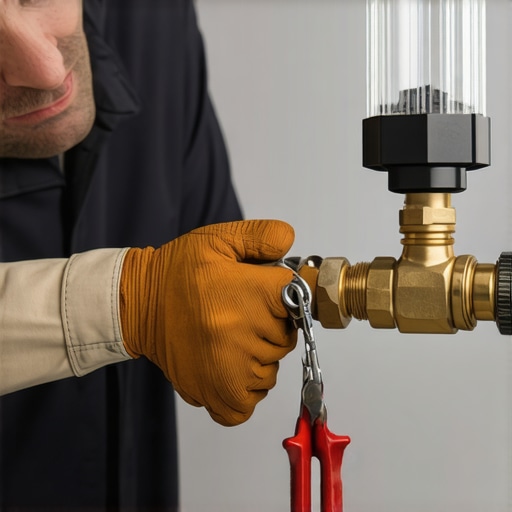
Use a wrench to gently unscrew the VBV from the boiler connection. Remember, apply steady pressure—twisting too hard may strip threads, especially if the valve is old. I once used pliers without care and ended up damaging the threads, which complicated the fix. If threads are stuck, a little penetrating oil can loosen them up. As you unscrew, inspect the valve for cracks or worn-out rubber seals. Check your grinder maintenance to keep all components in top shape.
Replace or Repair the Seal
If the rubber seal appears cracked or hardened, replacing it is the simplest fix. Purchase a compatible replacement seal or O-ring from a trusted supplier. To install, remove the old seal, clean the groove with a soft brush—this is where a small brush can be handy. Lubricate the new seal with a drop of food-safe lubricant, then press it gently into place. I once used a drop of food-grade vegetable oil, which helped it seat better without damage.
Reassemble and Test
Carefully screw the VBV back into the boiler, ensuring a snug but not overtightened fit. Refill the water reservoir and power on your machine. Listen for leaks or hissing sounds. During my first test, I noticed a slight drip that was remedied by tightening the connection a quarter turn. If the leak persists, double-check the seal placement and consider reapplying lubricant. For persistent issues, consulting a professional or considering a professional repair service may be wise.When it comes to mastering home espresso, many enthusiasts fall prey to misconceptions that can undermine their brewing success. One widespread myth is that more expensive gear always guarantees better results. While high-end equipment offers advantages, understanding the nuances—like grind consistency and water quality—is often more impactful for achieving optimal extraction. For instance, many believe that investing in the latest coffee grinder automatically elevates their shots, but without proper calibration, even premium burrs can produce inconsistent grinds. *Avoid assuming equipment alone compensates for technique.*
Is Your Espresso Kit Sabotaging Your Shots Without You Noticing?
A common trap is overlooking the importance of regular cleaning and maintenance. For example, failing to avoid oil buildup in grinders or ignoring mineral deposits in machines can cause bitter or salty flavors, regardless of the gear’s quality. Regularly cleaning your portafilter and grinder with simple tools and avoiding harsh chemicals can significantly improve taste and consistency, according to industry experts. Also, many home baristas underestimate the impact of optimizing workflow—like pre-wetting the coffee or adjusting tamping pressure—to enhance extraction. Check out our guide on proper portafilter cleaning techniques to prevent flavor defects. Another misconception involves milk frothing; some believe that high-tech frothers automatically create microfoam. However,advanced milk frothers often fail on soy milk if not used correctly, which is a common oversight. Simple adjustments like adjusting pitcher angle or steam wand position make a big difference—see these tips for better frothing on alternative milks. Don’t assume that equipment alone makes your coffee perfect—your technique and maintenance play equally crucial roles. Overlooking these details is where many home brewers stumble, leading to frustrating results. By focusing on the subtleties like grind uniformity, proper cleaning routines, and technique refinement, you become more like a pro. Remember, the devil’s in the details—mastering them distinguishes amateur attempts from true barista-quality espresso. Have you ever fallen into this trap? Let me know in the comments.
Invest in Quality Calibration Tools for Consistent Results
One of the most overlooked aspects of maintaining a reliable home espresso setup is precise calibration. I personally rely on a digital scale with flow rate measurement capabilities, such as the 2026 RDT Hack compatible scale. This tool allows me to monitor shot weight and extraction time simultaneously, ensuring each shot is perfect. Using a scale that offers real-time feedback helps catch inconsistencies early, saving time and coffee.
Consistent Grinder Maintenance for Flavor Clarity
Regularly cleaning your grinder is non-negotiable for long-term quality. I recommend the simple pipe cleaners detailed in this article to swiftly clear clogs, especially in difficult-to-reach spots. Proper maintenance prevents stale grounds from affecting flavor and keeps burrs aligned, preserving the integrity of your grind over hundreds of sessions.
Optimize Storage to Preserve Bean Freshness
Proper storage prevents oxidation and ensures freshness, which directly translates to better shots. I keep my beans in a sealed, non-porous container, like stainless steel, stored in a cool, dark place. Check out this guide for detailed storage strategies that extend bean life and improve flavor consistency.
Fine-Tune Milk Frothing with Precise Technique
Achieving silky microfoam depends heavily on technique, but using the right tools makes a difference. I personally prefer a calibrated steam wand with a high-quality milk pitcher. If you struggle with large bubbles or inconsistent foam, see these tips for troubleshooting and improving your frothing. A little practice combined with proper tools can elevate your milk texture significantly.
Future Trends: Automation and Smart Maintenance
The future of home espresso might see increased integration of smart sensors and automated calibration routines, making maintenance even easier and more precise. Devices could continuously monitor pressure, temperature, and grind consistency, alerting you when service is needed before problems develop. Staying ahead involves adopting tools that interface with these tech advancements now, like smart scales and diagnostic apps.
How can I keep my equipment working smoothly over time?
Learning routine maintenance practices, such as regular cleaning, calibration, and correct storage, will extend your gear’s lifespan and keep your espresso tasting its best. I encourage experimenting with advanced tools like flow meters and precision scales mentioned above—taking that extra step can make a noticeable difference. For example, mastering the use of proper tamping and dosing techniques can improve shot consistency and reduce wear on your machine.
Don’t forget, the key is consistent care combined with high-quality tools designed for home baristas. By investing in these essentials today, you’re setting yourself up for flawless espresso for years to come. Try integrating a flow-responsive scale into your routine this week and notice how your shots become more predictable and enjoyable.
Over time, I’ve learned that the real secret to a great espresso setup isn’t just about top-tier equipment but understanding how to troubleshoot and care for those tiny components that make all the difference. The moment I stopped ignoring those small leaks and hissings, my machine’s performance skyrocketed, delivering consistently delicious shots and extending its life beyond expectations. Remember, in home brewing, the devil truly is in the details—and honing that craft can feel incredibly rewarding.
Lessons No One Tells You About Home Espresso Maintenance
- Patience pays off: Knowing when to tighten a part versus when to replace a seal can save you time and money. I once overtightened a valve, and it turned into an even bigger issue—lesson learned the hard way.
- Small leaks can hide big problems: They often signal impending pressure drops or water damage. Addressing them early keeps your machine running smoothly.
- Proper cleaning is your best friend: Regularly cleaning your portafilter, grinder, and steam wand prevents buildup that can sabotage your shots and cause leaks. Check out this guide for effective techniques.
- Listen to your machine: Unusual sounds or hissing often indicate leaks or pressure issues. Trust those signals—your espresso machine is telling you something.
- Invest in calibration tools: Using a digital scale or flow meter enables precise shot dialing, reducing guesswork and improving consistency. The 2026 RDT Hack has been a game changer for me.
My Top Picks for Home Espresso Excellence
- Reliable cleaning tools: Pipe cleaners and soft brushes from this resource help keep all nooks and crannies spotless.
- Storage solutions: Proper bean storage in non-porous, airtight containers—see this guide—prevent oxidation and preserve freshness.
- Calibration devices: A flow-accurate scale, like the recommended model, ensures each shot hits your target profile.
- Milk frothing aids: Better foam comes with technique, but tools like high-quality pitchers and proper steaming routines help too.
Your Next Step Toward Mastery
Embarking on this journey means embracing both the science and artistry behind espresso. By paying attention to those small leaks, maintaining your gear conscientiously, and investing in the right tools, you’re setting yourself up for barista-quality results at home. Each subtle tweak and ongoing maintenance session enriches your experience and, ultimately, the flavor of every cup you brew. Remember, the future of your home espresso adventure is in your hands—take charge today.
What’s been your biggest challenge in maintaining your espresso gear? Share your story below, and let’s learn together!
}ɘ|json}]}×