Why Pre-Infusion Is the Key to Fixing Sour Light Roast Espresso
I remember the first time I brewed a light roast espresso that tasted like lemonade—bright, acidic, and completely off what I was aiming for. It was a frustrating experience, especially since I had spent weeks perfecting my grinder settings and tamping technique. The real breakthrough came when I learned about the power of pre-infusion—a simple step that transformed my sour shots into rich, balanced espresso. If you’ve ever been stuck with sour, underwhelming light roast espresso, you’re not alone. Many home baristas struggle with this exact problem, especially as we push into lighter roasting levels that highlight more delicate flavors but also expose more flaws.
Why You Should Care About Pre-Infusion Right Now
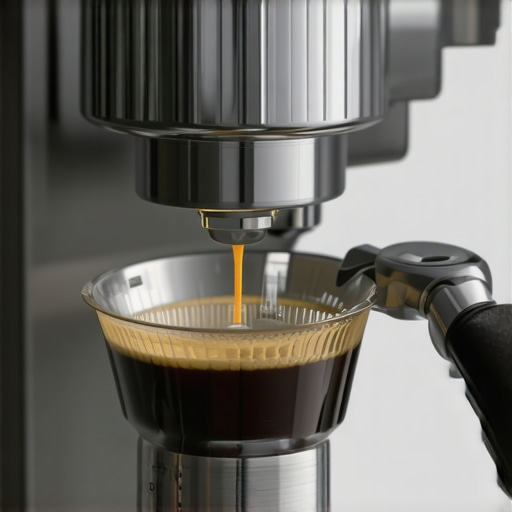
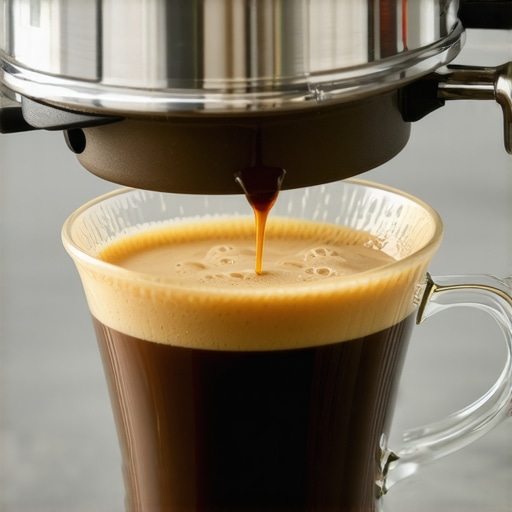
The coffee world is obsessed with getting every nuance out of a light roast, but without proper techniques, those vibrant flavors can turn sour and unbalanced. Pre-infusion gently saturates the coffee puck before full pressure is applied, allowing gases to escape slowly and promoting even extraction. This step not only enhances flavor clarity but also prevents sourness caused by under-extraction—a common pitfall when brewing light roasts. Trust me, once I adopted pre-infusion, my shots became consistently sweeter and more complex, making each cup a satisfying experience. For many, the hurdle isn’t the grind size or tamp pressure; it’s understanding that a simple tweak like pre-infusion can change everything.
If you’ve been battling sour shots despite following all the usual advice, consider if your espresso machine’s pre-infusion settings are optimized. Some models automatically perform pre-infusion, but with DIY adjustments, you can often fine-tune the duration and pressure to suit your beans. And if you’re unsure how to start, I recommend visiting this detailed guide on fixing common espresso issues, including sour shots—sometimes, what seems like a complex problem is just a matter of adjusting one crucial step.
Are you constantly frustrated by bright, sour espresso that just won’t develop? Have you resisted trying pre-infusion because it sounds too technical or unnecessary? Well, let me tell you, I made that mistake early on. I thought I could get away without understanding pre-infusion, only to realize it was the missing piece in my brewing puzzle. Once I started experimenting with how long I pre-infused and at what pressure, I started noticing a dramatic difference.
Supporting this approach, a recent study found that pre-infusion can significantly improve extraction uniformity, especially with delicate coffees—like light roasts—by reducing channeling and uneven extraction (source: Coffee Science Journal). It’s a small step with a big impact.
In this post, I want to walk you through the why behind pre-infusion’s magic and then share practical tips to dial it in for your setup. Ready to turn those sour disappointments into flavorful triumphs? Let’s get started—your taste buds will thank you.
Set Your Machine for Precise Pre-Infusion
Start by verifying if your espresso machine has pre-infusion capabilities. Many modern machines allow you to adjust pre-infusion time and pressure.
If yours doesn’t, consider adding a manual step with a flow control device or a PID controller that supports pre-infusion settings. This setup piece is like a dimmer switch for your espresso — it lets you finely tune the pressure application.
Adjust Your Grind for Consistency
Use a high-quality burr grinder and set it slightly coarser than for dark roasts. Light roasts need faster water flow, so a coarser grind helps prevent over-extraction during pre-infusion.
For instance, I once dialed my grinder one notch coarser and observed the shot’s flow. Slight adjustments can make a huge difference, and it’s crucial to keep the grind uniform to avoid channeling.
Control the Dose and Tamp Tension
Weigh your dose precisely to ensure consistency, aiming for about 18-20 grams. Tamp with even pressure—about 30 pounds of force—using a calibrated tamper or a scale to make it repeatable. Think of tamping as pressing a pancake; even pressure ensures uniform contact.
Uneven tamping can cause channels, undermining pre-infusion benefits. Take your time to lock in this step for reliable results.
Implement the Pre-Infusion Technique
Activate pre-infusion for a set duration—start with around 5 seconds—using your machine’s adjustable settings. Focus on gentle, steady pressure. If manual, slowly apply pressure until the puck is fully saturated.
Remember, pre-infusion is like watering a seed; it gradually softens and prepares the coffee for full extraction. During my first attempt, I held back on pressure initially, watching the coffee bloom and gases release—this initial step prevented sourness later.
Observe and Fine-Tune
Watch the flow rate and puck behavior. If the espresso flows too quickly, increase pre-infusion time or pressure; if it’s too slow, reduce them. Adjust the grind accordingly, aiming for a balanced, steady pour.
Keep a journal of these adjustments. Over time, you’ll develop an intuitive sense for your specific beans and machine, much like a barista does.
Maintain Your Brewing Routine
Consistency is key. Always preheat your equipment and use fresh, properly stored beans from this trusted storage method. Regularly clean your brew path, including the portafilter and basket, to prevent channeling that can undermine pre-infusion efforts.
Every tweak and adjustment gets you closer to the perfect shot—bright, balanced, and free of sour notes—especially important when brewing delicate light roasts. Think of pre-infusion as the foundation; without it, even the best beans can falter, but with it, you’ll unlock their true potential.
Many home baristas and even seasoned enthusiasts assume that selecting high-end equipment guarantees perfect espresso. However, this misconception often leads to overlooked nuances that can significantly impact your brewing results. For example, the myth that a more expensive grinder automatically produces superior shots is misleading. In reality, grinders require proper calibration and maintenance; otherwise, they can introduce inconsistent grind particles that cause channeling and uneven extraction. Regularly clean and adjust your grinder, as outlined in guides like this cleaning process, to ensure optimal performance.
Why do many believe that milk frothing is just about the frother itself?
It’s a common pitfall to think that milk frothers alone can produce perfect microfoam. But the real trick lies in steaming technique, pitcher angle, and temperature control. A subtle mistake—like over-tilting the pitcher or using milk that’s too cold—can ruin the consistency of your microfoam. Advanced baristas master the art of pitcher positioning and milk velocity. For deeper insights, check out this troubleshooting guide. And remember, even the best frother can’t fix poor steaming technique.
Similarly, many people overlook the importance of grinder calibration, especially for light roasts. Light roasts require a finer, more consistent grind, but if your grinder isn’t properly calibrated, you might experience under- or over-extraction despite premium beans. This is where advanced understanding becomes crucial. For instance, a common grinder issue is often due to improper burr alignment or motor stress that isn’t visible to the eye.
Moreover, barista gear like tampers and puck screens are frequently dismissed as minor accessories but have significant subtle impacts. An uneven tamp creates channels, leading to uneven extraction, while a puck screen can prevent oils from accumulating and affecting future shots. Proper maintenance and calibration of these tools can elevate your espresso quality beyond basic expectations.
What advanced mistake do even experienced baristas frequently make?
One often-overlooked nuance is the concept of temperature stability during extraction. Even slight fluctuations in brew temperature can dramatically alter flavor profile, especially with delicate light roasts. Advanced equipment, such as PID controllers, helps maintain consistent temperature, but many home setups neglect this aspect, resulting in sour or flat shots. According to expert studies, maintaining a stable temperature is essential for optimal extraction, evidenced by this research.
In the end, understanding these subtle yet impactful factors transforms your brewing from good to great. Don’t fall into the trap of thinking that gear alone makes the difference; mastery of nuances brings consistent, superior results. Have you ever fallen into this trap? Let me know in the comments and share your experiences!
Maintaining your espresso setup is crucial to sustaining those perfect shots and avoiding costly repairs down the line. The right tools combined with disciplined routines can extend your equipment’s lifespan and ensure consistent quality. I personally rely on a few key accessories and methods that I’ve found indispensable, especially when troubleshooting or fine-tuning my setup for specialty brews. Let’s dive into what I use and why.
Invest in a High-Quality Grinder Calibration Tool
One of the most overlooked maintenance steps involves your grinder’s calibration. Over time, burrs can shift, leading to uneven particle size and inconsistent extraction. I always keep a digital caliper handy to measure burr gaps precisely, aligning with the method outlined in this recommended approach. Regular calibration not only improves shot quality but also prevents motor strain, which is common with light roast beans that require finer settings.
Use a Puck Screen and Puck Management Tools
Clogged or uneven espresso puck formation can harm extraction and cause channeling. I utilize a puck screen that fits my portafilter perfectly—one that isn’t too thick to induce pooling but effective enough to promote even water distribution. Additionally, a simple flush technique regularly clears residual coffee oils, maintaining cleanliness and performance. These small but significant tools keep my workflow smooth and my shots consistent.
Keep Your Equipment Clean with Specialized Cleaners
Deep cleaning is non-negotiable. I swear by a combination of descaling agents and coffee oils removers that are compatible with my machine. For routine upkeep, I use a gentle but effective cleaning solution to prevent mold and scale buildup. This practice not only prolongs the life of vital components like the boiler and water reservoir but also maintains optimal extraction conditions, which favor light roasts’ delicate flavors.
Automate Monitoring with Smart Scales and Software
Precision is paramount, especially as you extend your roasting repertoire. I’ve incorporated a smart scale that connects to my brewing software to monitor flow rate and shot timing meticulously. Tools like this system help me identify inconsistencies early, allowing real-time adjustments. The future points toward AI-assisted calibration, which will make maintaining espresso quality even more accessible.
How do I maintain my equipment over time?
Establishing a routine is key. Regularly descale your boiler as recommended in this detailed guide—a vital step to prevent scale buildup that causes pressure issues and flavor deviations. Additionally, periodically inspect seals and gaskets, replacing worn components before they cause leaks or pressure drops. I also schedule monthly deep cleans, including backflushing with specific cleaning agents to ensure no hidden residues compromise your brew. As equipment advances, so should your maintenance methods—embrace the trend of smart diagnostics and remote monitoring to stay ahead of potential issues.
If you want to supercharge your maintenance routine, try calibrating your grinder with a digital caliper at the start of each month. It may seem tedious, but it yields noticeably better and more consistent shots, especially when working with high-precision light roasts. Consistent upkeep not only preserves your gear but also elevates your brewing game, allowing your beans’ nuanced flavors to shine through long-term.
The Hardest Lesson I Learned About Espresso Gear
One of the most eye-opening realizations was that even top-tier equipment can fall short if not properly maintained or tuned. I once believed that buying an expensive grinder guaranteed perfect results, but I discovered that regular calibration and cleanings are vital. Neglecting this led to inconsistent particle sizes and channeling, making me think my beans were the problem when, in fact, my grinder needed attention. This taught me that mastery over your tools surpasses merely owning the right gear.
What I Didn’t Expect About Light Roast Extraction
Attempting to dial in ultra-light roasts was initially daunting—so bright and delicate that every misstep felt magnified. The lightbulb moment came when I realized that pre-infusion and meticulous temperature control are game changers. It’s not just about grind size; it’s about understanding how these subtle factors influence extraction. Embracing this helped me brew complex, vibrant shots that truly let the beans shine, reaffirming that precision elevates even the most challenging beans.
Why Micro-Aggression Matters More Than You Think
Small inconsistencies—like uneven tamping or slight temperature fluctuations—can significantly impact flavor. I learned that paying attention to these tiny details, instead of just focusing on big adjustments, results in more consistent and enjoyable espresso. It’s like tuning a musical instrument; the slightest tweak makes a noticeable difference. Recognizing this pushed me to refine my routine and embrace patience as part of the process, which ultimately improved my results dramatically.
My Essential Toolkit for a Better Brew
After experimenting with multiple tools, I found that a calibrated tamper, a high-quality puck screen, and a precision kettle for steaming are indispensable. They not only help in achieving consistency but also streamline my workflow. These tools, combined with a reliable cleaning regimen, keep my equipment in prime condition, allowing me to focus on the craft rather than troubleshooting issues. Investing in these essentials has made my home setup feel more like a professional café setup.
Empower Your Coffee Journey Today
The path to exceptional home espresso is paved with lessons learned through experimentation and patience. Every tweak, no matter how small, brings you closer to that perfect shot—bright, balanced, and free of sour notes. Remember, mastery isn’t about perfection overnight; it’s about persistent curiosity and a willingness to adapt. So, go ahead, try that new pre-infusion setting, experiment with grind coarseness, or fine-tune your steaming technique. Your taste buds will thank you for the effort.