How to Balance Countertop Space for a Dual Boiler Setup
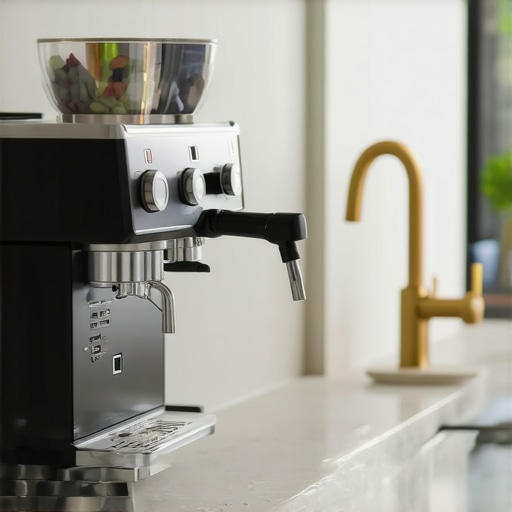
I remember the first time I set up my home espresso station. Everything looked perfect—brand-new machine, shiny grinder, and a beautiful countertop ready to host my barista dreams. But as I started making my first shots, chaos ensued. The espresso machine’s boiler and grinder seemed to fight for space, turning my once pristine countertop into a cluttered battlefield. It hit me: **how do I make this dual setup WORK without taking over every inch of my kitchen?**
The Art of Balancing Space in Your Coffee Nook
Many home baristas face this dilemma: how to organize a dual boiler espresso setup on a typically limited countertop. It’s not just about aesthetics—poor arrangement can lead to inefficiency, mess, and even equipment damage.
Imagine trying to steam milk while your grinder is in the way, or reaching for your tamper and knocking over your cup—sound familiar? If so, you’re not alone. After my early missteps, I learned that Smart space management isn’t just a luxury; it’s a necessity for consistently great coffee at home.
This post promises to guide you through practical, experience-based solutions to optimize your countertop. Without overcrowding, you can streamline your brewing routine and keep your space comfortable. If you’ve ever felt frustrated trying to fit everything in, keep reading—I’ve been there, and I’ve got your back.
Is Organizing Your Coffee Space Really That Critical?
Early on, I made the mistake of assuming that bigger equipment meant better coffee, regardless of space. That led to clutter, accidents, and wasted time searching for tools. Trust me, I’ve spilled more coffee on my backsplash than I’d like to admit. But I discovered that with a few strategic adjustments, I could make my setup both functional and tidy.
According to a recent study by the Specialty Coffee Association, efficient workspace layout can significantly improve the quality and consistency of home coffee brewing. Creating a dedicated, well-balanced station not only makes preparation smoother but also enhances your overall experience. For more tips on getting started, check out [Mastering the art of home espresso](https://espressotechguide.com/mastering-the-art-of-home-espresso-tips-for-beginners).
Are you tired of feeling overwhelmed every morning? Do your coffee tools seem to vie for space and attention? Let’s dive into some proven ways to tame the chaos and enjoy your brewing process.
Optimize Your Equipment Placement for Efficiency
Start by clearing your countertop of unnecessary clutter. Assign specific spots for your espresso machine, grinder, milk frother, and tools. Think of this like setting up a kitchen workstation—everything should have a designated place to minimize movement.
Use Vertical Space with Shelving
Install wall-mounted shelves above your setup to hold cups, accessories, and storage jars. For example, I repurposed a sturdy wooden plank to stack my coffee filters and cleaning supplies. This frees up precious counter space and keeps essentials within arm’s reach.
Implement Magnetic or Hook Storage
Attach magnets or hooks to your backsplash for tools like tampers, brushes, and cups. I used adhesive hooks to hang my milk thermometer and small utensils, reducing drawer clutter and making tools quickly accessible.
Organize Your Equipment for Quick Access
Group similar items together—keep your grinder, tamper, and scale in one zone. Use small containers or drawer dividers to categorize spare parts and cleaning supplies. When I organized my grinder accessories in a tackle box, I avoided digging through clutter, saving me seconds during busy mornings.
Stackable Storage Solutions
Use stackable containers for coffee beans, filters, and accessories. Transparent bins help you see contents instantly. For instance, I labeled my bean jars and stored them on a dedicated shelf, which prevented beans from spilling onto the counter and kept my workspace tidy.
Incorporate Compact, Multi-Functional Tools
Choose equipment that saves space—like a combined watering and cleaning brush or a foldable milk frother. I opted for a foldable knock box that tucks neatly underneath the machine when not in use, freeing up surface area.
Set Up a Dedicated Brewing Zone
Designate a specific area solely for brewing. Use a small tray or mat to catch spills, making cleanup easier. I learned that placing my portafilter and tamper on a silicone mat prevented messes and kept tools from slipping.
Use Pause Points to Keep Your Space Clean
Establish habits like wiping down after each shot or milk steam; keeping a microfiber cloth nearby. One hectic morning, I kept a small towel on my counter and wiped every spill immediately, which maintained a pristine workspace.
Leverage Smart Storage and Maintenance
Regularly review and declutter. Rotate tools you rarely use into storage boxes. Schedule weekly cleanings for grinders and machines to prevent buildup. I found that a small vacuum attachment made cleaning grinder chutes quick and effective, reducing downtime and mess.
Many home baristas believe that investing in high-end milk frothers, grinders, or espresso machines guarantees perfect coffee every time. However, even the most advanced gear can underperform if used without understanding its nuances. A common misconception is that with a premium machine, there’s no need for technique—this couldn’t be further from the truth. For instance, over-reliance on default settings without proper calibration can lead to inconsistent shots, as explained in [how to calibrate your grinder for better flavor clarity](https://espressotechguide.com/how-to-calibrate-your-grinder-for-the-perfect-coarse-setting). One critical mistake is assuming that more expensive equipment automatically produces better results; instead, proper use and maintenance are key. Another trap is neglecting routine cleaning, which can cause build-up that alters flavor and machine performance. A notable example is how mineral deposits can affect brewing temperature, as detailed in [how to tell if your brew temperature is too high](https://espressotechguide.com/how-to-tell-if-your-brew-temperature-is-too-high). For advanced enthusiasts, understanding the subtle differences in grinder burrs—ceramic versus steel—and how they influence grind consistency can elevate your brewing game. Many overlook the importance of pre-infusion or bloom stages, which enhance flavor extraction, yet these techniques are often underutilized. Moreover, choosing the right basket size for your roast level can significantly impact extraction and flavor, as discussed in [why your espresso shot’s start speed matters](https://espressotechguide.com/why-your-espresso-flow-starts-fast-then-slows-to-a-drip). Be cautious of common myths, such as believing that more coffee always equals stronger flavor; in reality, proper dose and tamping pressure are what truly matter. The risk of falling into these pitfalls can compromise your entire coffee experience. To truly master home espresso, you must go beyond gear and focus on technique, timing, and maintenance. Remember, even top-tier equipment demands knowledge and care. For an in-depth guide on optimizing your setup, check out [mastering the art of home espresso](https://espressotechguide.com/mastering-the-art-of-home-espresso-tips-for-beginners). Have you ever fallen into this trap? Let me know in the comments. Ensuring you’re aware of these nuances helps you avoid costly mistakes and brings out the best in your gear.Maintaining your home espresso setup is crucial for consistent, delicious results and prolonging the lifespan of your investment. The right tools, regular maintenance routines, and an understanding of your equipment can make all the difference. One essential tool I rely on is a precision calibration kit for my grinder, ensuring grind size remains optimal over time, which directly impacts shot extraction and flavor. Additionally, a high-quality cleaning brush set specifically designed for espresso machines helps me keep narrow spots, like shower screens and group heads, spotless, preventing buildup that can cause flavor defects. For routine descaling, I use a commercial-grade descaling solution compatible with my machine, following the manufacturer’s guidelines precisely, which you can verify with technical documentation to avoid damage (see cleaning tips here). In the future, I predict that smart maintenance tools—like IoT-connected sensors that monitor machine health—will become standard, alerting you when descaling or part replacement is needed. For now, set aside a weekly schedule to inspect and clean critical parts; for example, regularly inspecting the group gasket and considering replacement if it shows signs of hardening, as outlined in gasket maintenance tips.\n\n**How do I keep my gear functioning flawlessly over time?** Start with a dedicated cleaning schedule, using tools like a burr brush for grinders—these brushes prevent fines accumulation that can clog your grinder or cause inconsistent pours. I also recommend investing in a grinder calibration weight to ensure your burrs stay at the precise setting needed for your preferred extraction parameters. Regularly replacing seals and gaskets using OEM parts preserves the machine’s integrity and prevents leaks, which can cause expensive damage. Also, don’t overlook routine lubrication of moving parts following your machine’s manual—this reduces wear and tear. Precise calibration and timely replacement of wearable parts prevent common issues like uneven extraction or inconsistent pressure, ensuring every shot is as good as the first. For detailed maintenance procedures, check out this guide.\n\nGet comfortable performing minor maintenance yourself and you’ll save money while enjoying the art of perfect espresso. I challenge you to try calibrating your grinder with a precision weight today—it’s a game changer for consistent flavor. Remember, keeping your gear in top shape isn’t just about avoiding breakdowns; it’s about elevating your entire home barista experience.In my journey to craft perfect espresso at home, I realized that the tiniest adjustments in organizing my coffee space unlocked new levels of consistency and joy. The most valuable lesson I learned was that *space management isn’t just about saving room; it’s a strategic move that transforms your entire brewing experience.* When you start viewing your equipment as allies rather than clutter, you’ll find brewing becomes more intuitive and less stressful.
Seamlessly integrating your grinder and espresso machine requires thoughtfulness—think vertically, utilize multi-purpose tools, and designate zones for different tasks. For example, placing frequently used tools within arm’s reach and dedicating specific shelves to coffee beans and accessories prevents chaos and makes every morning smoother. Small investments like magnetic tool holders or stackable bins pay dividends in efficiency and cleanliness.
But beyond tidiness, the most substantial gain is the confidence it breeds. Knowing exactly where everything is allows you to focus on perfecting your shots, experimenting with techniques, and enjoying every sip. Your home coffee area deserves as much care as a professional barista station—after all, this is your personal space for brewing greatness.
As you optimize your setup, remember that ongoing maintenance is the key to enduring excellence. Regular cleaning, calibration, and re-evaluating your organization keep your gear performing at its best and your environment inspiring.
Let your coffee space reflect your passion and attention to detail. With a little strategic planning, you’ll turn your home into a sanctuary of espresso mastery, where every shot is a testament to your craftsmanship.
For deeper insights into perfecting your home espresso station and maintaining your gear, check out [mastering the art of home espresso](https://espressotechguide.com/mastering-the-art-of-home-espresso-tips-for-beginners). And if you’re curious about advanced equipment care, explore [gasket maintenance tips](https://espressotechguide.com/why-your-group-head-gasket-keeps-leaking) to keep your setup flawless.