How to Calibrate Your Commercial Espresso Machine’s Volumetric Buttons
Have you ever pulled a shot of espresso that tasted more like brown water than a rich, aromatic masterpiece? Or maybe you’ve noticed your milk doesn’t froth quite right, leaving your latte lacking that silky microfoam. I used to battle with inconsistent shots and uneven pours—frustrating enough to make me question whether my beloved espresso machine was malfunctioning or if I was simply doing something wrong. That was until I realized that the culprit was often something surprisingly simple: the calibration of my machine’s volumetric buttons.
Why Proper Calibration Can Transform Your Coffee Experience
When I first got my commercial espresso machine, I assumed the factory settings were basically foolproof. Turns out, they aren’t. Over time, I learned that even minor shifts in how the machine dispenses water can throw off your entire brew. Calibrating the volumetric buttons ensures that each shot is consistent, whether you’re making a single or double shot. Proper calibration doesn’t just improve flavor; it enhances efficiency and reduces waste. Did you know that incorrect button settings can lead to over-extraction, which results in bitter notes, or under-extraction, leaving sour tastes? Accurate calibration saves you from these pitfalls and elevates your barista game.
Is It Really Worth the Hassle to Calibrate?
At first, I was skeptical. I thought, how hard can it be? Just press a button and go. But I made a critical mistake early on—thinking that factory calibration was a one-size-fits-all solution. This oversight led to inconsistent shots and wasted beans. Trust me, taking the time to calibrate your volumetric buttons accurately is a game-changer. It might seem intimidating at first, but once you understand the process, you’ll wonder why you didn’t do it sooner. The effort pays off in better-tasting espresso, more efficient workflow, and fewer frustrations.
So, if you’re tired of mediocre shots and want to take control of your espresso quality, you’re in the right place. Over the next sections, I’ll guide you through the simple steps to calibrate those crucial buttons and turn your machine into the reliable, flavor-producing workhorse it was meant to be. Ready to brew like a pro? Let’s dive in!
Prepare Your Machine for Calibration
Before adjusting buttons, ensure your machine is clean and warmed up. Run a shot or two to reach typical brewing temperature, as cold machine components can skew your calibration results. Clean your group head and portafilter thoroughly to avoid residual coffee grounds affecting the flow rate. For a detailed cleaning routine, follow this cleaning guide. When you’re ready, turn off the machine and disconnect it from power to prevent accidental activation during setup.
Identify Your Current Settings and Goals
Check the factory settings of your volumetric buttons. Most commercial machines have a default volume, but over time, the water flow may fluctuate due to wear or sediment buildup. Decide on your target shot volume—usually 30ml for single shots and 60ml for doubles—and note current dispense times. Document these readings to compare after calibration. Remember, aiming for consistent shot weight is more reliable than relying solely on time.
Calibrate Step-by-Step
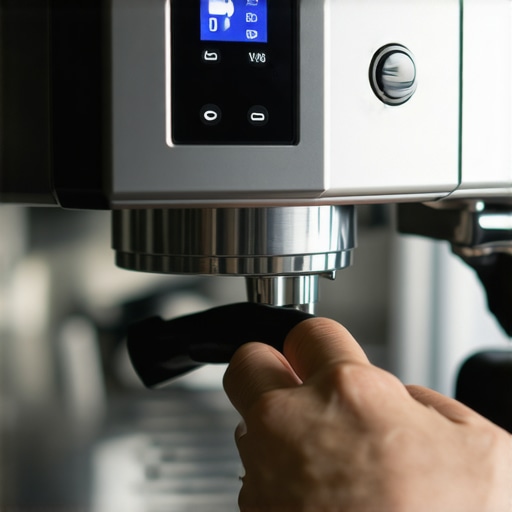
1. Press and hold the button you wish to calibrate until the machine beeps or flashes, indicating it’s in programming mode. You may need to consult your machine’s manual for specific instructions.
2. Place a graduated container or scale-equipped cup under the portafilter spout.
3. Press the button for the desired shot volume; allow water to dispense fully.
4. Stop flow once the target volume is reached.
5. The machine will typically save this new volume automatically, or you may need to manually confirm.
6. Repeat the process to fine-tune, aiming for precise and consistent dispensing.
For example, I recently calibrated my double shot button, aiming for exactly 60ml. After a couple of attempts, I adjusted the volume setting to reduce over-dispensing, which made a noticeable difference in shot consistency and flavor balance.
Refine the Calibration
If the shot volume is still off, double-check water pressure and flow rate. Higher or lower water pressure can affect measures, similar to how pump noise indicates pressure issues. Adjust your machine’s pump pressure or consult your manual for fine-tuning options. Also, consider cleaning or replacing worn-out parts like valves or seals that might introduce flow inconsistencies. Once calibrated, run multiple shots to confirm stability. Consistent shots ensure that every espresso you sip is as good as the first—no surprises in flavor or strength.
Verify and Record Your Settings
Place a scale or measuring vessel under the spout, dispense several shots, and record the volume and time. If you’re measuring weight, aim for a stable shot weight (e.g., 18-20g for single shots). Document these metrics so you can quickly compare in future sessions. Regular calibration, say monthly, helps maintain ideal performance, especially if your machine is frequently used or if you notice shot inconsistencies. If you encounter persistent problems, review related issues like bean freshness or water quality, which can subtly influence flow and taste. Proper calibration unlocks your machine’s potential, resulting in richer aroma, better crema, and balanced flavor profiles.Even experienced home baristas often fall prey to misconceptions about their equipment, especially when it comes to milk frothers, espresso machines, and grinders. One widespread myth is that higher-priced gear automatically guarantees perfect shots and silky microfoam. In my experience, this isn’t always the case. The quality of your results depends more on understanding the nuances of each component than on the price tag. For example, many folks assume that ceramic burrs are always superior to steel ones, but the choice depends on your specific coffee profile; ceramic burrs excel at flavor clarity due to their heat resistance, but can be more fragile than steel. Make sure you’re not falling for these oversimplifications—dive into the specific strengths and limitations of your equipment.
An often-overlooked trap is neglecting proper cleaning and maintenance, which can sabotage even the most advanced gear. For instance, milk frothers require regular cleaning of the steam wand and frothing attachments; otherwise, residual milk can clog the system and impair foam quality. Skipping this maintenance is a common mistake that leads to inconsistent microfoam and corrosion over time. It’s worth noting that many baristas overlook the importance of descaling their espresso machines regularly, which can cause pressure inconsistencies and flavor issues. While some believe descaling is only necessary for hard water, even soft water systems need routine cleanup to prevent biofilm buildup—see this [guide](https://espressotechguide.com/why-your-water-reservoir-is-growing-slime-and-how-to-sanitize-it-safely) for detailed steps.
For advanced enthusiasts aiming for precision, a crucial but often misunderstood aspect involves grinder adjustments. Many think that once they’ve dialed in their grind, they never need to revisit it. However, subtle changes in humidity, bean age, and wear can require recalibration. An improper grind setting not only affects extraction but can also cause channeling, leading to uneven shots. Carefully monitoring and adjusting your grind regularly can save you from bitter or sour results. For expert tips on maintaining consistent grind size, check out this article on [grinder adjustment rings](https://espressotechguide.com/why-your-grinder-adjustment-ring-is-stuck-and-how-to-free-it-safely).
What most home baristas don’t realize is the profound impact of water quality on all of this. Using unfiltered or poorly maintained water reservoirs can lead to mineral buildup, mold growth, and even equipment failure. Regularly sanitizing your water tank is simple but essential—this small step ensures your machine performs optimally and your coffee tastes fresh. Consider implementing a routine cleaning, especially if you notice a change in shot quality or if your reservoir has visible slime. More details can be found in this [water reservoir maintenance guide](https://espressotechguide.com/why-your-water-reservoir-is-growing-slime-and-how-to-sanitize-it-safely).
Finally, let’s address a myth that’s subtly dangerous: that advanced gear is only for pros. In reality, with knowledge and discipline, even home enthusiasts can master these nuances. As you explore your equipment’s capabilities, remember that understanding these hidden factors makes all the difference in achieving barista-level results. Have you ever fallen into this trap? Let me know in the comments.
Prioritize Regular Maintenance to Keep Your Coffee Equipment in Top Shape
Investing in quality coffee gear is just the start; consistent maintenance is what truly preserves performance. For instance, I swear by using a dedicated water sanitizer solution once a month to prevent biofilm buildup in the reservoir, which can subtly influence shot quality over time. Regularly cleaning components like your espresso machine’s group head, steam wand, and grinder burrs ensures longevity and optimal flavor extraction. These practices aren’t just about hygiene—they prevent costly repairs and keep your microfoam silky. In my experience, scheduling a weekly deep clean with specific tools has saved me hundreds in repairs and improved shot consistency.
What are the best tools to maintain your barista setup over time?
For thorough cleaning, I rely on a precision brush set that reaches into tight joints and crema channels, ensuring no residual oils or grounds can taint subsequent brews. A portable ultrasonic cleaner helps me remove stubborn grease from OA-rich parts like valves and seals—especially useful after descaling a leaky steam wand. When it comes to grinder maintenance, I use a specialized grinder adjustment toolkit to prevent the adjustment ring from seizing, eliminating accuracy issues. These tools collectively keep my setup operating seamlessly, which is essential as I scale my home setup into a small cafe.
Predicting the future of digital tools in coffee maintenance
Looking ahead, I predict a surge in AI-powered cleaning systems that can automatically monitor and prompt maintenance schedules based on usage data. Imagine a smart espresso machine that detects microbial buildup or burr wear through sensors and schedules cleanings proactively. This evolution will make routine upkeep less tedious and more effective, ensuring your gear consistently produces top-tier coffee without accidental neglect.
How do I keep my equipment running smoothly for years?
One crucial tip is to establish a maintenance calendar that aligns with your usage patterns. For example, I set bi-weekly reminders to replace water filters, check for mineral deposits, and calibrate grinder settings. Using high-quality descaling solutions, like citric acid-based formulas, prevents scale buildup without damaging internal components. Also, periodically inspecting seals, gaskets, and o-rings—refer to guides like this step-by-step guide—can save you from leaks and maintain extraction consistency. Remember, the key is consistency in your maintenance routine, not just the occasional deep clean.
Why skip maintenance at your peril?
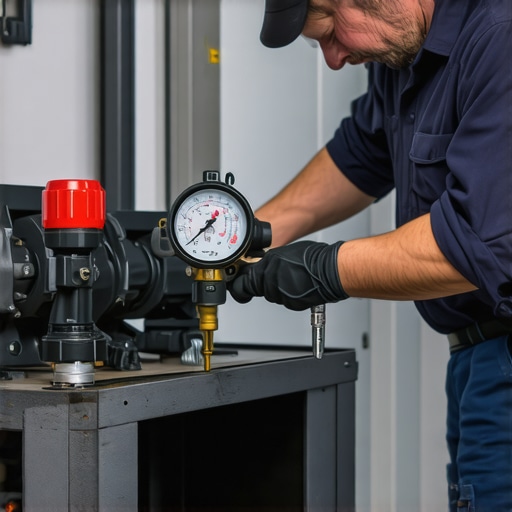
Neglecting upkeep can lead to issues like salted-tasting shots or even equipment failure. Think of your gear like a precision instrument; small issues escalate over time if left unchecked. For example, I experienced a decline in steam pressure because I ignored regular descaling, resulting in sluggish microfoam and overdrawn energy bills. Using tools like a pressure gauge or flow rate monitor helps catch problems early. Investing in maintenance isn’t optional—it’s essential for delivering consistent, professional-quality coffee day after day.
Ready to take your maintenance routine up a notch?
Try integrating a regular calibration check of your grinder and espresso machine using a precise scale and measuring tools. Small but disciplined steps can dramatically improve long-term results. For advanced users, exploring methods like rebuilding gaskets or cleaning internal boilers with natural solutions can extend your gear’s life significantly.
Now, go ahead—schedule your next maintenance session, and enjoy the peace of mind that comes with knowing your coffee setup is at its best.
Lessons Only the Pros Usually Discover About Espresso Machines
- My biggest eye-opener was realizing that factory settings are just starting points, not rules etched in stone. Fine-tuning your machine’s volumetric buttons can dramatically improve shot consistency and flavor, much like a seasoned barista does every day.
- Overlooking water quality was a sneaky culprit in my brewing failures. Switching to filtered water and regular descaling transformed my espresso’s aroma and crema, proving that great coffee starts with great water.
- I learned the hard way that even high-end grinders require periodic adjustment. Small changes in grind size, driven by humidity or bean freshness, can make the difference between a balanced shot and a sour disappointment.
- Maintenance isn’t optional—it’s an investment in taste, efficiency, and equipment longevity. Developing a routine, like weekly deep cleans and monthly gasket checks, saved me countless hours and gourmet disappointments.
- My most surprising insight was discovering tools that simplify upkeep, such as ultrasonic cleaners for espresso parts and precision brushes for portafilters. These gadgets turned maintenance from a chore into a satisfying ritual.
Tools and Resources I Trust for Coffee Mastery
- Espresso Calibration Kits: Precise scales and measuring cups help me dial in shot volumes reliably, ensuring each espresso is picture-perfect.
- Filtered Water Systems: Investing in a high-quality water filter saved my machine from mineral buildup and improved flavor clarity significantly.
- Cleaning and Maintenance Guides: The comprehensive resources on this site have been invaluable for routine upkeep and troubleshooting.
- Specialized Tools for Grinder and Machine Repair: From burr alignment kits to gasket replacement tools, these have empowered me to fix issues swiftly and confidently.
Your Journey Starts Now—Don’t Wait for Perfection
Every shot of espresso is an opportunity to elevate your craft. Embrace calibration and maintenance as vital steps rather than chores, and watch your coffee experience transform. Remember, mastery comes from continual learning and caring for your gear. So, what’s the first tweak you’re going to try today to bring out the best in your espresso setup?