Why Your Commercial Steam Pressure Drops Suddenly and How to Fix It
Ever been midway through steaming milk for that perfect latte, only to notice the steam pressure suddenly dropping? I’ve been there. It’s frustrating, nerve-wracking even. You’re all set for a beautiful, velvety froth, and then, out of nowhere, the steam wand sputters, spits water, or just… loses steam. That sharp drop in pressure can throw off your entire brewing session—and your day.
Understanding Why Your Steam Pressure Drops Without Warning
Let’s talk about why this happens. A sudden pressure loss isn’t just a minor hiccup; it’s often a sign that something’s wrong, whether it’s a simple fix or a sign of a bigger issue. From mineral buildup to faulty valves, there are several common culprits.
I remember my first massive steam pressure drop—well, I thought it was massive at the time. After a bit of research and some trial and error, I realized that mineral deposits in the boiler’s water lines were blocking proper steam flow. Did you know that mineral buildup can reduce boiler efficiency and cause pressure drops even in well-maintained machines? According to the Specialty Coffee Association, mineral deposits are among the top causes of boiler-related issues in espresso machines (source). Early on, I made the mistake of ignoring regular descaling, thinking it wasn’t necessary—I’ve since learned better.
What you’ll find in this post is a straightforward, friendly guide to diagnosing and fixing those pressure drops, so you can get back to brewing perfect shots and steaming milk without interruption. Ready to troubleshoot your machine? Let’s dive into practical steps you can take today.
Is a Drop in Pressure Actually Worth All the Hype?
If you’re skeptical about whether this issue warrants the time and effort, I get it. It’s easy to dismiss a sputtering steam wand as a minor inconvenience. But trust me, those pressure drops can seriously affect taste, texture, and consistency. Missing out on that perfect microfoam or a shot with balanced extraction isn’t just disappointing—it’s costly if it happens repeatedly.
One mistake I made early in my journey was assuming that a pressure drop was always due to user error—like overfilling the boiler or using wrong water purity—when sometimes, it was a simple case of needing to clean valves or replace seals. Small issues like a worn-out pressure relief valve can cause substantial headaches if left unchecked.
If you’ve experienced this yourself, don’t worry. I’ll walk you through how to identify the real cause and get your machine running smoothly again. Stay tuned for the next section where we’ll go step-by-step through troubleshooting your steam pressure—no fancy tools required.
Check the Water Level and Quality Immediately
Begin by inspecting your water reservoir. Low water levels can cause insufficient steam pressure, akin to trying to blow up a balloon with a pinhole—it just won’t get enough air. Also, ensure the water is clean and free of mineral deposits, which can clog the boiler. Regular descaling and cleaning with safe sanitizing solutions will prevent mineral buildup that impairs steam generation. When I faced a sudden pressure drop, a quick water check revealed my reservoir was nearly empty—simple, but often overlooked. For recommendations on cleaning, visit this guide.
Inspect and Maintain the Steam Valve and Lines
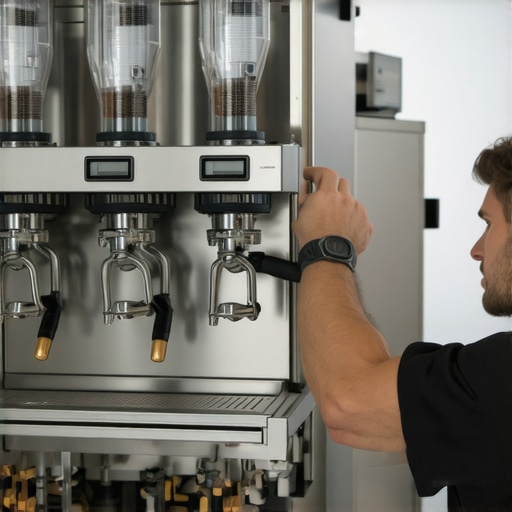
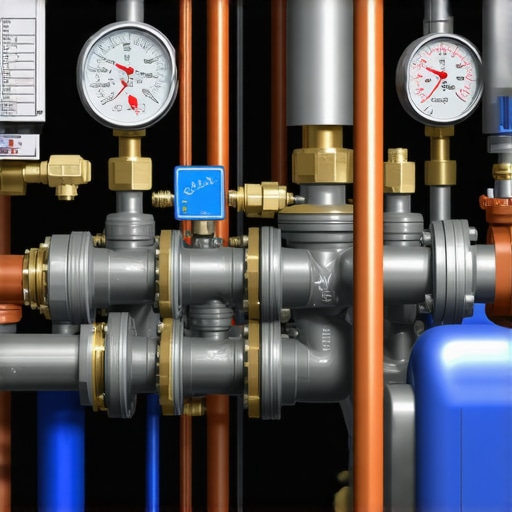
Worn or clogged valves are common culprits behind pressure drops. Turn off your machine, carefully detach the steam line, and check for blockages or mineral deposits. Use a soft brush and a descaling solution to clear obstructions. Think of your steam valve like the faucet in your sink—if it’s partially clogged, water can’t flow freely, reducing pressure. During my troubleshooting, cleaning the valve restored proper pressure almost instantly. For detailed steps, look into this resource.
Examine and Replace the Seals and Gaskets
Over time, seals and gaskets can degrade, leading to leaks that lower internal pressure. Carefully remove the steam conduit and inspect for cracks, brittleness, or residue buildup. If damaged, replacing these parts can quickly restore pressure. Think of it like replacing worn-out door seals to maintain proper insulation—without a tight seal, pressure escapes easily. I recently replaced a worn gasket, which took me about 15 minutes and significantly improved my steaming performance. For guidance on gasket replacement, visit this tutorial.
Clean the Boiler and Internal Components
Mineral deposits and coffee residue inside the boiler can restrict vapor flow. Use appropriate descaling agents and follow manufacturer instructions to flush out all internal passages. Imagine your boiler as a chimney—clogged and dirty, it can’t produce optimal heat and pressure. I once opened my boiler and meticulously cleaned it, which eliminated a persistent pressure issue. Be cautious and refer to your machine’s manual before attempting internal cleaning. For detailed cleaning procedures, read this article.
Verify the Thermostat and Temperature Settings
An incorrect thermostat setting or faulty temperature sensor can prevent the boiler from reaching proper pressure levels. Use a temperature probe to confirm the boiler heats to the optimal range (usually around 212°F or 100°C). Adjust the thermostat carefully, following your machine’s instructions. Think of it like a thermostat controlling a radiator—you need the right temperature to generate steam. During my last adjustment, resetting the thermostat resolved a pressure drop issue that had persisted for weeks. If calibration is needed, consider consulting this resource.Many home baristas believe that choosing the most expensive grinder or espresso machine guarantees perfect results, but the truth is far more nuanced. A common misconception is that grind size alone defines shot quality, yet factors like distribution and tamping pressure often make or break extraction. For instance, even with a high-end grinder, inconsistent particle size due to poor burr alignment can cause channeling, leading to sour or bitter shots. Understanding these subtleties can elevate your brewing game significantly.
Why does the distribution of coffee grounds impact extraction quality more than we realize?
Contrary to popular belief, focusing solely on grind setting is insufficient. Proper distribution ensures uniform extraction, avoiding over- or under-extraction in parts of the puck. Techniques like WDT (Weiss Distribution Technique) or using a piezo needle can help, but many overlook the importance of thorough tamping and puck preparation. A study from the Specialty Coffee Association highlights how uneven puck density causes inconsistent flow, which impacts flavor clarity. To master this, consider investing time in learning distribution and tamping consistency—tools and methods that often get ignored. Have you ever fallen into this trap? Let me know in the comments.
Myth: More gear means better coffee
It’s tempting to think that upgrading your espresso machine from entry-level to professional-grade will instantly improve your shots, but experience shows that technique outperforms equipment upgrades. Even the most sophisticated gear cannot compensate for poor grind adjustment, incorrect dose, or inconsistent tamping. For example, a recent client upgraded to a top-tier machine but still struggled with sour shots because they ignored water quality and proper calibration. Remember, mastering the fundamentals—like water sanitation and precise dosing—is more impactful than just gear. Check out this simple trick to ensure your dosing funnel stays in place or revisit core skills.
How can advanced techniques improve your espresso even if your machine is basic?
Advanced baristas optimize shot consistency by fine-tuning variables like brew temperature, pre-infusion, and pressure profiling. Small adjustments can have a notable impact on flavor and crema stability. For instance, modifying pre-infusion duration can smooth out shots of lightly roasted beans, a nuance often missed by beginners. Recognizing these details allows you to get the most from your existing equipment without unnecessary upgrades. Having a clear understanding of these advanced strategies is essential for serious enthusiasts. If you’re eager to refine your technique, exploring resources on dial-in procedures can be a game changer. Want to learn how to perfect your brew? Start with our pro tips for light roasts.
Tools I Trust for Reliable Maintenance
Having the right tools is essential to keep your espresso setup performing at its best. I personally swear by a high-quality digital caliper for precisely measuring burr alignment, which directly impacts grind consistency and shot clarity. Regularly checking burrs with this tool ensures they sit perfectly parallel, preventing bitter or sour results caused by uneven grinding. Additionally, a precision screwdriver set aids in tightening loose fittings and replacing worn seals without damaging delicate components.
For cleaning, I recommend an ultrasonic cleaner to remove stubborn mineral deposits in small parts like shower screens and portafilter baskets. It’s impressive how a quick session can restore performance and flavor. Remember to use appropriate descaling solutions during these routines to prolong your equipment’s lifespan and maintain optimal pressure.
Scheduling and Automating Maintenance Tasks
Consistency is key. I’ve set up a monthly maintenance schedule using your smartphone’s calendar app combined with checklists. For example, descaling every 200 shots or whenever you notice a decline in steam pressure can prevent bigger issues down the line. There are also specialized apps designed for home baristas that log maintenance history and suggest when to replace parts like o-rings or filters based on usage patterns. Automating reminders ensures you never forget these crucial tasks, saving you from costly repairs or flavor degradation.
Future Trends in Equipment Care
Looking ahead, I predict a surge in smart coffee appliances equipped with sensors that monitor water quality, mineral buildup, and component wear in real-time. These innovations will empower enthusiasts to perform predictive maintenance, catching issues before they impact performance. Companies like Sage are already experimenting with IoT-connected grinders that alert users when burrs need replacing. Embracing these technologies will make maintaining your gear more intuitive and less time-consuming.
How do I maintain my espresso machine over time? If you want to keep your setup running flawlessly, focus on routine checks like descaling, inspecting seals, and cleaning internal components with proper tools. Remember, addressing minor issues early with precise tools such as a water reservoir cleaning and burr alignment prevents costly breakdowns later on. Try incorporating an ultrasonic cleaner into your maintenance routine—it’s a game-changer for internal parts. As technology advances, consider upgrading to IoT-enabled devices that can monitor their own health, making long-term maintenance simpler and more effective. For now, building a habit of scheduled care and using specific tools will ensure your coffee gear remains a reliable partner in your daily brew.The Hardest Lesson I Learned About coffee grinders,barista gear,milk frothers,home espresso,espresso machines
One of the most valuable lessons I discovered was that even the most sophisticated equipment can falter if neglected. Regular and precise maintenance routines prevent small issues from snowballing into costly repairs. For instance, I once ignored descaling my espresso machine, leading to pressure drops and uneven extraction. Now, I schedule monthly checks and use trusted tools like ultrasonic cleaners and digital calipers, which have transformed my brewing experience. Knowing that proactive care makes a tangible difference has truly deepened my appreciation for this craft.
My Essential Toolkit for Coffee Equipment Care
Over time, I’ve curated a set of tools that ensure my gear performs at its peak. A reliable water reservoir cleaner keeps my water fresh and prevents mineral buildup. A precision screwdriver set makes replacing seals straightforward, while an ultrasonic cleaner effortlessly removes stubborn deposits inside boiler parts. Trusting these tools has saved me time and money, allowing me to focus on brewing rather than repairs.
What Keeps Me Going in Coffee Maintenance
This journey isn’t just about tools and routines; it’s about nurturing a connection to your equipment. When I see my espresso machine running silently and my milk microfoam silky-smooth, I feel a sense of pride. Embracing routine maintenance has taught me patience and respect for the process. It’s easy to overlook small leaks or neglected cleaning, but addressing them early preserves the machine’s lifespan and flavor profile. Remember, a well-cared-for machine is the foundation for your best coffee yet. Do you have a maintenance routine that feels like a ritual? Share your methods below to inspire fellow coffee lovers.