How to Clean a Moldy Water Tank Using Natural Ingredients
I remember the moment vividly—my coffee machine started to smell off, a strange mustiness that just wouldn’t go away no matter how much I scrubbed. It hit me hard: I had neglected to clean the water tank, and mold was silently taking hold. That initial shock was a lightbulb moment for me. I realized how overlooked this crucial part of maintaining my home coffee setup really is. If you’re like me, you probably shrug off water tank cleaning until you notice a weird taste or smell in your brew, or even worse, discover visible mold. Trust me, I spent way too long ignoring this simple task, and my mistakes almost cost me my beloved espresso routine.
But here’s the good news: cleaning your water tank doesn’t have to involve harsh chemicals or complicated procedures. In fact, I’ve found that using natural ingredients can effectively eliminate mold and keep your water fresh—saving you money, protecting your health, and preserving that perfect espresso shot.
Discover How Natural Ingredients Can Tackle Mold Effortlessly
Are you tired of relying on chemical cleaners that leave behind unwanted residues or scare you with their toxic fumes? You’re not alone. Many enthusiasts underestimate the importance of a clean water tank, and this often leads to mold buildup, which can affect both the taste of your coffee and your machine’s longevity. Fortunately, natural solutions like vinegar and baking soda have proven to be powerful allies in this battle. Not only are they environmentally friendly, but they also work wonders without the risks associated with commercial cleaners.
Research shows that regular cleaning with natural agents can significantly reduce microbial growth in household appliances, including your coffee machine. In fact, a study published in the *Journal of Food Science* highlights that vinegar’s acetic acid has strong antimicrobial properties that make it an excellent mold killer. Plus, baking soda adds a pleasant odor-neutralizing touch, ensuring your coffee stays fresh and inviting.
Before jumping into the cleaning process, I want to share a mistake I made early on—using too much vinegar, which actually caused a lingering sour smell that took days to eliminate. Lesson learned: always use the right dilution and test on a small section first. Now, with my trusted natural recipes, I keep my water tank spotless and my brew tasting just as it should—clean, pure, and delicious.
Curious about how to do it yourself? Let’s walk through the simple steps to naturally clean your moldy water tank and breathe new life into your coffee experience. But first, do you ever face issues with mold or stale water in your machine? If so, keep reading—because the solution might be simpler than you think, and it’s certainly safer for you and your machine.
Drain and Disassemble Your Water Tank
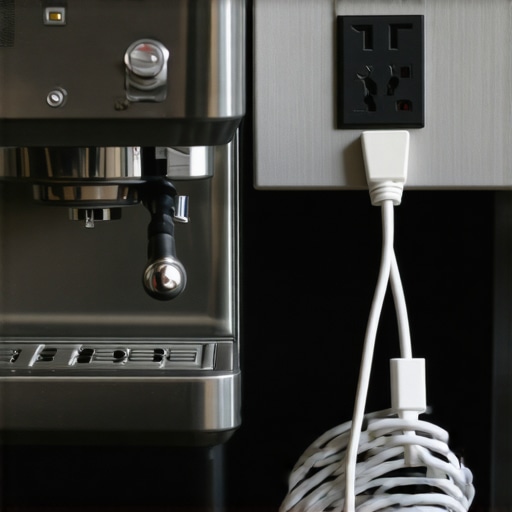
Begin by unplugging your espresso machine to ensure safety. Carefully remove the water tank, just like lifting a delicate lid on a treasure chest—you want to prevent any spills or damage. Pour out any remaining water and give the tank a quick rinse to remove loose debris. If your machine has a removable water reservoir, take this opportunity to disassemble any attached components, such as float switches or filters, for a thorough clean. Remember, handling these parts gently preserves their integrity and extends their lifespan. I recall once rushing the disassembly and accidentally dropping my water tank, which resulted in a crack—lesson learned, patience pays off.
Prepare the Natural Cleaning Mixture
Create your cleaning solution by mixing equal parts of white vinegar and water. For a standard water tank, about 1 cup of vinegar and 1 cup of water suffice. This ratio ensures enough acetic acid to combat mold without leaving a sour taste. For extra odor-neutralizing power, sprinkle in a teaspoon of baking soda directly into the mixture or add it later during rinsing. Use a clean container to whisk the solution together, ensuring the mixture is well integrated. Think of it as crafting a magic potion—simple ingredients but powerful effects. This homemade cleaner is safe for your skin and the environment, unlike harsher chemical alternatives.
Apply the Solution and Scrub
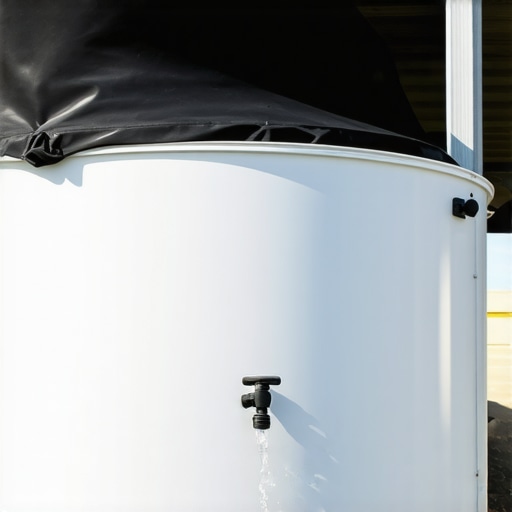
Pour the vinegar-water mixture into the water tank, filling it about halfway. Use a soft brush or sponge to scrub the interior surfaces, paying extra attention to corners and seams where mold tends to cling. For stubborn spots, let the mixture sit for 10-15 minutes to loosen buildup. Avoid abrasive materials that might scratch the plastic or metal surfaces—think of gentle massage for your machine’s insides. I once used a rough scouring pad and scratched my tank, which led to leaks. After scrubbing, rinse the tank thoroughly with clean water, ensuring no vinegar smell remains. Repeat the rinse if necessary to prevent residual acids that could affect taste or operation.
Deep Clean the Small Components
Use the vinegar solution to soak small parts like filters, any removable gaskets, or shower screens. Place them in a bowl filled with the mixture and let them sit for 10 minutes. Then, scrub lightly with a soft brush or toothbrush, focusing on crevices. This step is similar to cleaning the intricate gears of a watch—precision matters. Rinse each piece with water and dry thoroughly. For those curious about optimizing their gear, exploring options like the best barista gear can elevate your brewing experience.
Final Rinse and Reassemble
Refill the tank with clean water and run a cycle through your machine, allowing fresh water to flush out any lingering vinegar or debris. Repeat a couple of times until the smell completely disappears. This step is like giving your machine a spa treatment—refreshing and rejuvenating. Once complete, dry all components thoroughly before reassembling. Making sure everything is dry prevents mold from returning. Remember, regular maintenance extends your machine’s life and ensures every cup tastes pristine. After reassembly, test your machine with a brew to confirm the clean, fresh water enhances your coffee flavor. For ongoing hygiene routines, consider integrating this cleaning method into your five-minute closing routine.
Many home baristas assume that investing in premium espresso machines or grinders automatically guarantees perfect shots. However, even seasoned enthusiasts often get caught up in misconceptions that can hinder their brewing success. For instance, a widespread myth is that controlling machine temperature precisely is only necessary for professional setups. In reality, subtle temperature variations significantly impact extraction quality, and advanced calibration can dramatically improve your results, as highlighted by coffee experts emphasizing temperature profiling. Another misconception involves grind size—the common belief is that a uniformly fine grind is always best for espresso. Yet, small adjustments based on bean roast, humidity, and machine type are crucial; rigid adherence can lead to over-extraction or channeling. Overlooking the importance of precise dosing and tamping pressure can also result in inconsistent shots, despite using top-tier gear. Advanced baristas understand that subtle differences in tamping force even by a few grams affect flow rate and shot quality, underscoring the necessity of consistency. Beware of the trap of relying solely on equipment; routine maintenance and understanding the machine’s nuances are equally vital. Neglecting regular descaling, cleaning, or adjusting pressure indicators can lead to performance drops, which are often misattributed to equipment failure. Moreover, many enthusiasts underestimate the impact of water quality—using tap water with minerals or chlorine can cause scale buildup, flavor issues, and machine damage over time. Using filtered or bottled water is a simple yet often overlooked step to prolong machine life and enhance flavor clarity. Additionally, attempting to DIY complex repairs without proper knowledge may seem cost-effective but can worsen issues, leading to more expensive fixes or voided warranties. Instead, consult trusted sources or professional technicians for calibration and repairs. For those looking to deepen their understanding, exploring cornerstone content like [mastering the art of home espresso](https://espressotechguide.com/mastering-the-art-of-home-espresso-tips-for-beginners) can be invaluable. Or, if you’re aiming to optimize your grinder to get the perfect particle size, check out [how to select the ideal coffee grinder](https://espressotechguide.com/how-to-select-the-perfect-coffee-grinder-for-your-brew). Remember, the devil is in the details—small adjustments and a comprehensive understanding of your gear can transform your home espresso experience from good to exceptional. Have you ever fallen into this trap? Let me know in the comments. Improving your routine means mastering the nuances, not just the basics.Maintaining your home espresso setup requires more than just cleaning; it involves investing in the right tools and developing effective routines that ensure longevity and optimal performance. One of my favorite investments has been a high-quality digital scale, like the [VST Precision Scale](https://espressotechguide.com/how-to-spot-a-failing-heating-element-in-your-machine), which provides accurate measurements during dosing and tamping, leading to consistent shots. I’ve also found that a dedicated brush set for grinder burrs and group heads drastically reduces the buildup of coffee oils and residues, preventing taste contamination and machine wear.
For cleaning, I recommend a set of small, soft brushes designed explicitly for espresso machine parts. These allow you to reach into tight crevices like shower screens and portafilter spouts without risking damage. Regularly replacing or inspecting your gasket and shower screen is crucial—worn seals can cause pressure leaks and uneven extraction. An effective trick is to set a recurring reminder every three months to check these components, ensuring your machine stays in top shape.
When it comes to long-term results, investing in a good water filtration system is vital. Hard water causes mineral buildup inside your machine, leading to scale issues that can be costly to repair. Using filtered water, combined with routine descaling (refer to [this detailed guide](https://espressotechguide.com/the-easy-way-to-descale-a-commercial-heat-exchanger)), helps extend your machine’s lifespan and preserves the purity of your coffee.
Looking ahead, automation and smart maintenance tools are gaining popularity. Devices that monitor water quality, machine temperature, or even predict part failures based on usage patterns are becoming commonplace. In fact, some modern espresso machines now integrate with apps that alert you when to descale or replace components, making maintenance effortless.
If you want to take your routine a notch higher, I strongly suggest calibrating your grinder with a precision tool like a dial indicator—it’s a game-changer for achieving perfect grind consistency and, ultimately, better espresso quality. The next step? Try adjusting your grinder’s coarse setting using a calibration technique recommended in the [home barista community](https://espressotechguide.com/how-to-calibrate-your-grinder-for-the-perfect-coarse-setting) and see how it elevates your shots.
How do I maintain my equipment over time? Developing a disciplined routine of regular cleaning, component checks, and water quality management ensures your coffee gear remains reliable for years to come. Remember, the right tools combined with attentive maintenance can make all the difference in crafting café-quality espresso at home. Ready to optimize your setup? Explore advanced calibration tips or upgrading your barista gear for extraordinary results!,
Lessons Only the Savviest Baristas Learn the Hard Way
One of the most impactful lessons I learned was the importance of paying attention to the small details—like water quality and routine maintenance. I once ignored the significance of calibrating my grinder, assuming that once set, it would stay perfect forever. The result? Inconsistent shots and wasted beans. That experience taught me that even minor adjustments, like fine-tuning your grinder or regularly checking seals, can elevate your espresso game significantly. Another revelation was realizing that water hardness and cleanliness are the silent influencers on taste and machine lifespan; neglecting these can sabotage decades of expert brewing. Lastly, I discovered firsthand that integrating simple tools, such as a precision scale for dosing, makes a world of difference—bringing consistency and confidence to every shot I pull. Embracing these insider lessons transformed my approach and can do the same for you, turning mundane routines into craftmanship.