The Cardboard Trick for Leveling a Grinder on an Uneven Counter
Ever spent hours dialing in your perfect espresso shot only to realize that your grinder’s grind stability is all over the place? I remember the first time I faced this dilemma—after finally investing in a decent grinder, I set it on my kitchen counter, eager to start brewing like a pro. But as I began, I noticed my shots were inconsistent, and the grind level seemed to shift every time I adjusted. It was frustrating, especially because I couldn’t figure out why my setup felt so unstable. That was my lightbulb moment—that my uneven countertop might be the culprit. And let me tell you, once I discovered the simple trick using cardboard, everything changed. Today, I want to share this trick with you because if you’re like I was, you’ve probably spent too much time fussing over your grinder’s calibration without fixing the root of the problem.
Why a Level Grinder Station Matters More Than You Think
I’ve learned that a stable, level foundation doesn’t just keep your grinder from wobbling—it plays a crucial role in ensuring uniform grinding and, ultimately, a better shot. An uneven surface can cause vibrations, inconsistent burr alignment, and uneven grind distribution—no matter how good your grinder is. According to a recent study by the Specialty Coffee Association, stability during grinding directly affects the uniformity of grind particles, which in turn impacts extraction quality (source: How to select the perfect coffee grinder). I made the mistake early on of ignoring this aspect and thought my grinder was the problem, but it was really the unstable setup that caused fluctuations.
Is the Cardboard Trick Truly Worth It?
My initial skepticism was typical—surely a stack of cardboard isn’t a long-term fix, right? But after a few tries, I noticed immediate stability improvements. The trick is simple: using pieces of cardboard to shim your grinder or machine to create a perfectly flat surface. It costs nothing, takes just a few minutes, and offers a surprisingly sturdy solution. I’ve since recommended it to friends, and many have embraced this quick fix, saving time and frustration. But, I’ll admit, I wasn’t always perfect—early on, I placed the cardboard unevenly and wondered why the stability wasn’t better. Learning to fine-tune the shim placement made all the difference.
So, if you’ve faced wobbling or uneven shots due to an uneven countertop, this quick hack might be just what you need. Ready to learn how to do it like a pro? Keep reading, because in the next section, I’ll walk you through the step-by-step process to get your setup perfectly level—and keep it that way.
Place Your Equipment on a Flat Surface
First, identify the area where your grinder sits. I recall one morning my setup was wobbly, causing uneven grind distribution. To fix this, I cleared the counter and made sure the surface was clean and dry. Remember, dust or crumbs can prevent your shims from sitting evenly, so a quick wipe helps.
Assess the Levelness of Your Countertop
Use a simple spirit level or a smartphone app to check if your countertop is perfectly flat. If it’s slightly tilted, that’s your culprit. I discovered my countertop had a small incline, which made my grinder wobble during operation. Understanding this helps you decide how to shim effectively.
Fabricate Cardboard Shims
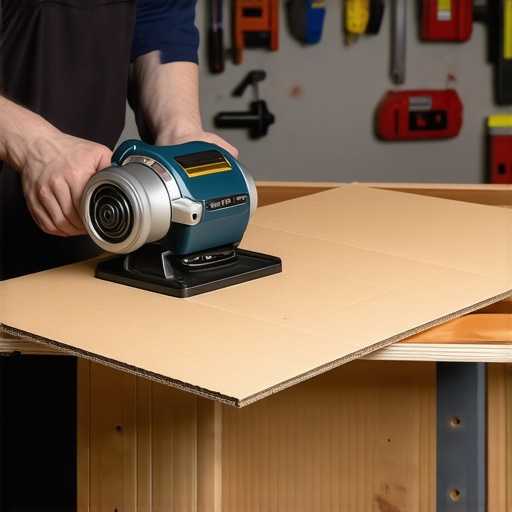
Grab some sturdy cardboard—old cereal boxes work well. Cut pieces into strips slightly wider and longer than the base of your grinder or machine. For example, I cut 2-inch wide and 4-inch long strips. The key is to create enough cushion and support without overstacking, which could make the setup unstable.
Tips for Cutting Cardboard
Use scissors for clean edges. If you want more precise cuts, a utility knife on a cutting mat works best. Avoid flimsy or overly thin cardboard—thicker material provides better stability. I once used a single layer, but stacking two or three layers gave a more secure footing.
Insert Shims for Leveling
Place your cardboard strips under the grinder’s feet—if it has adjustable ones—or directly beneath the base if it’s a flat surface. In my case, I positioned the cardboard on the side with a slight tilt, then slowly added or removed layers until it sat perfectly level. Use a spirit level on top of your grinder to confirm your adjustments.
Fine-Tuning the Shim Position
Adjust the cardboard placement until the level indicates perfect horizontality. Don’t rush this—small shifts make a big difference. I found that stacking and repositioning a few times ensured maximum stability, resulting in more consistent grinds and shots.
Test and Observe Results
Run a few test grinds or shots to see if the wobbling diminishes. I did this on a busy morning, and the difference was clear—the grind was more uniform, and my espresso shots tasted better. Keep an eye on your setup during initial use, as slight settling might necessitate minor adjustments.
Maintain Your Shims
Check periodically to ensure the cardboard hasn’t compressed or shifted due to moisture or movement. Replace or add layers as needed. I keep spare pieces nearby for quick fixes, especially during humid days when cardboard can warp.
This simple hack is a game-changer for home baristas facing uneven countertops or unsettled equipment. It’s an inexpensive, quick way to improve stability without investing in heavy-duty mounts or expensive fixtures. For more tips on optimizing your setup, visit how to choose the best barista gear. Now, your grinder can stay steady, so you can focus solely on brewing the perfect cup.
 While many enthusiasts focus on choosing the latest espresso machine or premium grinder, there’s a common misconception that technical specs alone guarantee great results. In reality, understanding the subtleties of how equipment interacts with your environment and technique can make all the difference. For example, a machine’s temperature stability is often overlooked, yet it’s crucial for consistent extraction. Many assume that once set, your espresso machine’s temperature remains steady, but fluctuations—even subtle ones—can lead to over- or under-extraction, affecting flavor and crema. Experts like Scott Rao emphasize that stability in the brew temperature enhances shot quality, yet typical home machines sometimes lack this precision, especially when not properly preheated or maintained. Therefore, investing in a machine with advanced temperature control features or learning how to optimize your current setup’s heat stability can elevate your brewing.
Moreover, many believe that a burr grinder’s grind setting is a one-time calibration. However, subtle changes—like burr wear or even ambient humidity—can influence grind consistency over time. Regularly recalibrating and understanding the intricate relationship between grind size, dose, and tamp pressure saves time and improves shot quality. Don’t forget, even the grind path is nuanced; slight misalignments can cause uneven grounds, leading to channeling. Advanced baristas often utilize tools like the chalk trick to verify burr alignment, ensuring uniformity.
The myths surrounding milk frothers also deserve mention. Many home baristas think more foam equals better microfoam for latte art, but density and temperature control matter more. Over-foamed milk can be more frothy than silky, hindering pouring precision. The secret lies in mastering the texture, using foam milk at the right temperature—around 140°F (60°C)—and adjusting steaming techniques accordingly. For a deeper dive into milk frothing mastery, check out this guide.
Finally, advanced users recognize the importance of environmental factors. Humidity, ambient temperature, and even countertop vibrations influence equipment performance subtly but significantly. A frequent overlooked nuance involves the placement of your grinder and espresso machine. Placing them on a stable, level surface minimizes vibrations and inconsistencies. Consider using a leveling shim or a dedicated, vibration-absorbing mat—the difference can be remarkable. Remember, the devil is in the details.
Have you ever fallen into this trap of overlooking equipment nuances? Let me know in the comments or explore more expert tips at this article on choosing the best gear for your setup.Maintaining your espresso setup isn’t just about occasional cleaning—it involves a proactive approach to ensure your gear performs optimally over years of use. Regularly inspecting and servicing critical components like rubber gaskets, seals, and filters can prevent breakdowns and preserve flavor quality. For instance, replacing worn-out portafilter gaskets every 6-12 months, depending on usage, helps maintain a secure fit and prevents water leaks. Utilize a dedicated cleaning brush for group heads and steam wands weekly; this simple step avoids residue buildup that can interfere with extraction. Investing in a high-quality descaling solution and following manufacturer guidelines ensures your boiler and heat exchangers stay free of scale, which can impair temperature stability. Remember, every piece of equipment from your espresso machine to your grinder benefits from scheduled maintenance—think of it as an investment in your coffee’s consistently excellent taste. Looking ahead, automation and smart diagnostics are set to revolutionize home barista routines, providing real-time alerts when maintenance is due, much like modern vehicles. To stay ahead, consider integrating a maintenance calendar app tailored for coffee gear, or upgrade to models equipped with built-in sensors for proactive upkeep.
How do I keep my coffee machine and grinder working flawlessly over time?
Regular cleaning and timely replacement of wear parts, such as gaskets, seals, and filters, are vital. For example, cleaning your grinder’s burrs every few months with a specialized brush preserves sharpness and consistency. Using tools like a gauge to monitor pressure and temperature can help catch issues early before they impact your shot quality. For detailed guidance, consult resources like this maintenance guide. Don’t forget to keep spare parts like portafilter gaskets on hand—it’s a small investment that pays off during busy mornings. I recommend scheduling routine checks at least quarterly; this habit prevents minor problems from turning into costly repairs and ensures your coffee continues to taste as stellar as when you first bought your gear. For hands-on advice on maintaining your home espresso, see this beginner-friendly guide. Make maintenance a part of your routine—your taste buds will thank you.
The Hidden Truths That Changed My Approach to Espresso
One of the most eye-opening lessons I learned was that even the best equipment can underperform if set up improperly. Simple things like ensuring your grinder is forced to sit on a level surface can dramatically improve grind consistency and shot quality. I once spent weeks troubleshooting my grinder and machine, only to realize that a few cardboard shims under the machine stabilized everything instantly. That small tweak taught me to pay closer attention to the environment around my gear rather than just the gear itself.
The importance of paying attention to environmental factors became clear when I noticed fluctuations in temperature or vibrations affecting my shots. It’s easy to focus solely on settings and forget how much the surroundings influence performance, which is why maintaining a stable setup is key. Keep in mind that even something as simple as changing your countertop or adding vibration absorption mats can make a big difference, echoing the idea that the environment plays a crucial role in achieving consistent results.
Another surprising lesson came from understanding that regular maintenance isn’t just routine but fundamental to consistency. Small habits like cleaning your grinder burrs or replacing worn seals safeguard the precision necessary for great espresso. I found that scheduling short, weekly maintenance checks saved me from more extensive repairs down the line, and kept my machines functioning at peak performance. Remember, the more you invest in caring for your equipment, the better your shots will taste, which is why I swear by setting a maintenance calendar—trust me, it transforms your brewing experience.
My Arsenal of Tools That Make Home Brewing Better
Over the years, I’ve curated a handful of trusted resources that revolutionized my approach to home espresso. For instance, I regularly consult guides on choosing the best grinder because proper calibration is the backbone of consistent extraction. The precision of my grinder, paired with tools like a grinder burr alignment chalk trick, keeps me laser-focused on performance.
In addition, I rely heavily on high-quality cleaning tools and descaling solutions to prolong the life of my machines. Spider-Man-like cleaning techniques aren’t just for show—they guarantee that mineral build-up doesn’t sneak into your brew. More so, I recommend a good read like mastering the art of home espresso for practical tips and tricks. These resources, combined with personal experience, sharpen your skills without the frustration.
Ignite Your Passion and Elevate Every Cup
Stepping into the world of home espresso might seem intimidating at first, but the key is embracing continuous learning. Your setup and technique are a reflection of your dedication. Remember that every little adjustment—be it leveling your grinder or maintaining your steam wand—contributes to the magic of a perfect shot. Don’t hesitate to experiment, ask questions, and seek out expert advice. Your journey toward barista-level results begins with a single step, so why wait?
What’s one environmental tweak you’re eager to try that could improve your espresso quality? Share your thoughts below—we’d love to hear how you plan to elevate your home coffee experience.