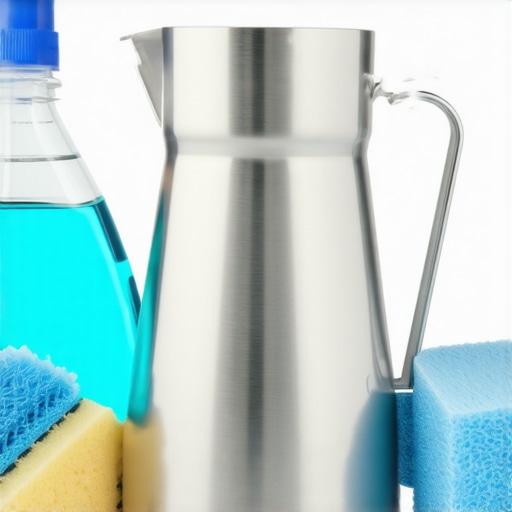
How to Deep Clean Your Milk Pitcher to Remove Old Residue
Have you ever looked at your milk pitcher after frothing and wondered if what you’re seeing is just leftover milk residue or something more stubborn? I’ve been there—frustrated, facing a pitcher that refuses to come clean no matter how much scrubbing I threw at it. The lightbulb moment hit me hard when I realized I was only cleaning the surface, ignoring the hidden buildup that silently sabotages my coffee experience. That’s when I decided enough was enough. If you’re tired of battling old, stubborn residue lingering in your milk pitcher and ruining your crema, then stick around—because I’m about to share the exact process I used to transform my cleaning routine.
Why Deep Cleaning Your Milk Pitcher Is More Important Than You Think
The truth is, neglected pitcher residue doesn’t just look unappealing—it affects the flavor and texture of your microfoam, leading to bitter tastes or a grainy mouthfeel. Plus, stubborn milk deposits can harbor bacteria, which isn’t exactly the goal of your daily coffee ritual. An outdated residue buildup can also cause inconsistency in frothing, making your milk hot one day and lukewarm the next. According to barista experts, regular deep cleaning can extend the lifespan of your equipment and ensure every cup you serve meets the highest standards of quality. This isn’t just about aesthetics; it’s about safeguarding your coffee experience and health.
Is Deep Cleaning Really Necessary or Just Hype?
I used to think that a quick rinse was enough—spoiler alert, it’s not. My early mistake was assuming that common dish soap and scrubbing would do the trick, which often left behind thin film layers of old milk. It’s only after I started paying attention that I realized that these microscopic residues could affect the clean taste and foam quality. If you’re skeptical, consider this: over time, mineral deposits and dried milk can create a sticky, stubborn layer that is resistant to regular cleaning methods. Doing a proper deep clean isn’t just a good idea; it’s essential for true cleanliness and optimal frothing performance.
Thinking about giving your pitcher a thorough overhaul? Great! In the next section, I’ll walk you through the step-by-step process to ensure no residue is left behind, leaving your milk tasting fresh and your microfoam smooth as silk. If you’ve faced the persistent challenge of grimy pitchers, don’t worry—you’re not alone, and I’ve got your back.
Start with a proper disassembly
Remove the pitcher from your espresso machine and detach any parts such as the lid or handle if possible. Think of disassembly like stripping a gear for a thorough clean—every piece matters. I remember once trying to clean a heavily stained pitcher without taking it apart, only to find residue lurking in hard-to-reach spots, which made my cleaning ineffective.
Pre-soak to loosen dried milk
Fill the pitcher with hot water and a splash of white vinegar or a specialized milk pitcher cleaner like the ones discussed here. Let it soak for 10-15 minutes. This step is akin to softening hardened glue before scraping—reducing the effort and avoiding scratches.
Scrubbing with a dedicated brush
Choose the right brush
Use a nylon or silicone brush designed for coffee gear to avoid scratching the stainless steel. Keep your brushes dry and store them properly, as explained here.
Focus on the corners and crevices
Use the brush to scrub all surfaces, paying special attention to the seam between the body and the bottom. Remember, residue often hides in these tight spots. I once used an old toothbrush to get into the narrowest lip of my pitcher, saving myself from stubborn stains.
Target tough stains with paste and agitation
Create a cleaning paste from baking soda and water to tackle particularly stubborn spots. Apply gently with your brush or a soft cloth. Think of this like exfoliating skin—you want to remove all the dead, dull layers for a fresh look. After scrubbing, rinse thoroughly with warm water to remove all chemical residues, which can affect milk taste and foam quality.
Deep rinse and dry thoroughly
Hydrate all parts with clean water, ensuring no cleaner or residue remains behind. Dry every surface with a lint-free cloth or microfiber towel to prevent water spots and bacteria buildup. I always let my pitcher air dry upside down on a rack, similar to how professional baristas keep their tools in top condition.
Inspect and reassemble for a spotless finish
Finally, check the interior and exterior for any remaining residues or streaks. If you find stubborn spots, repeat the scrubbing process. Reassemble the pitcher carefully, ensuring no parts are loose. Regularly performing this deep cleaning routine prevents buildup, helping you achieve silky microfoam and better-tasting coffee—see how I improved my latte art after this routine here.
Many home baristas get caught up in the basics of coffee gear, but beneath the surface lies a web of nuanced truths that can significantly impact your brewing results. For example, a common myth is that the burrs in your grinder don’t need regular alignment, but misaligned burrs can cause uneven particle size distribution, leading to inconsistent shots. Even experienced enthusiasts sometimes underestimate the importance of grinder retention; a high-retention grinder can trap old coffee grounds, causing stale flavors to mix with fresh beans. While it’s widely accepted that freshly ground beans yield better flavor, few realize that the way you dispatch grounds—such as tapping or tamping—can influence grind consistency and extraction quality. In the realm of espresso machines, many believe more pressure equals better extraction, but applying excessive tamping force can choke the shot, reducing clarity and flavor. Instead, consistent, level tamping with the right pressure is crucial; learn more about proper technique here.
Is Your Grinder Adjustment Truly Precise or Just Guesswork?
Many seasoned home brewers struggle with their grinder’s settings feeling ‘mushy,’ often due to worn burrs or miscalibrated adjustments. Regularly checking and tightening burrs, and understanding your grinder’s nuances, is essential to maintain consistent grind sizes. Neglecting this can lead to time-wasting trial and error and disappointing espresso shots. External factors, like ambient humidity, can also subtly alter grind behavior, making it advantageous to adjust your grind size progressively rather than sticking rigidly to a static setting. Experts suggest keeping a detailed log of adjustments relative to environmental conditions for optimal consistency. For more advanced tips on dialing in your grinder accurately, visit here.
Another common pitfall involves milk frothers. Many enthusiasts assume that any foam bubbles mean a successful froth, but the microscopic structure of the foam determines its silkiness and longevity. Over-aerating or under-aerating milk, depending on the method, can lead to either froth collapse or dryness. Advanced baristas know that controlling steam pressure and milk temperature, as well as proper positioning of the steam tip, are the real game-changers. Also, many overlook routine cleaning of steam wands, leading to blockages that dramatically diminish frothing quality. Use of quality barista gear and understanding specific machine quirks can improve results considerably—check out here for insights.
So, the next time you think your equipment is performing optimally, challenge yourself to look deeper. Discovering these subtle details can elevate your coffee game from good to exceptional. Have you ever fallen into this trap? Let me know in the comments.
Keep It Running: Tools and Techniques for Sustained Coffee Gear Excellence
Investing in quality coffee equipment is just the beginning; maintaining it for optimal performance over years requires specific tools and methods. As an enthusiast aiming for consistently perfect espresso or microfoam, having the right gear and routine can save time and money while ensuring your brews remain exceptional. I’ll share the exact tools I rely on and how you can implement practical maintenance strategies to prolong your equipment’s life and keep your coffee game strong.
High-Precision Calibration Devices
One of my favorite investments is a calibration scale. Precise calibration of grinder settings ensures each shot is consistent, especially when environmental factors like humidity change. Using a digital scale with built-in timers allows me to fine-tune my grind size and dose repeatedly, maintaining optimal extraction. For espresso machines, a pressure gauge is invaluable—they help me monitor pump pressure directly, preventing channeling or under-extraction. Regular calibration with these tools avoids the frustrating guesswork and helps sustain perfect extraction every time.
Specialized Cleaning Supplies for Long-Term Maintenance
Keeping your machines and accessories clean is critical. I use a non-abrasive, chemical-free burr cleaning brush for my grinder, which I store properly using the dedicated drying rack to prevent bacteria buildup. For the espresso machine’s group head and steam wand, I recommend routinely backflushing with a backflush kit designed specifically for your model. Regular cleaning prevents mineral deposits and residue buildup, which can hamper performance and flavor.
Durable Wear Parts and Replacement Components
Long-term maintenance also involves replacing parts before they break down. I keep spare group gaskets and o-rings on hand, replacing them proactively. This practice minimizes downtime and prevents damage to more expensive components like the boiler or pump seals. I also use a precise tamper to ensure consistent tamping pressure, reducing wear on the espresso puck and machine parts over time.
Making Future Trends Work for You
The trend toward smarter, connected maintenance tools is evolving. I predict that in the near future, apps integrated with these devices will provide real-time feedback on machine health, enabling proactive upkeep. Meanwhile, I recommend starting with simple tools like calibration scales and cleaning kits—these are proven to extend your equipment’s lifespan and enhance your brewing quality. For expert insights, explore here.
How do I maintain my equipment over time?
Establishing a regular routine using specialized tools—such as calibration scales, backflushing kits, and replacement parts—keeps your gear performing at its best. Schedule maintenance tasks weekly or monthly based on usage, and always follow manufacturer recommendations for cleaning and part replacements. Taking these steps prevents costly repairs and ensures your coffee remains exceptional. Try incorporating one advanced tip today, like calibrating your grinder with a digital scale, to see immediate benefits in consistency and flavor. Remember, the key to long-term success is proactive, informed maintenance—your future self will thank you.
The Little Lessons That Changed My Coffee Routine
One of the most unexpected insights came when I realized that even the smallest overlooked residue could sabotage my entire brew. That moment of clarity taught me the importance of meticulous cleaning, especially with stubborn milk residues and mineral deposits—lessons that no quick rinse can replace. Recognizing the patterns behind buildup patterns has helped me prevent issues before they start, saving time and enhancing flavor.
Another revelation was understanding that my equipment’s lifespan hinges on proactive maintenance. Regularly inspecting and replacing worn parts, along with thorough cleaning, ensures consistent results. It’s a shift from reactive fixes to a preventative mindset that truly elevates my coffee experience.
Lastly, I learned that the synergy between tools and techniques—like using the right brushes, calibrating grinders precisely, and controlling steam pressure—makes all the difference. The more I refine these details, the more I bridge the gap between amateur and barista-standard brews, making every cup feel special and consistent.
Tools and Resources That Elevated My Brewing Game
Investing in a quality calibration scale transformed my grinder adjustments. It allowed me to achieve consistent particle sizes and extraction times, leading to richer, more balanced espresso. For maintenance, using dedicated cleaning brushes from trusted sources like Espresso Tech Guide helps me reach those hard spots without causing scratches, prolonging my equipment’s life. When it’s time for part replacements, sourcing high-quality gaskets and seals from reputable suppliers ensures longevity and prevents leaks—key for preserving pressure and flavor integrity. Lastly, I rely on comprehensive guides and tutorials from trusted websites to stay updated on best practices and avoid common pitfalls, turning routine maintenance into a satisfying part of my coffee ritual.
Embrace Your Inner Barista and Elevate Your Experience
Deep cleaning your coffee gear isn’t just about maintenance—it’s about cultivating pride in your craft and ensuring every espresso, milk froth, and microfoam reaches its full potential. Trust in your ability to learn, adapt, and improve, knowing that the small, consistent efforts you put in today lay the foundation for your next great brew. Don’t hesitate—your perfect cup is just a cleaning routine away. Cheers to elevating your coffee journey—keep pressing forward, and share your wins and challenges below. What’s the one equipment tip that transformed your brewing process? Let me know in the comments!