How to Stop Your Espresso Machine From Rattling Against the Wall
Ever had your espresso machine’s sudden rattle wake you up at the worst possible moment? I remember the first time mine started shaking violently during a morning shot—seriously, it felt like it was about to take off. That jarring noise not only disrupted my peaceful morning routine but also made me wonder if I’d somehow damaged my beloved machine. Turns out, this is a surprisingly common issue among home baristas, and the good news is, it’s usually a fixable problem.
In this post, I’ll share practical, straightforward tips that helped me silence that rattle and prevent it from ruining my coffee sessions. Whether you’re a seasoned espresso enthusiast or just starting your home setup, understanding why your machine rattles and how to fix it can save you from unnecessary stress—and keep your kitchen peaceful.
Why Does My Espresso Machine Rattle Against the Wall?
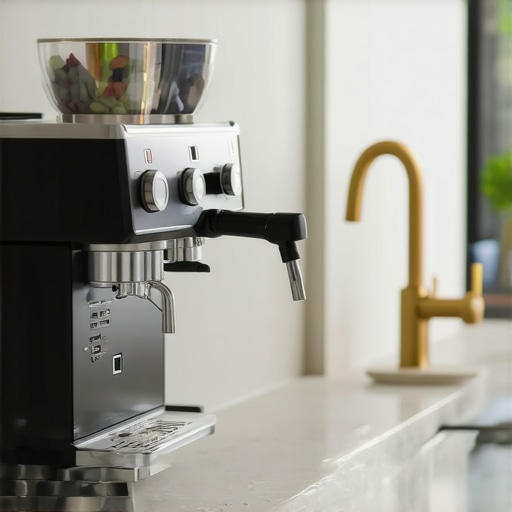
The main culprit is often the stability and positioning of your espresso machine. Machines that aren’t properly secured or are resting directly against a wall can vibrate excessively, especially during the pump or steam cycles. Over time, this can lead to increased noise, potential vibration damage, or even instability that risks tipping your machine over.
One common mistake many make early on is placing their machine on an uneven surface or failing to implement simple stabilization techniques. I learned this the hard way when my initial setup, a flimsy countertop, amplified every racket. After upgrading to a sturdier, level surface and adding some basic vibration dampening, the difference was night and day.
Practicing these fixes not only quiets your machine but also prolongs its lifespan. For example, ensuring your espresso machine is on a solid, level platform can drastically reduce unwanted movement, as shown in various barista DIY tips. If you’ve ever wondered whether your setup is part of the problem, consider testing your grinder or espresso machine with a simple paper towel test—it’s the best way to check for dull grinder burrs that cause uneven extraction and maybe even contribute to vibrations.
Finally, don’t underestimate the power of dampening mats or anti-vibration pads, which I now swear by. They’re affordable and surprisingly effective at absorbing vibrations that might otherwise resonate through your walls or counter.
If the idea of persistent rattling has you worried about your machine’s health—or about disturbing neighbors—trust me, there are easy solutions. Keep reading, and I’ll walk you through the tried-and-true methods I’ve used to make my espresso experience much quieter and more enjoyable. Plus, I’ll share a few common mistakes to avoid, so your setup remains as reliable as your morning brew.
Secure Your Machine Properly
Start by placing your espresso machine on a sturdy, level surface. Use a silicone or rubber mat underneath—think of it as the shock absorber for your gear. I once set mine on a wobbly wooden table, and the noise was unbearable. Transitioning to a thick rubber mat drastically reduced vibrations and kept my mornings peaceful.
Check and Adjust Placement Against Walls
If your machine sits tightly against a wall, vibrations can reverberate and amplify. Leave at least an inch of space behind and on the sides. This prevents echoes and promotes stability. I rearranged my countertop to give my machine breathing room, and the difference was immediate—less rattling and a quieter work environment.
Inspect and Tighten Loose Components
Loose screws, panels, or fittings can cause rattling sounds. Use a screwdriver to tighten any visible bolts or panels. During one session, I ignored a slightly loose panel, and it kept knocking loudly whenever I operated the pump. After tightening everything, my machine settled down, and the noise disappeared.
Utilize Anti-Vibration Pads or Dampening Materials
Invest in anti-vibration pads—they’re affordable and highly effective. Place them underneath your machine legs. I added a pair under each corner, and it absorbed the small tremors that used to shake the entire countertop. This is especially useful if your setup is on a tile or hardwood floor that amplifies vibrations.
Regular Maintenance and Inspection
Ensure your machine is clean and functioning well. Over time, build-up or worn parts can cause excess vibrations. For instance, misaligned burrs in your grinder could lead to uneven grinding, which creates pressure fluctuations during extraction, generating more noise. To check for dull burrs, consult the paper towel test discussed on this guide. Maintaining your grinder and espresso machine improves stability and reduces rattling.
Replace or Repair Worn Parts
If tightening and stabilizing don’t help, examine internal parts like pump mounts or vibration dampers. Worn mounts can vibrate excessively. Follow manufacturer instructions or seek professional repair if needed. Often, replacing a worn gasket or seal can restore quiet operation, prolonging your machine’s lifespan. For common pump issues, learn more about this fix.
Many home espresso enthusiasts fall prey to misconceptions that can undermine their brewing quality. One widespread myth is that expensive equipment automatically guarantees perfect results. In reality, many seasoned baristas achieve superior shots through skill and maintenance rather than sheer investment. For example, even high-end espresso machines can produce mediocre coffee if not properly calibrated or cleaned. Regularly checking your grinder’s burrs with the paper towel test can reveal dullness that dulls extraction and dims flavor—and a common mistake is to overlook grinder maintenance. Additionally, many believe that milk frothers alone can create microfoam suitable for latte art, but without understanding steaming techniques and milk temperature control, froth quality remains subpar. Advanced users often emphasize that temperature stability in espresso machines is crucial; a quick glance at a budget model’s thermal profiling might mislead you into thinking it’s sufficient, but high-quality models with better thermal stability lead to more consistent shots over time. Beware the trap of relying solely on gadget features; instead, mastering the fundamentals—like proper tamping pressure and grind size—is what truly elevates your brewing. Curious about the more nuanced technical pitfalls? Take a look at this guide on smart scale calibration to ensure your equipment aids rather than hinders your process.
What advanced mistakes do even experienced baristas make that could be hurting their shots?
One often-overlooked error involves neglecting the tiny details like consistent dosing and puck preparation. Variations in dose weight or uneven tamping can cause channeling, leading to uneven extraction and bland flavors. Also, many fail to recognize the importance of calibration tools; for instance, a misaligned grinder or scale latency can cause subtle errors that compound over multiple shots, degrading overall quality. Regularly verifying your equipment’s calibration with precise methods—like the simple paper shim trick to align burrs—can prevent these issues and provide a more reliable foundation for your brewing. Remember, equipment alone doesn’t make great espresso; it’s the consistent application of technique and regular maintenance that creates exceptional results. Have you ever fallen into this trap? Let me know in the comments.
Essential Equipment for Long-Term Coffee Happiness
Maintaining a high-performing home espresso setup requires more than just the machine itself; the right tools make all the difference. I recommend the paper towel test for quick grinder burr checks, ensuring your grind consistency stays optimal. Regular calibration, like using a smart scale correctly—guided by detailed fixes at this resource—can significantly improve your shot timing and flavor clarity. Additionally, investing in anti-vibration pads, such as these damping mats, ensures your machine stays steady, reducing noise and wear over time.
How do I keep my gear performing well over years?
Consistency is key. Set a routine to dismantle and clean your equipment monthly—especially the boiler and steam wand—to prevent scale buildup and mechanical issues. A video guide from industry expert advice emphasizes flushing out deposits to maintain thermal stability. Moreover, replace worn parts promptly; for pump issues, here’s how to prevent pump failure, which can lead to costly repairs if neglected.
What about scaling your setup as your skills grow?
Scaling involves upgrading individual components, like moving to a precision grinder or a dual boiler machine. But before that, fine-tune your existing tools. For example, aligning burrs with the simple paper shim trick (see how here) can dramatically improve extraction consistency. Once you’re confident with your baseline setup, consider precise temperature controllers or a flow meter to monitor your brew process in real time. These investments can help you achieve professional-level results right at home.
Future Trends in Home Barista Equipment
As technology advances, expect more intelligent systems with predictive maintenance and customizable profiles. Smart scales and sensors will become more integrated, alerting you when calibration is off or parts need replacement. Staying ahead means adopting these tools early, saving time and money, and consistently delivering exceptional coffee experience. For example, a recent breakthrough involves integrating flow rate feedback directly into your espresso machine’s app, reducing guesswork and refining technique over time.
How do I maintain my gear over time?
Establish a regular maintenance schedule that includes deep cleaning, calibration checks, and timely part replacements. Keep detailed logs of your routines; I use a simple checklist every Sunday to ensure nothing is overlooked. Additionally, dedicating a small toolbox with screwdrivers, cleaning brushes, and spare gaskets ensures quick fixes when issues arise. Regular checkups not only extend your gear’s lifespan but also help you maintain that perfect shot day after day. Ready to make a difference? Start by calibrating your grinder with the paper shim method today and notice the improvement in flavor and consistency.
Lessons the Walls Won’t Tell You About Your Espresso Setup
One of the most surprising realizations I had was how much of my shaking and rattling was a matter of setup rather than the machine’s quality. I learned that even a high-end espresso machine can be disruptive if not properly stabilized, saving me from unnecessary repairs and neighborly complaints. Placing my machine on a dedicated, level platform with anti-vibration pads transformed my mornings into quiet, enjoyable rituals. Another lesson was that vague assumptions about stability often lead to overlooked issues—like loose screws or cramped spaces—that amplify noise and wear. Fixing these small details made a huge difference, reinforcing the idea that precision in setup leads to serenity in operation. Lastly, understanding the importance of proper clearance from walls and counter edges has been a game-changer, reducing echoing vibrations and protecting my gear from long-term damage.