The Best Way to Store Your Drip Tray to Prevent Mold
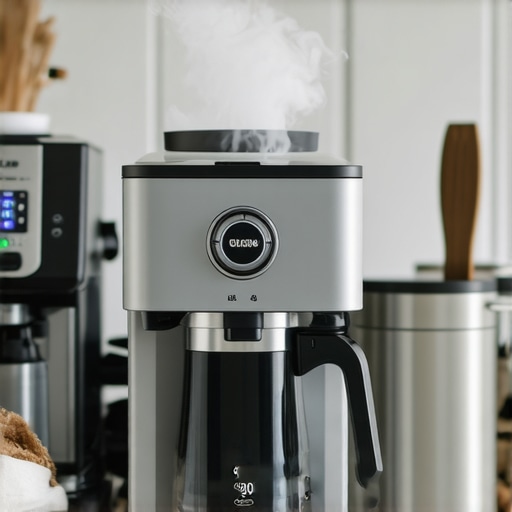
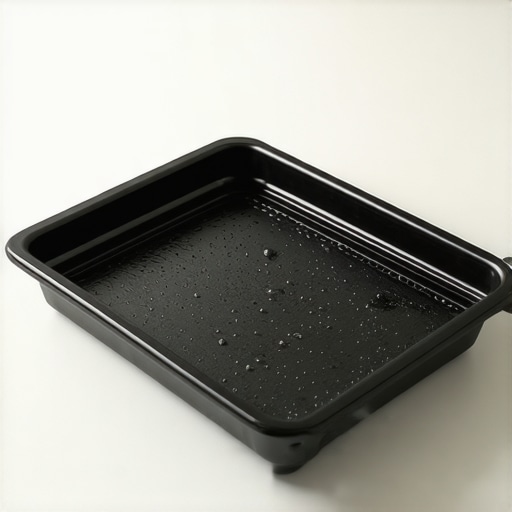
It was a typical morning in my kitchen—cup in hand, ready to start the day—and I noticed a musty smell wafting up from my espresso machine. I reached beneath the device and saw the drip tray, covered in a slimy, dark film. Ugh. That lightbulb moment hit me hard—how could I have ignored the buildup in what seems like a simple part of my beloved coffee setup? You see, those drip trays, often overlooked, are the silent culprits when it comes to mold and bacterial growth. And trust me, I learned the hard way that neglecting them can turn your daily brew into a health hazard.
Why Your Drip Tray Deserves More Attention Than You Think
The drip tray might seem insignificant—a small, removable piece that catches excess water and coffee dribbles. But it’s a playground for mold, bacteria, and unpleasant odors if not cleaned and stored properly. Regular use introduces moisture and organic matter that, when left unchecked, become perfect breeding grounds for mold. According to the CDC, mold can cause allergic reactions and respiratory issues, especially for those with sensitivities. And since your espresso machine is a daily fixture in many coffee enthusiasts’ mornings, overlooking this component can have real health implications.
Are You Falling for This Common Mistake?
Early on, I made a rookie mistake. I believed that simply rinsing the drip tray once a week was enough. Nope. Without proper storage and regular drying, mold still took hold. Tight spaces, dark corners, and constant dampness create ideal conditions for mold spores to settle in. This was a wake-up call that made me realize: even the tiniest, seemingly insignificant part of your barista gear requires attention, or it’ll undermine the quality of your coffee—and your health.
To keep your drip tray spotless and mold-free, I’ve delved into the best practices based on experience and expert advice. Ready to learn how to prevent mold before it starts? Let’s jump into easy, effective solutions that will keep your coffee setup fresh, safe, and smelling just as inviting as your favorite brew.
,
Remove the Drip Tray Carefully
Start by powering off your espresso machine and unplugging it to ensure safety. Gently slide out the drip tray, supporting it with both hands to prevent dropping. Use a soft cloth to wipe away loose debris. During my first attempt, I struggled a bit, but I learned quick—supporting with both hands avoids spills and breakage.
Disassemble for Deep Cleaning
Check if your drip tray has removable components like a grille or insert. Detach these parts and soak them in warm water mixed with a few drops of mild dish soap. Use an old soft toothbrush or a small brush to scrub crevices thoroughly, removing grime and mold spores. This step is crucial because buildup thrives in hidden corners, as I discovered when my tray had hidden corners clogged with dark deposits.
Scrub with Right Tools
Use a soft-bristled brush or non-abrasive scrub sponge—abrasive tools can scratch surfaces and harbor more bacteria. Pay special attention to the corners and the drainage holes, which often trap grime. I once used a tiny interdental brush to dislodge stubborn dirt, and it made a noticeable difference in cleanliness.
Sanitize to Eliminate Mold and Odors
Prepare a solution of equal parts water and white vinegar or a commercial mold-and-mildew cleaner. Submerge removable parts in this mixture for 10-15 minutes to kill bacteria and prevent mold growth. Subsequently, rinse thoroughly with warm water. During my routine, I found that regular sanitizing kept odors at bay and extended the drip tray’s lifespan.
Dry Completely Before Reassembly
Use a clean towel or cloth to pat dry all parts, then leave them air dry for a few minutes. Avoid reassembling damp components because moisture promotes mold. I learned this the hard way when reassembling wet parts, which led to mold reappearing within days. Ensuring complete dryness is like giving your coffee gear a fresh start each day.
Reinstall and Regular Maintenance
Place the clean components back into the machine, ensuring they fit snugly. Set a reminder to repeat this cleaning weekly, especially if you brew daily. Keep an eye on drainage holes and clean them with a toothpick or pipe cleaner as needed. Once, I ignored a clogged drain and ended up with overflow issues—lesson learned is that consistent upkeep prevents big problems.
Store Properly When Not in Use
If your machine isn’t used daily, ensure the drip tray remains dry and free of organic matter. Store the tray in a clean, dry place or in a dust-free cabinet. Proper storage avoids accidental contamination and mold growth, making each brew a clean, safe experience.
Remember, neglecting the drip tray not only causes bad odors but also encourages mold spores, which can affect your health. Regular, thorough cleaning is a simple habit that preserves your coffee’s purity and your equipment’s longevity. For more tips on maintaining your coffee gear, check our guide on choosing the best barista gear.
Many coffee enthusiasts dive into upgrading their equipment with high hopes, but often miss the subtleties that can make or break their brewing experience. Contrary to popular belief, expensive gear doesn’t always guarantee perfect results; mastering the nuances of your grinder settings or espresso machine maintenance is essential. For instance, a common myth is that a more powerful milk frother will automatically produce better microfoam, but in reality, technique and temperature control are more crucial than wattage.
Can Advanced Users Benefit from Specialized Gear or Is It Just Overkill?
Expert baristas know that the key to exceptional coffee lies in understanding the intricate interactions between grind size, tamping pressure, and water temperature, rather than just their equipment’s specs. Studies, such as those published in the Journal of Food Science, emphasize that precision in parameter control often outweighs equipment fatigue or marginal upgrades. When selecting tools, consider the specific qualities of your beans and brewing style—an overly aggressive grinder can lead to uneven particle distribution, which hampers extraction even if the machine itself is top-tier. Avoid falling for the trap of constantly chasing the latest gear; instead, focus on understanding and optimizing what you already have. For instance, many overlook the importance of proper grinder burr alignment, which can drastically improve consistency over just buying a new grinder. Regular cleaning and calibration are your best allies in maintaining peak performance. Also, don’t forget that environmental factors like humidity can alter grind behavior and extraction; thus, adapting your setup becomes part of the advanced art. Remember, a well-maintained espresso machine with a calibrated grinder can outperform brand-new or expensive alternatives if you understand its quirks. Want to get more technical? Check out our guide on how to select the perfect coffee grinder or explore advanced cleaning techniques to prolong your equipment’s lifespan.
Have you ever fallen into this trap? Let me know in the comments.
Maintaining your home espresso setup isn’t just about cleaning—it’s about implementing systems and tools that ensure longevity and optimal performance over time. As someone deeply invested in craft coffee, I can attest that investing in quality tools and adopting disciplined routines yields the best long-term results. For example, I rely heavily on a burr grinder alignment tool, which has revolutionized my consistency and reduced waste — and you can check out my detailed review of how proper burr alignment impacts your grind quality. When it comes to espresso machines, regular calibration with a dedicated water quality tester like the TDS meter ensures water consistency, directly affecting flavor extraction and machine health. I predict the trend towards smarter, app-controlled coffee gear will grow, allowing precision tuning and maintenance reminders—making ‘set and forget’ a thing of the past.
How do I maintain my equipment over time?
Routine maintenance begins with understanding your gear’s specific needs. For grinders, I emphasize regular deep cleaning using eco-friendly guidelines to prevent clogging and preserve burr sharpness. A key tool I use is a burr alignment laser; it ensures that the grinding mechanism stays perfectly calibrated, which is vital for consistent extraction. For espresso machines, a monthly descaling process with a commercial descaler like Dezcal, combined with thorough internal cleaning, keeps the boiler and flow pathways clear, preventing off-flavors and mechanical issues. Don’t overlook the steam wand—regularly purging and cleaning the tip with a dedicated brush prevents buildup and ensures silky milk textures. Incorporating small, dedicated maintenance folders—digital or physical—reminds me of scheduled checks, like reviewing gasket integrity or water filter capacity, prolonging equipment lifespan.
Tools I recommend for longevity and performance
Investing in quality tools can make all the difference. A milk frothing thermometer helps dial in the perfect milk temperature, preventing burnt flavors and extending equipment life. A precision tamper, like the VST or IMS models, ensures even tamping pressure, reducing wear on the portafilter and group head. For grinder maintenance, I swear by a chute cleaning brush to prevent static buildup and blockages. Remember, consistency in maintenance routines is key. Scheduling brief weekly inspections of gaskets, water filters, and cleaning cycles can save you from costly repairs and flavor issues.
Scaling ingredients and techniques will shape future efficiency
The future of home espresso also points toward automation. Digital descaling kits and IoT-enabled cleaning systems are becoming more accessible, promising fewer surprises and more consistent results. Staying ahead in this space involves embracing these technologies and understanding their capabilities. For example, the appropriate cleaning schedules and tools help manage scale buildup effectively.
If you’re serious about keeping your gear performing at peak levels, I suggest trying the advanced burr alignment method I mentioned earlier. It’s a game-changer for maintaining shot consistency. Regularly updating your knowledge through trusted resources like our contact page will keep you informed. Remember, dedicated time and proper tools today mean fewer headaches tomorrow, and an even better coffee experience for years to come.
The Hardest Lesson I Learned About Barista Gear and Coffee Equipment
One of the most eye-opening lessons came when I realized that even the smallest overlooked component, like the drip tray, could drastically affect my coffee’s quality and my health. A simple habit of neglecting regular cleaning led me to learn that mold and bacteria thrive in dark, damp spaces, reminding me that every part of my machine deserves attention. This experience taught me that mastering home espresso isn’t just about fancy beans or high-end machines but about understanding and maintaining each component meticulously.
3 Myths About Coffee Gear That Held Me Back
For a long time, I believed that expensive espresso machines guaranteed perfect shots, but I discovered that routine maintenance and calibration are far more critical. I also thought that a powerful milk frother would make better microfoam—turns out, technique trumps wattage. Lastly, I used to underestimate how much environmental factors like humidity could affect grinder performance. Busting these myths helped me optimize my setup without constantly chasing upgrades, demonstrating that knowledge and care are key to great coffee.
What Experts Won’t Tell You About Home Espresso Perfection
One subtle insight from seasoned baristas is the importance of precise burr alignment and consistent cleaning routines. They emphasize that understanding your equipment’s quirks—like how slight misalignments can cause uneven extraction—is vital. Adopting tools like a burr alignment laser or a water quality tester ensures your gear performs at its best. This behind-the-scenes knowledge transforms your approach from guesswork to craftsmanship, making every shot a step closer to coffee shop quality.
Resources That Changed How I Approach Home Brewing
My favorite starting point was investing in a quality burr grinder and purchasing a burr alignment tool, which drastically improved consistency. The [guide on choosing the best barista gear](https://espressotechguide.com/choosing-the-best-barista-gear-for-coffee-enthusiasts) helped me understand that understanding equipment capabilities and limitations makes a real difference. Additionally, books like “The Home Barista” opened my eyes to advanced brewing techniques, elevating my daily routine. Lastly, trusted online resources and community forums provide ongoing advice and troubleshooting tips that keep my skills sharp and my machine running smoothly.
Rise to the Challenge: Your Best Coffee Awaits
Remember, truly mastering home espresso requires patience, curiosity, and a willingness to learn from every shot. With careful maintenance and a passion for small improvements, your coffee experience can become truly exceptional. Embrace the process, and you’ll find that each cup not only energizes your day but also becomes a source of personal pride and joy. Now’s the perfect time to take charge of your coffee journey—your future self will thank you for every effort and every perfect espresso shot.