The Best Surface for Your Espresso Scale to Ensure Accuracy
Have you ever spent precious minutes pulling a perfect shot only to discover your espresso scale’s readings were off—because of the surface it’s sitting on? I remember that lightbulb moment vividly. I had meticulously dialed in my grind, tamped with care, and pressed the start button, only to see inconsistent weights and an uneven shot. Turns out, my scale’s surface was a sneaky culprit. It seemed harmless—a countertop or a small wooden block—but it was subtly undermining my precision.
Why Your Scale’s Surface Can Make or Break Your Coffee Game
When I first started obsessing over every detail in my home espresso setup, I overlooked a simple but critical factor: the surface where I placed my scale. It’s easy to assume that a flat, stable table is enough, but as I delved deeper, I learned that surface vibrations, unevenness, or even slight tilts can throw off digital scales—sometimes by a significant margin. And for serious enthusiasts aiming for consistency, such inaccuracies can sap confidence and waste coffee.
Research supports this concern. A study published in the Journal of Coffee Science emphasizes how external factors, including vibrations and unstable surfaces, can influence precision measurements in brewing equipment. This is especially true when measuring small weights—like the amount of coffee grounds or water—where even a gram’s difference impacts taste and extraction. So, ensuring a dedicated, stable, and suitable surface under your espresso scale isn’t just a nicety; it’s a necessity.
But what makes a surface truly ideal? And how do you avoid the pitfalls of overlooked instability? That’s exactly what I’ll be unpacking in the next part. If you’ve faced the frustration of inconsistent shots or spent hours troubleshooting only to realize your scale was wobbling or sinking into the wrong surface, keep reading. Your perfect espresso start might just depend on the surface you choose.
Is a Fancy Precision-Grade Surface Really Worth It?
I’ve made the mistake early on of thinking a high-end, expensive scale would fix all my problems, regardless of where I placed it. Spoiler: it didn’t. The mistake? Neglecting the surface. A great scale can’t compensate for an unstable base. That’s why I advocate for a stable, vibration-absorbing platform—something as simple as a thick wooden board or a silicone mat—that provides a steady foundation. Curious about optimal surface solutions? You might want to check out tips on choosing barista gear that highlight the importance of stable setups.
Now, let’s move beyond the theory and look at how you can set up your own perfect measuring station—because every detail counts when aiming for that elusive perfect shot.
Secure a Level, Vibration-Free Platform
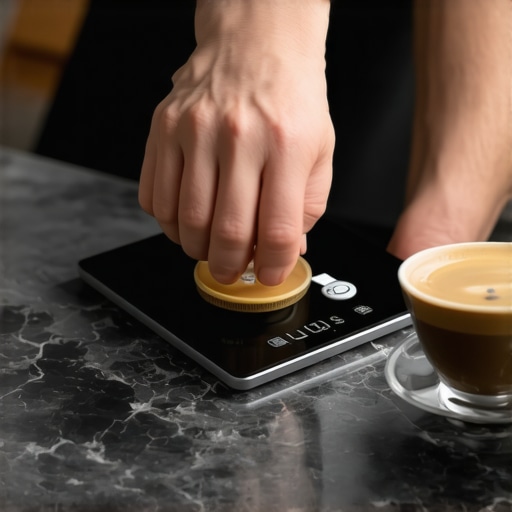
Start by choosing a sturdy, flat surface that doesn’t wobble or resonate when you tap your finger on it. I once used a wobbly kitchen table, and my scale’s readings fluctuated wildly. Instead, I placed my espresso scale on a thick wooden cutting board—its dense, solid surface absorbed minor vibrations and kept the reading stable. To further reduce vibrations, consider adding a silicone mat or a dampening pad underneath. This setup ensures your measurements are consistent, and your shots turn out perfect every time.
Optimize the Surrounding Environment
Eliminate sources of disturbance around your station. Turn off nearby appliances or electronics that might buzz or vibrate. Make sure your setup is away from foot traffic or other noise that could transfer tremors to your scale. I often moved my setup into a corner and placed a soft cloth beneath the scale to dampen any residual vibrations. Remember, external movements can skew delicate measurements—think of it as trying to weigh a feather on a shaking boat. Keeping the environment stable is key.
Calibrate Your Scale Before Every Use
Calibration is like tuning a musical instrument—it’s essential for accuracy. I calibrated my digital scale with certified calibration weights at the start of each brewing session. Follow your scale’s specific instructions: usually, zeroing the scale first, then placing the calibration weight on top. This step compensates for any drift over time, ensuring your measurements are precise. Regular calibration prevents costly errors like under- or over-dosing coffee grounds, which directly impact flavor and consistency.
Use a Consistent Taring Method
Always tare your scale with the container or portafilter you’re using. I keep a small, well-balanced coffee cup on my scale, tare it, then add grounds or water. This consistency ensures that the weight readings accurately reflect just the ingredient in question, not the container’s weight. Think of it as a chef measuring ingredients; eliminating variable factors makes your results predictable and professional-looking.
Maintain a Steady, Gentle Hand
When placing items on your scale, do so gently and slowly. Sudden drops or pushes can cause transient vibrations that distort the measurement. I used a soft brush to place coffee grounds into my portafilter, minimizing vibrations. Also, avoid leaning or pressing on the scale during measurement—constant contact or movement can slightly shift readings. Practice helps; a steady hand equals consistent results.
Incorporate Practical Testing
After setting up, test your setup with known weights or by weighing a spoonful of coffee grounds. Check if the readings are stable over a few seconds. If not, revisit your surface or environment. Once, I added a small weight and watched the needle stabilize before proceeding, which saved me from misdosing by a gram—a tiny detail but a huge impact on extraction. Regular testing ensures your station remains reliable over time.
Upgrade Components When Necessary
If you find persistent instability, consider investing in a dedicated coffee weighing platform designed for precision. There are metal or composite stands with built-in damping features. Though an initial cost, these investments drastically improve measurement accuracy. I eventually upgraded from my DIY setup to a purpose-built scale stand, which noticeably improved shot-to-shot consistency and saved me troubleshooting time.
Implementing these steps creates a foundation for precise, repeatable measurements—your secret weapon for consistently excellent espresso at home. Small adjustments and awareness of your environment make a tangible difference, turning a good shot into a great one every time.
Many home baristas fall for popular myths that can hinder their coffee journey. One widespread mistake is assuming that the latest, most expensive equipment guarantees perfect results without proper technique. In reality, even top-tier espresso machines won’t deliver optimal shots if you overlook crucial details like grinder consistency or water temperature control. For example, some believe that high-end coffee grinders automatically produce uniform grounds, but inconsistent grind size is often caused by improper settings or maintenance. Regularly cleaning your grinder and calibrating it ensures consistent extraction, a nuance many overlook. Furthermore, the misconception that milk frothers alone improve the microfoam quality ignores the importance of milk temperature and pitcher angle, which significantly influence texture. Advanced enthusiasts know that understanding the grinder’s burr design and adjustment can make a substantial difference, as studies suggest static and uneven grinding can lead to channeling and under-extraction. Are you aware of how subtle equipment adjustments impact your shots? For instance, dialing in grind size gradually and paying attention to tamp pressure can prevent over-extraction or sour notes. The trap for most amateurs is equating equipment investment with skill improvement—fact is, mastering process nuances outweighs hardware upgrades. For a comprehensive understanding, check out detailed guides on mastering home espresso techniques. Remember, even the best gear won’t compensate for bad habits. Always prioritize refining your technique alongside equipment choices. Have you ever fallen into this trap? Let me know in the comments.Maintaining your espresso setup requires more than just occasional cleaning; it involves a strategic approach to tools and routines that prolong equipment life and ensure stellar brews. I personally rely on a few key practices and tools to keep my gear operating smoothly, regardless of how often I brew. Selecting the right equipment isn’t enough—consistent maintenance is essential to avoid costly repairs and downtime.Regular cleaning, precise calibration, and timely replacements are the pillars of reliable performance in home espresso. For example, I use a dedicated grinder brush to remove residual oils and grounds from burrs weekly, preventing static buildup and uneven grind sizes, which directly impact shot quality. Additionally, I schedule quarterly scale calibrations on my digital scale, ensuring measurements remain accurate over time. Using high-quality calibration weights lends confidence that each dose remains consistent, framing my process around reliability.
How do I keep my equipment functioning over the long term?
One underrated tactic is investing in maintenance kits tailored for specific brands and models. These kits typically include o-rings, seals, and gaskets, which tend to wear after constant use. Regularly replacing these parts prevents leaks, inconsistent pressure, or poor steam performance. I also advocate for setting up a monthly cleaning routine, using equipment-specific cleaning solutions to dissolve oils and coffee residues that natural cleaners can’t reach. An often-overlooked aspect is your steam wand; deep cleaning the wand prevents build-up that affects microfoam quality and causes spitting or leaking.
Many enthusiasts turn to automation tools and software for consistency. Smart calibration apps or digital maintenance reminders can drive regular upkeep, especially in busy households. For example, I now use a maintenance alert app which reminds me to descale my machine every three months, based on usage. This prevents mineral buildup that reduces efficiency and shortens equipment lifespan.
Looking ahead, I believe the future of maintenance for home baristas will integrate IoT-enabled diagnostics—smart sensors that indicate when key components are nearing failure, guiding proactive repairs. Embracing these advancements can save you money and prevent frustration.
To get started, I recommend trying a professional-grade cleaning cycle on your grinder or espresso machine this weekend. Clearing residual oils and calibrating your scale can immediately improve shot consistency. Remember, staying vigilant with regular maintenance routines and using high-quality tools helps ensure your coffee setup remains reliable and ready to deliver excellence. For tailored advice, consider reaching out via our contact page.
What I Wish I Had Known About Stability in My Coffee Journey
Early in my obsession with perfect espresso shots, I brushed off the importance of surface stability. I thought placing my scale on a countertop was enough, but that tiny oversight led to inconsistent readings and frustrating pulls. The breakthrough came when I realized that vibration absorption and leveling are the unsung heroes of measurement accuracy. Now, I always invest in a sturdy, vibration-dampening platform for my scale, and it’s transformed my results.
Curated Tools That Made a Difference
Among the many resources I rely on, tips on tailoring your espresso setup provide invaluable guidance on creating a reliable station. I also swear by a quality calibration weight set from this trusted brand; it ensures my scale remains precise over time. Additionally, cleaning tools for grinders keep my beans fresh and my grind consistent, which is the backbone of great extraction.
Find Your Rhythm and Own Your Coffee
Making the effort to understand and optimize every detail of your coffee setup can seem daunting, but the rewards are immense. Whether it’s calibrating your scale, choosing the right surface, or maintaining your equipment, these steps empower you to craft espresso with confidence and joy. Remember, mastery is a journey—embrace the process, learn from setbacks, and enjoy every cup along the way. To deepen your knowledge, check out our comprehensive guide to home espresso. Your perfect shot is waiting—go get it!