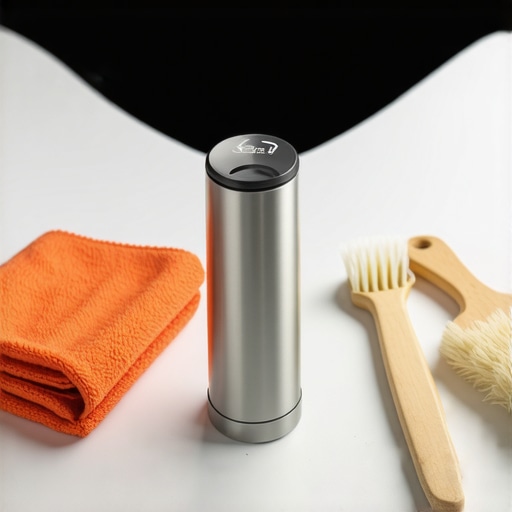
How to Deep Clean Your Manual Frother in Under Five Minutes
Ever had that disappointing moment when your perfectly steamed milk comes out gritty or with an off-taste, leaving you questioning if your equipment is secretly staging a revolt? I remember the first time I encountered this—after a weekend of indulgent coffee adventures, I pulled my trusty manual frother out of storage. To my frustration, it was clogged and squeaking like a rusty hinge. That lightbulb moment hit me hard: if I could clean this little beast quickly and thoroughly, I’d save time and avoid the dreaded compromised flavor.
Why Quick and Deep Cleaning of Your Frother is a Game Changer
If you’re like me, you probably dread the thought of spending precious brew time on complex cleaning routines. The truth is, neglecting your frother’s cleanliness can severely affect your coffee’s taste and texture. Residual milk fats and oils build up over time, causing sourness, bitterness, and microbial growth—definitely not the kind of enhancement you want in your daily cup. A recent study highlights that improperly cleaned frothing devices contribute to bacterial contamination, which can impact health and flavor alike.
But here’s the real kicker: most of us believe that deep cleaning takes ages—think scrubbing, soaking, and dismantling. Bullock! I discovered that with the right method, you can refresh your frother in under five minutes, keeping it pristine and ready for that perfect microfoam.
Is Deep Cleaning Your Frother Worth the Effort?
Honestly, I used to think regular rinses were enough. I’d give it a brief rinse, shake out the milk remnants, and call it a day. Early on, I made the mistake of overlooking stubborn milk oils, which accumulated silently in the crevices. That simple oversight turned my frother’s performance into a sluggish, squeaky mess—an easy fix that I learned the hard way. Trust me, dedicating just five minutes for a comprehensive clean not only preserves the quality of your milk frothing but also extends the lifespan of your gear.
In the following sections, I’ll share my go-to routine that’s simple, effective, and perfectly suits that busy home barista. Ready for some quick tips to transform your frothing game? Let’s go! And if you want to explore more about *best-rated espresso machines* or *tips for choosing the right barista gear*, I’ve got plenty of insights that can help elevate your whole coffee setup—just visit our [top-rated espresso machines for 2025](https://espressotechguide.com/top-rated-espresso-machines-for-coffee-lovers-in-2025) or check out [how to select the perfect coffee grinder](https://espressotechguide.com/how-to-select-the-perfect-coffee-grinder-for-your-brew).
Disassemble Your Milk Frother Carefully
Start by unplugging your frother to ensure safety. Gently remove the continuous frothing arm or any detachable parts, akin to taking apart a tiny machine. Use a soft brush or cloth to wipe away milk residue from accessible areas. If components are stuck, don’t force them; instead, soak them briefly in warm water with a dash of mild dish soap to loosen stubborn buildup.
Use a Natural Cleaning Solution for Stubborn Oils
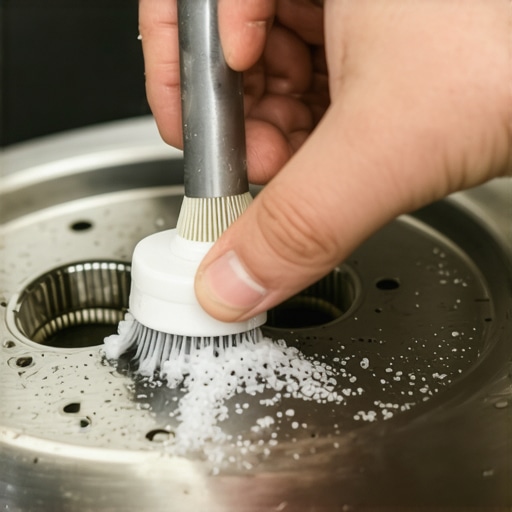
Prepare a mixture of equal parts white vinegar and water. Dip a soft cloth or sponge into this solution and wipe the interior and exterior surfaces of your frother. This method is effective because vinegar’s acidity dissolves milk fats and oils without damaging delicate parts. For crevices and small holes, a soft-bristled toothbrush dipped in the same solution works wonders. This is comparable to cleaning a coffee grinder’s burrs with a gentle brush to remove residual oils.
Brushing Is Key
Pay special attention to the frother’s nozzle and internal tube, where milk oils tend to hide. Use a pipe cleaner or a small brush to scrub these areas thoroughly. Remember, the goal is to dislodge dried, baked-on milk residues that can clog your device over time. Think of it as clearing out a tiny chimney—meticulous, gentle, and effective.
Rinse and Reassemble To Prevent Residual Smells
After cleaning, rinse all parts with warm water to remove vinegar traces. Ensure no soap or vinegar remains, as these can alter your milk’s taste or cause foaming issues. Use a clean cloth to dry all parts thoroughly. Once everything is dry, reassemble your frother carefully, ensuring all components click into place securely. This step prevents leaks and ensures optimal performance on your next use.
Test Your Frother with Plain Water
Before frothing milk again, fill your device with plain water and run a quick cycle. Check for any leaks or unusual noises. If everything is smooth, your cleaning routine is successful. This process acts as a flush, removing any lingering residues and confirming the appliance is ready for perfect microfoam. This simple step boosted my confidence, especially after a messy clean-up that yielded silky results afterward.
Regular Maintenance Saves Time and Enhances Flavor
In my experience, establishing a routine—cleaning your frother thoroughly at least once a week—prevents buildup and maintains flavor integrity. Think of it as giving your gear a health check; a few minutes of proactive care ward off longer, messier fixes later. For more tips tailored to home espresso success, check out mastering home espresso or explore our guides on milk frothers that elevate your brew.While mastering the basics of home coffee setup is essential, many enthusiasts overlook the nuanced intricacies that truly elevate their brews. A common misconception is that buying the most expensive equipment automatically guarantees barista-level results. In reality, even premium machines can underperform if not properly maintained or calibrated, highlighting the importance of understanding the subtleties of each component. For instance, some believe that grinding coffee finer always results in richer flavor, but overfilling the basket or using an overly fine grind can cause over-extraction and bitter tastes—sometimes, less is more in the grind size. A frequent trap is neglecting the importance of proper tamping pressure; applying uneven or excessive force can lead to channeling, which compromises extraction consistency. According to research published in the Journal of Coffee Science, consistent tamping pressure within a narrow range significantly improves shot uniformity. Moreover, many assume that all grinders are equal, but flat burrs typically produce less static and more uniform grounds than conical burrs, especially with darker roasts, which can clog or static-charge lesser models. Seeking out insights from **[the best-rated espresso machines for 2025](https://espressotechguide.com/top-rated-espresso-machines-for-coffee-lovers-in-2025)** or **[tips for choosing the perfect coffee grinder](https://espressotechguide.com/how-to-select-the-perfect-coffee-grinder-for-your-brew)** can prevent costly mistakes. Additionally, understanding the science behind extraction—such as how to optimize water temperature and flow—can dramatically improve flavor clarity. For example, brewing at precisely 92–96°C ensures optimal extraction of aromatic compounds while avoiding over-extraction bitterness. Keep in mind that even the most down-to-earth equipment can suffer from overlooked issues—like scale buildup or worn seals—that subtly degrade quality. Regularly cleaning your gear and replacing worn parts can be the difference between a mediocre shot and a stellar one. Remember, every detail counts in the quest for perfect espresso. Finally, incorporating advanced troubleshooting, like checking pressure stats or flow rates, can unlock hidden potential in your setup. For an in-depth guide, visit **[mastering the art of home espresso](https://espressotechguide.com/mastering-the-art-of-home-espresso-tips-for-beginners)**. Have you ever fallen into this trap? Let me know in the comments.Maintaining your home espresso setup isn’t just about buying the right gear—it’s about adopting practices and using tools that ensure consistent performance over time. One tool I swear by is a high-quality digital calibration scale, like the **Acaia Lunar**, which I use to dial in my shots precisely and monitor any drift in grind size or tamping force. Regular calibration with such scales helps me catch subtle changes early, preventing flavor degradation and equipment strain. Additionally, a dedicated cleaning brush set—specifically designed for espresso parts—has become indispensable. I prefer brushes with stiff yet gentle bristles to scrub portafilter baskets and group heads without damage, saving me costly repairs and ensuring optimal extraction.
Speaking of maintenance, I highly recommend implementing a scheduled cleaning routine that aligns with your usage frequency. For example, a monthly deep clean of your **espresso machine’s group head** and **brew pathway** prevents scale build-up and bacteria growth, which can silently ruin your coffee. Remember, even the best machines won’t perform at their peak without regular upkeep, much like a fine instrument.
Looking ahead, I believe the trend in home barista gear will tilt even more toward automation and sensor integration. Machines with smart diagnostics can alert you to descaling needs or worn seals before problems become noticeable. Investing in tools that provide real-time feedback, like the **Barista Mat** that tracks tamping consistency, can elevate your brewing discipline and keep your setup in top shape.
How do I maintain my coffee tools and equipment over time?
Regularly inspect and clean your **grinder burrs**—using a method I detail in [how to clean a grinder after using flavored beans](https://espressotechguide.com/the-best-way-to-clean-a-grinder-after-using-flavored-coffee-beans)—to prevent residual oils from tainting new beans. Replace worn seals and gaskets proactively; for example, my **steam wand seal** was causing inconsistent frothing, and I caught it early by following maintenance tips from [why your milk is getting too hot before foaming](https://espressotechguide.com/the-real-reason-your-milk-is-getting-too-hot-before-it-foams). Finally, keep a log of your adjustments and maintenance schedule—this helps in identifying patterns and planning future upgrades.
Don’t overlook the power of simple tools like a microfiber cloth for wiping down surfaces and a silicone gasket scraper for stubborn residue. These small investments pay off in longevity and flavor clarity. As I experiment with implementing Bluetooth-enabled sensors in my machine, I predict smarter, connected home espresso setups will become standard, making maintenance even easier and more precise. To integrate these tips into your routine, try calibrating your grinder with a digital scale and note the improvements in shot consistency—you’ll thank yourself during those early morning pulls! For more comprehensive advice on selecting the perfect barista gear to complement your maintenance efforts, visit [choosing the best barista gear for coffee enthusiasts](https://espressotechguide.com/choosing-the-best-barista-gear-for-coffee-enthusiasts). Keeping your tools in tip-top shape is ultimately the key to long-term brewing joy.
Over the years, I’ve realized that the true secret to consistently brewing exceptional espresso and frothed milk isn’t just about choosing the right grinder or machine—it’s about maintaining those tools meticulously. A clean, well-kept setup transforms your coffee from good to extraordinary, unlocking flavors and textures that can’t be mimicked with shortcuts or neglected routines.
Lessons That Changed My Home Barista Journey
- One-size-fits-all cleaning routines don’t exist: I used to believe rinsing was enough, but deep cleaning my grinder and espresso machine components revealed hidden flavors and prevented frequent clogs. The lightbulb moment came after I started paying closer attention to residual oils and mineral buildup, significantly improving my shot quality.
- Quick maintenance saves time—and taste: I discovered that dedicating just five minutes weekly to thorough cleaning, including disassembling parts and using vinegar solutions, keeps my equipment running smoothly without sacrificing flavor or durability. This routine prevented me from wasting beans or pulling flat, bitter shots in the mornings.
- Small details have a big impact: Properly wiping down steam wands and regularly inspecting seals and gaskets kept leaks and sour odors at bay, ensuring my milk frothing remains silky and clean. The subtle difference in cleanliness translated into confident, consistent performance every time I brewed.
- Personalized approach beats generic advice: Experimenting with cleaning frequencies based on my usage prevented unnecessary wear and tear, demonstrating that understanding your specific gear is invaluable. A little patience and curiosity in maintenance can unlock new levels of espresso flavor.
Tools and Resources That Make Every Brew Count
- Deep-clean brushes: My go-to for scrubbing grinder burrs and keep static and residual oils at bay, essential for consistency.
- Accurate calibration scales: They help me monitor grind adjustments and tamping uniformity, ensuring each shot is dialed in perfectly.
- Cleaning solutions and descalers: Natural vinegar mixes have been surprisingly effective without harsh chemicals, making maintenance both safe and affordable.
- Reputable equipment guides: Resources that help me stay informed about upgrades and replacements, keeping my setup performing like new.
Keep Your Passion Alive: Practice and Enjoyment
Embarking on a journey to master your home espresso doesn’t need to feel overwhelming. By integrating simple, consistent cleaning routines and leveraging trusted tools, you’ll find that each cup becomes an act of daily celebration. Remember, real progress comes from paying attention to the tiniest details—those are the moments that turn good coffee into a memorable experience.
So, are you ready to give your espresso setup the care it deserves? Your perfect cup awaits with just a few mindful steps each week. Don’t wait—start today, and watch your skills—and your flavor profile—thrive.
Got a cleaning tip or tool that revolutionized your brewing? Share your experience below—I’d love to learn from your journey!
,