Why Putting a Commercial Grinder in Your Kitchen is Usually a Mistake
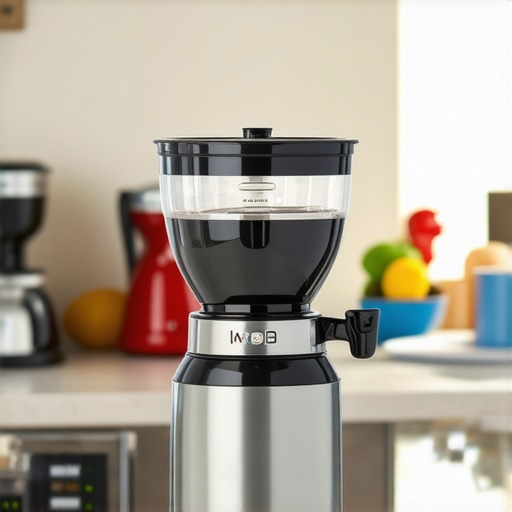
I remember the moment clearly—leaning over my kitchen counter, staring at a shiny, massive commercial grinder that was almost taller than me. I had just spent a fortune on it, dreaming of café-quality coffee every morning. But instead of the perfect grounds I envisioned, I faced a frustrating reality: jammed burrs, inconsistent grind size, and a surprisingly hefty noise that seemed to echo loudly in my small kitchen. That lightbulb moment made me realize something crucial—high-end, commercial-grade equipment often doesn’t translate well into home settings.
The Hidden Challenges of Commercial Coffee Grinders in a Home Kitchen
Doing the research, I stumbled upon a startling fact: many commercial grinders are designed for continuous, heavy-duty use and can overwhelm the delicate balance of a home setup. They often require more space, power, and maintenance than most of us anticipate. Plus, their settings are tuned for large-volume coffee production, which can actually hinder your ability to dial in perfect shots when brewing in smaller quantities.
If you’ve ever grappling with inconsistent grind size or static clinging to your coffee grounds, you’re not alone. My early mistake was ignoring the practical differences between commercial and home grinders. I assumed that bigger and more expensive meant better, but that’s not always the case. Instead, such equipment can introduce new hurdles, like static buildup or difficulty in achieving precise adjustments.
The good news? Recognizing these challenges is the first step towards a more reliable, hassle-free home brewing experience. Today, I’ll share some insights into why a commercial grinder might not be your perfect match and how to choose equipment that aligns better with your home coffee ambitions.
Is the Hype About Commercial Grinders Really Justified?
Many coffee enthusiasts, inspired by barista-level results, fall into the trap of believing that investing in a commercial grinder is the ultimate upgrade. I did, too. But I learned that such machines often require a specific environment—like proper ventilation, ample space, and technical know-how—that many home setups simply can’t provide. Additionally, a mistake I made early on was neglecting to understand the impact of static and grind retention, which can sabotage consistency, especially with lighter roasts. If you’re curious about how to avoid these pitfalls, check out [this guide](https://espressotechguide.com/why-multi-modal-burrs-crush-flat-burrs-for-2026-light-roasts) for tips on optimizing grind quality.
In the next sections, I’ll walk you through practical alternatives and solutions that can elevate your brewing without the unnecessary hassles of a commercial grinder. Are you tired of battling inconsistent pours and static cling? Let’s explore how to set up a coffee station that’s actually enjoyable and reliable.
Optimize Your Grinder Settings for Consistency
Start by dialing in your grinder precisely. Use a scale to measure your grind size and adjust incrementally, testing with small shots until you reach the ideal extraction time. Remember, static can cause grounds to stick and clog, so consider implementing [this RDT hack](https://espressotechguide.com/fix-your-grinder-static-this-2026-rdt-hack-still-works-best-2) to reduce static cling. Applying steady, even pressure during tamping ensures uniform density, leading to consistent shots every time. I vividly recall a morning when I spent 15 minutes adjusting my grinder, ultimately achieving a shot that was bright, clear, and balanced—proof that precision pays off.
Maintain Your Equipment Regularly for Peak Performance
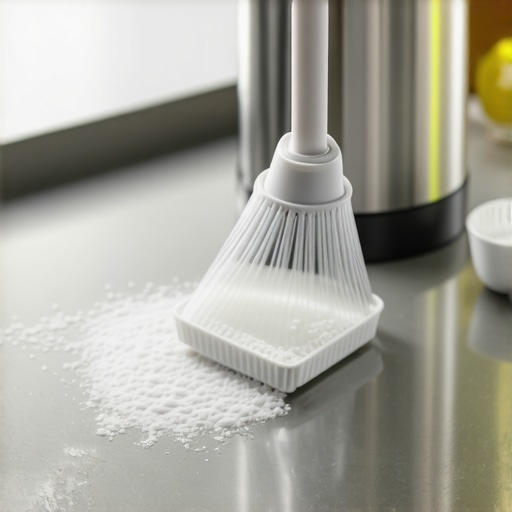
Cleaning your espresso machine’s group head and grinder burrs regularly is crucial. Use a burr cleaning brush to remove residual coffee oils, which can taint flavors. Implement a weekly descaling routine, especially in hard water areas, and consider [flushing the circuit](https://espressotechguide.com/why-your-2026-machine-needs-10-minutes-for-thermal-recovery-2) after long brews to prevent thermal lag. During a busy weekend, I dedicated 10 minutes to descaling, noticing a marked improvement in temperature stability and shot clarity. Don’t forget to inspect your grinder’s steel or ceramic burrs; if they show signs of wear, replace them with [DLC-coated options](https://espressotechguide.com/why-dlc-coated-burrs-outlast-titanium-for-2026-light-roasts) for enhanced longevity.
Perfect Your Milk Frothing Technique
Achieve silky microfoam by positioning the steam wand just below the milk surface. Start with cold, fresh milk, and slowly introduce steam, creating a gentle vortex—similar to stirring a thick batter—until the milk thickens slightly and reaches about 150°F. I once attempted to steam almond milk, which often scorched easily; by adjusting my wand position and waiting for the thermal stable period, I prevented scorching and achieved velvety foam. For faster cleanup, use a quick swish with a damp cloth to wipe the wand tip immediately after steaming, avoiding milk buildup. Remember, stale or oxidized milk will sabotage your efforts, so always use fresh ingredients. For better heat management, consider [adding a 10-minute thermal recovery period](https://espressotechguide.com/why-your-2026-machine-needs-10-minutes-for-thermal-recovery-2) between brewing sessions, maintaining consistent steam pressure.
Tune Your Espresso Extraction for Light Roasts
Light roasts demand precise calibration. Adjust your grind coarser or finer based on taste; if your shot is sour, try a finer grind—if bitter, go coarser. Use a timer to aim for a shot duration of 25-30 seconds. When working with ultra-light roasts, consult [these tips](https://espressotechguide.com/7-pro-tips-to-dial-in-2026-ultra-light-roasts-without-choking) for ideal parameters. During my test run with a new batch, I tweaked the pressure profile, resulting in a shot that preserved delicate brightness without excessive acidity. Incorporate a pre-infusion step to gently saturate the puck, enhancing extraction uniformity. Regularly check and calibrate your PID controller using [these methods](https://espressotechguide.com/is-your-2026-pid-controller-lying-3-ways-to-check) for temperature stability, ensuring each shot meets the desired profile. Proper calibration minimizes variability, especially in the complex realm of light roasts, making every sip consistent and delightful.Many coffee enthusiasts believe that acquiring high-end barista gear automatically guarantees expert-level results, but in reality, most people overlook critical nuances that can undermine their brewing. For example, a common myth is that a more expensive espresso machine always produces better shots. While price can reflect build quality, it doesn’t always translate into consistent extraction without proper calibration and understanding of its quirks. In fact, many high-end machines require specific maintenance routines, like regular thermal recovery cycles, to perform optimally, which beginners often neglect.
Are Your Machines Actually Calibrated for Light Roasts?
Light roasts demand a precision that many home setups struggle with, largely because grinders are often misaligned or their burrs haven’t been broken in correctly. An overlooked detail is the importance of using multi-modal burrs to crush flat burrs for delicate light roasts, ensuring even extraction and vibrant flavors. A mistake that many make is relying solely on factory settings or neglecting to re-calibrate after minor grinder adjustments, leading to uneven grind size and inconsistent shots.
Another trap is underestimating static buildup, which causes grounds to cling to burrs and portafilter, complicating dosing and tamping. The RDT hack can significantly reduce static, but many beginners never learn about it, resulting in inconsistent dosing and channeling issues. This often leads to wasted beans and frustration, despite investing in top-tier equipment.
Espresso machines with digital PID controllers offer precise temperature control, but only if properly calibrated. The misconception is that setting the temperature once is enough. In practice, regular calibration ensures stable shot quality, especially when brewing multiple drinks in succession or when ambient temperatures fluctuate. Ignoring these details means your brew temperature could drift, resulting in sour or bitter shots.
One often-overlooked aspect is milk frothing—people assume bigger steam boilers or fancy wands inherently produce better microfoam. But, mastering techniques like positioning the wand just below the milk surface and applying a vortex are key to silky microfoam, regardless of machine complexity. Improper steaming can lead to scorching or flat foam, wasting time and milk. ” alt=”Barista steaming milk with professional technique” title=”Mastering Milk Frothing”/> Most importantly, home baristas ideally pay attention to equipment maintenance. Replacing worn-out burrs with DLC-coated burrs extends grinder lifespan and preserves flavor clarity, especially with light roasts. Neglecting routine cleaning and calibration may actually diminish the advantage of high-end gear.
In the end, achieving expert-level home coffee isn’t just about gear—it’s about understanding how each element interacts, calibrating carefully, and avoiding common traps like static, misalignment, and neglecting maintenance. Do you think you’ve fallen into any of these pitfalls? Let me know in the comments!Maintaining your home coffee setup is essential for reliable, high-quality brews. First, regularly clean your grinder burrs using a DLC-coated burrs or ceramic options to prevent flavor contamination and minimize static buildup. Schedule a weekly descaling of your espresso machine to remove mineral deposits and ensure temperature stability, which is critical for light roasts. Implement a routine thermal recovery period, as outlined in this guide, to allow your machine to stabilize after long pulls, especially in low ambient temperatures. Use a dedicated drip tray hack to keep your workspace tidy and prevent moisture accumulation, which can cause internal corrosion over time.
Invest in a high-quality
cleaning brush and a precision pressure calibrator to verify your espresso machine’s temperature and pressure settings, ensuring consistency shot after shot. Regularly inspect and replace worn parts, such as seals and gaskets, based on manufacturer recommendations, to avoid leaks and pressure drops that compromise extraction quality. Lastly, consider using a precision dosing scale to measure grind amounts accurately, preventing over- or under-extraction.
Looking ahead, smart maintenance tools with IoT capabilities might revolutionize how we care for our equipment, providing real-time alerts for calibration needs or descaling schedules. For now, setting up a disciplined routine with these specific tools will keep your gear performing at its best. Try incorporating a weekly burr cleaning with a DLC-coated tool and observe how your shot clarity improves over time—small adjustments can lead to significant long-term gains.
What I Wish Someone Told Me When I Started Brewing
One of the most eye-opening lessons was realizing that my quest for perfection often led me to overlook simple, yet crucial details—like keeping my grinder burrs clean or calibrating my machine regularly. Sometimes, the tiniest adjustments—like reducing static with an RDT hack—made the biggest difference in shot consistency. Embracing patience over haste taught me to trust the process, not just the gear.
Why Rushing Leads to Missed Flavors
Initially, I believed that upgrading to high-end equipment automatically improved my brew. But I discovered that rushing calibration or neglecting regular maintenance, like thermal recovery routines, often caused more harm than good. Slow, deliberate adjustments unlocked the nuanced flavors that a quick shot could never reproduce, especially with delicate light roasts.
Go Beyond the Basic: Personal Hacks That Worked for Me
Experimenting with stage-wise tamping, or trying different grind profiles, revealed hidden layers of flavor—particularly with light roasts. I also learned to trust my sensory cues over preset parameters, such as adjusting the grind based on taste rather than time alone. These small personal tweaks elevated my espresso from decent to truly exceptional and empowered me to understand my equipment deeply.
Resources That Elevated My Coffee Game
- Espresso Tech Guide: A treasure trove for understanding complex machine behaviors, like thermal stability and maintenance routines. I trust their insights because they’re thorough and practical.
- Specialty Coffee Association: Their technical courses and guides shaped my understanding of light roast extraction and grind calibration. The quality of their content is unmatched for home enthusiasts seeking professional-level knowledge.
- Lab-grade scales and calibration tools: Investing in precise tools, such as a dosing scale, made me more consistent and confident in my recipes. They’re like my personal barista assistants.
Keep Pushing Boundaries: Your Coffee Journey Awaits
Mastering home espresso isn’t about instant results—it’s about continuous improvement, curiosity, and embracing the learning curve. Every adjustment, every tweak, brings you closer to that perfect shot you once thought was out of reach. The journey is as rewarding as the coffee itself, so stay curious and never settle for anything less than your best. Have you ever experienced a breakthrough after a small change in your setup? Share your story in the comments below!