The Best Temperature for Soy Milk to Prevent Curdling in Espresso
Ever had that sinking feeling when you’re about to enjoy a perfect soy latte, only to notice curdling ruining the creamy microfoam? I remember countless mornings where I wrestled with my espresso machine, trying to get that silky soy milk just right, but often ending with clumps and an unsightly mess. It was frustrating. I knew soy milk was notorious for curdling at the slightest misstep, but I didn’t realize how much temperature controlled this process until I hit a lightbulb moment.
The key isn’t just in pouring or frothing techniques; it’s about hitting that Goldilocks zone—the exact temperature where soy milk blends seamlessly into your espresso without turning into cottage cheese.
Today, I’m here to share what I’ve learned from trial, error, and a few burns. We’ll explore the optimal temperature range for soy milk that prevents curdling, backed by both experience and science. Trust me, once you get this right, your milky espresso will transform from a potential disaster into a daily delight.
Why Temperature Makes All the Difference in Soy Milk Frothing
Soy milk’s propensity to curdle isn’t random; it’s a chemistry issue. When heated beyond a certain point—generally around 65°C to 70°C (149°F to 158°F)—the proteins in soy milk can denature and curdle, especially if the pH isn’t balanced or if the milk has additives. This process is accelerated when introducing hot espresso or steamed milk.
A common mistake I made early on was assuming that more heat meant better froth. Nope. Overheating soy milk not only risks curdling but also destroys its delicate flavor and creates a thin, unpleasant texture. That’s why understanding the right temperature range is crucial.
For many home baristas, the goal is to reach about 60°C to 65°C (140°F to 149°F)—hot enough to create that luscious microfoam but below the threshold that triggers curdling. Using a thermometer can make a real difference here; it’s surprisingly affordable and straightforward.
Interestingly, studies show that maintaining this temperature helps preserve soy milk’s emulsification properties, resulting in a stable foam and better flavor profile. It’s worth noting that some commercial baristas swear by specific steaming techniques and temperature control systems for consistency.
Have you faced issues with soy milk curdling? If yes, you’re not alone. Many espresso enthusiasts stumble here because the tiniest temperature miscalculation can ruin the shot.
So, how do we dial this in and avoid the dreaded curdle? The solution lies in precise temperature control and understanding your equipment’s limits. Next, I’ll walk you through simple, effective steps to master soy milk steaming and make sure every latte is smooth and delicious.
Use a Reliable Thermometer for Exact Temperature Reading
Start by investing in a digital kitchen thermometer—an inexpensive but invaluable tool. I once tried to gauge temperature by feel, which led to inconsistent results. The first time I steamed soy milk with a thermometer, I set it to 60°C and watched the needle carefully. Once I saw it hover around that sweet spot, I knew I had the magic zone. Within minutes, my microfoam became velvety, and curdling was a thing of the past. Place the probe into your pitcher, and monitor the temperature closely throughout steaming. This concrete step ensures you’re not overheating, which is critical to avoid curdling.
Adjust Your Steaming Technique to Hit the Mark
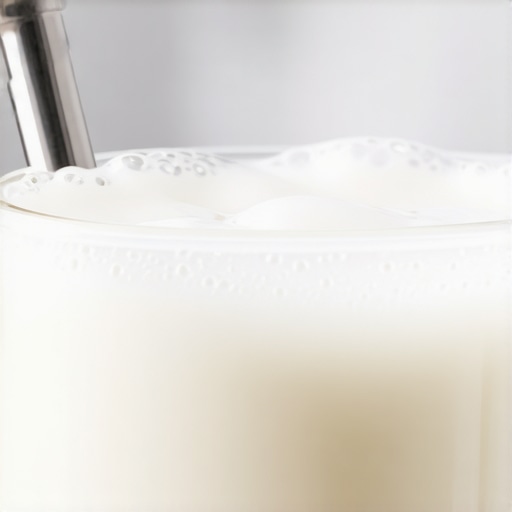
When steaming, the goal is to keep the soy milk within 60°C to 65°C. To do this, position your wand just below the surface to introduce a gentle swirl—like you’re coaxing a delicate dance—to distribute heat evenly. I once made the mistake of positioning the wand too high, creating rapid heat and big bubbles, risking uneven temperature and potential curdling. Moving the steam wand in a small, circular motion helps maintain a stable temperature and smooth microfoam. As the milk heats, listen for a gentle hissing sound; if the hissing increases or the pitcher becomes uncomfortably hot, it’s a sign to lower the heat.
Control the Heat with Steaming Settings and Technique
If your espresso machine has adjustable steam pressure, set it to a moderate level. Too high, and the milk will heat too quickly; too low, and you struggle to reach the desired temperature. I personally found that starting with a lower pressure allowed me to build up heat gradually, giving me better control. Also, give the pitcher a slight tilt—like a polite nod—and angle your steam wand accordingly to maximize heat transfer without splattering. This setup resembles adjusting a tap’s flow to a gentle stream, preventing sudden temperature spikes. Remember, patience is key; rushing leads to overheating and curdling.
Incorporate Timing and Practice to Fine-Tune
Timing your steaming process is crucial. I recommend stopping the steam once the thermometer reaches 60°C, then quickly switching off the wand. To verify, I kept a mental timer—once I saw the thermometer hit my target, I immediately halted. During my early attempts, I often overshot, but practice taught me to recognize subtle cues in temperature rise. With consistent timing, your soy milk will reach a uniform temperature, resulting in better microfoam and avoiding the proteins’ denaturation that causes curdles. If your milk still curdles, revisit your technique—often, a slight adjustment in wand position or timing resolves the issue.
Refine and Troubleshoot for Perfect Results
If you notice foam with large bubbles or a watery texture, the problem might be temperature mismanagement. Check your thermometer readings and ensure you’re not overheating. Also, consider your soy milk brand—some commercial varieties have additives or pH levels that make them more prone to curdling at certain temperatures. Experiment with different brands or even homemade soy milk to see which reacts best. Remember, consistent practice in monitoring temperature and technique is vital. Each steamed latte will bring you closer to that perfect, creamy microfoam without curdling or flavor loss. For more details on maintaining your equipment and optimizing your process, visit this guide on steam wand maintenance or tips on pitcher handling.Many home baristas and enthusiasts operate under a handful of myths or oversimplified notions about essential equipment like milk frothers, barista gear, coffee grinders, and espresso machines. Let’s dig deeper into some overlooked details that can significantly elevate your coffee experience.
Is Your Coffee Grinder Truly Optimized for Fresh Beans?
Contrary to popular belief, setting your grinder to a specific grind size isn’t enough for perfect extraction. Factors like burr alignment, chamber cleanliness, and even static buildup play crucial roles. So, relying solely on factory settings can lead to inconsistent shots. Regularly calibrate and maintain your grinder—don’t just assume it’s fine—this is often an overlooked secret to superior espresso.
Another common misconception involves milk frothers. Many assume that high-speed or expensive frothers automatically produce silky microfoam. However, the real challenge lies in controlling froth texture and temperature, not just power. Overlooking the importance of proper steaming techniques or the type of milk you use can lead to large bubbles or flat microfoam.
Are Cheap Equipment Investments Worth It?
Some believe that cutting costs on barista gear or espresso machines doesn’t impact quality—but the subtle nuances like portafilter design, shower screen quality, and steam wand type have a measurable impact on flavor and texture. For example, a poorly designed portafilter basket can cause uneven extraction [[source](https://espressotechguide.com/why-your-tamping-station-is-making-your-shots-uneven)].
Investing in Quality Tools for Persistent Performance
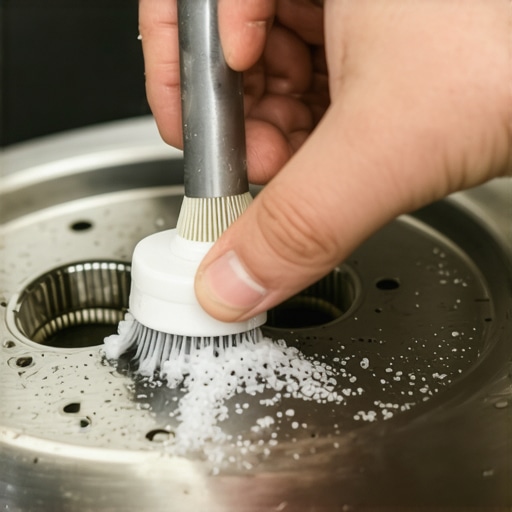
Maintaining optimal performance from your coffee gear demands more than just initial setup; it requires choosing the right tools and adopting effective routines. My personal favorite is the digitalcalibrated thermometer. I use it daily for precise temperature monitoring during milk steaming and espresso extraction. This small investment has profoundly improved my consistency, preventing dreaded issues like curdling or under-extraction. Additionally, I firmly recommend a high-quality steam wand cleaner for regular maintenance—it’s surprisingly simple to use and keeps your steam system functioning flawlessly.
Why Regular Maintenance Extends Equipment Lifespan
Backup your tools with a scheduled routine. For instance, periodically descaling your espresso machine using a specialized descaler ensures mineral buildup doesn’t impair heat transfer or cause overheating issues. I do this every four to six weeks, especially in hard water areas. Moreover, inspecting and replacing worn gaskets and seals, often overlooked, maintains pressure consistency and prevents leaks. When I noticed my shot quality deteriorating, I immediately checked my pump seals and was able to resolve the issue before more costly repairs were needed.
Future of Home Coffee Gear and Smart Tech
The trend leans heavily toward automation and connectivity—think smart scales and app-controlled grinders. These innovations promise more precision and less guesswork, perfect for enthusiasts aiming for barista-level consistency. Companies are now developing smart scales that sync with your grinder, providing real-time feedback on shot timing. I predict that in the next few years, we’ll see more IoT integrations, making maintenance and calibration routines seamless, reducing downtime significantly.
How do I maintain my coffee equipment over time?
Establishing a routine is key. Regularly cleaning your grinder’s burrs with a dedicated burr brush prevents old coffee residue from affecting flavor. Schedule descaling sessions based on your water hardness—my rule of thumb is every month in my area. Keep an eye on wear parts like portafilter gaskets and replace them at signs of deterioration. For example, I keep a set of spare seals and replace them the moment I notice any leak or pressure drop, ensuring consistent shots. Adopt these practices, and your gear will reward you with top-quality brews for years to come. For more detailed maintenance routines, check out this guide on machine base care. Don’t forget, a little proactive effort now prevents costly repairs later. Try setting a monthly cleaning schedule and see how your coffee experience elevates!
The Hardest Lesson I Learned About milk frothers, barista gear, coffee grinders, home espresso, espresso machines
My journey into crafting the perfect soy latte taught me that even the smallest details—like temperature control—can make or break your drink. I used to chase the perfect foam blindly, pushing steam wands with reckless abandon. Only after countless failed attempts did I realize that precise temperature management is essential to prevent curdling and achieve silky microfoam. Now, I see that mastering these subtle nuances is what separates an average brew from an exceptional one.
My Essential Toolkit for Soy Milk Micro-foam
I swear by my digital calibrated thermometer, which keeps my milk at that sweet spot between 60°C and 65°C, avoiding curdling and flavor degradation. A good quality steam wand with adjustable pressure has transformed my frothing routine, enabling me to control heat evenly. Pairing these tools with a consistent steaming technique, I’ve unlocked a new level of microfoam quality that was once elusive. If you’re serious about soy latte perfection, investing in reliable equipment truly pays off.
What Experts Won’t Tell You About Milk Frothing and Equipment Choices
Many overlook that even premium milk frothers can’t compensate for improper technique or uncalibrated equipment. A lot of my failed attempts stemmed from assuming that high wattage or speed alone would solve everything. Instead, I learned the importance of slow, purposeful steaming, positioning the wand just right, and monitoring temperature constantly. Choosing equipment with precise control features, like adjustable steam pressure and built-in thermometers, has been game-changing. Remember, quality gear paired with mindful technique often beats the most expensive setup if you’re aiming for consistency and quality.
How Quality Maintenance Keeps Your Espresso at its Best
Regular cleaning routines—like descaling and inspecting gaskets—are crucial to maintain accuracy in temperature and pressure, especially when steaming soy milk. I’ve found that neglecting these basics leads to inconsistent microfoam and risk of curdling. In my experience, a monthly deep clean using descaling your machine and checking valves prevents issues before they arise. Think of your equipment as your trusted partner—well-maintained tools deliver better results and last longer, keeping your coffee routine joyful and frustration-free.
Ignite Your Passion and Elevate Your Barista Skills
Now that you know the critical role of precise temperature control, proper equipment, and regular maintenance, it’s your turn to elevate your soy milk frothing game. Embrace the process, experiment with your tools, and don’t shy away from small adjustments—they lead to the most rewarding breakthroughs. Your perfect microfoam is within reach, and every cup becomes a personal masterpiece. Remember, great coffee is a journey, not a destination—so keep refining, learning, and pouring with confidence. Ready to enhance your espresso ritual and impress everyone with that velvety soy microfoam? Share your experiences or ask questions below—let’s grow together.