The Best Way to Clean a Moldy Water Tank Using Natural Ingredients
Ever opened your water reservoir and been hit with an unmistakable musty smell? I’ve been there. It’s that sinking realization that mold has taken hold, threatening the quality of your espresso and your health. That lightbulb moment hit me hard—how could something so vital be hiding such a mess?
Why a Moldy Water Tank Is More Than Just a Nasty Surprise
Most of us overlook the water tank, thinking it’s just an empty container. But neglecting its cleanliness can lead to mold buildup, which not only ruins your brew but can also pose health risks. I learned this the hard way when my once-crisp morning espresso started tasting off. Research shows that mold spores in water tanks can become airborne, potentially impacting respiratory health over time. That’s when I decided enough was enough. And the good news? You don’t need harsh chemicals or expensive cleaners to tackle it.
Is Using Natural Ingredients Really Effective for Cleaning?
Initially, I was skeptical. The idea of using natural ingredients to clean something as stubborn as mold? It sounded too good to be true. But I made a mistake early on—assuming store-bought cleaners were the only way to keep my water tank pristine. Turns out, proven natural options like vinegar and baking soda can do wonders, especially when paired with proper brushing and rinsing. I’ve found that these household staples are not only safe but also highly effective, and I’ll show you exactly how to use them.
Let’s face it—keeping your water tank clean isn’t glamorous, but neglect has consequences. Today, I’ll guide you through a simple, natural method that restores your tank’s purity without exposing yourself to harmful chemicals. Ready to reclaim your morning brew? Let’s dive into the step-by-step process that’s worked for me—and will work for you too.
Drain and Prepare Your Tank for Cleaning
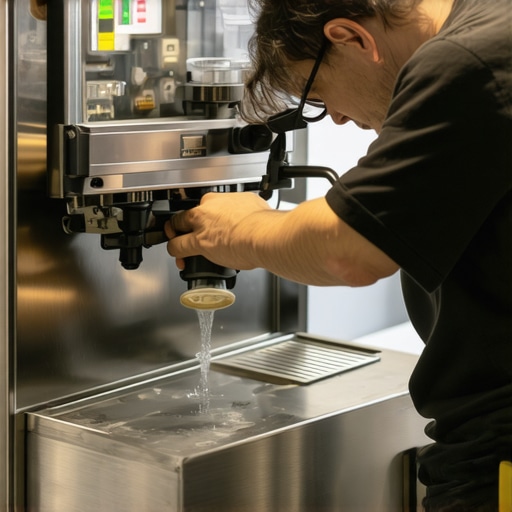
Start by turning off your water supply and unplugging the machine to ensure safety. Remove the water reservoir carefully, pouring out any remaining water into a sink. Use a soft cloth to wipe away any loose dirt or debris around the opening. For a thorough cleaning, fill the tank with a mixture of equal parts white vinegar and water—this natural solution is effective against mold without harsh chemicals. Let it sit for about 15 minutes to loosen mold spores and mineral deposits.
Scrub the Interior Gently for Deep Cleaning
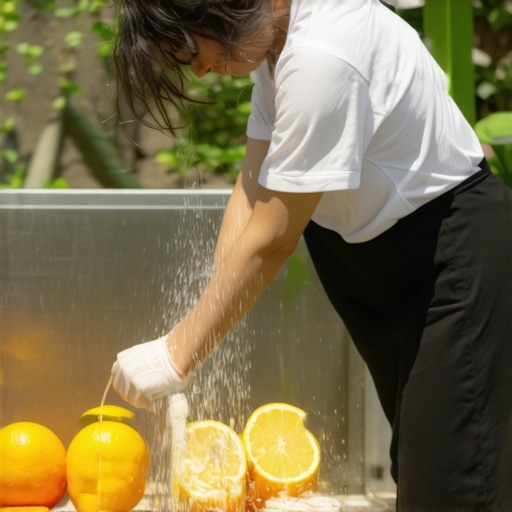
Using a soft-bristled brush or sponge, scrub the interior surfaces of the tank gently but thoroughly. Focus on corners and under the lid where mold tends to accumulate. I once spilled the vinegar solution overboard during my first attempt, causing a bit of a mess, but it underscored the importance of covering all areas. Rinse the tank multiple times with clean water to ensure all vinegar residue and loosened debris are washed away. If you notice persistent mold patches, repeat the vinegar soak and scrubbing process.
Use Baking Soda for Stubborn Spots
For stubborn mold or mineral buildup, sprinkle about a tablespoon of baking soda directly onto the affected areas before scrubbing. Baking soda naturally deodorizes and enhances the cleaning power of vinegar. After scrubbing, let it sit for a few minutes, then rinse thoroughly. This duo effectively removes odors and prevents mold regrowth.
Ensure Proper Drying for Future Prevention
Dry all parts of the reservoir completely with a clean towel or by air drying in a well-ventilated area. I once neglected this step, which led to mold reappearing within days. Consider leaving the lid off for a few hours to allow air circulation and moisture evaporation. Regularly inspecting and drying your tank can significantly reduce mold risk. Once dry, fill your tank with fresh, filtered water to get your espresso machine back in shape.
Maintain Your Water Tank with Routine Care
To prevent future mold growth, establish a routine cleaning schedule—every 1-2 weeks depending on usage. Use vinegar and baking soda periodically, and always dry the tank thoroughly afterward. For detailed guidance on maintaining other parts of your machine, explore resources like this guide on milk pitchers or tips for steam pressure issues. Consistent care keeps your equipment in top condition and guarantees flavorful, mold-free brews.Even seasoned home espresso enthusiasts often fall for misconceptions that hinder their brewing progress. One prevalent myth is that grinding finer always yields a richer shot. In reality, over-fine grinding can cause over-extraction and bitter flavors, especially if your machine isn’t equipped to handle high pressure or flow rate. Instead, focus on dialing in your grind to balance extraction, and consider the nuances of each bean type.
Another trap many fall into is over-reliance on gadgets without understanding their mechanics. For instance, assuming that a higher wattage grinder automatically produces better grounds ignores critical factors like burr alignment and consistency. Regularly checking your grinder’s burrs and cleaning it thoroughly can dramatically improve your espresso quality. For detailed tips, visit this guide on flat burr maintenance.
Why does pre-infusion make such a difference, and how can I optimize it for different beans?
Pre-infusion gently saturates the coffee puck before full pressure is applied, reducing channeling and ensuring even extraction. This step is often overlooked but can drastically improve shot consistency, especially with light roasts or delicate beans. To optimize pre-infusion, adjust your machine’s settings or use a programmable dose to start with a lower pressure, allowing the grounds to saturate evenly. Read more about pre-infusion techniques here.
Misunderstandings about milk frothing are common as well. Many beginners think that hotter milk automatically means better microfoam. However, milk temperature should be carefully controlled—usually between 140-150°F—to produce glossy, microbubbled foam. Over-heating causes large bubbles and collapses the foam quickly. For advanced baristas, mastering the steaming technique—like the proper position and angle of the steam wand—can elevate your milk art skills. Have you ever fallen into this trap? Let me know in the comments.
Keeping your home espresso setup in prime condition requires more than just good beans; it involves selecting the right tools and applying consistent maintenance routines. The investment in quality equipment and proper care not only extends the lifespan of your gear but also ensures every shot is as delicious as the first. I personally rely on a few key tools to streamline my workflow and achieve professional results at home.
Precision Dosing with a Grind Size Matched to Your Equipment
One of my favorites is the Scales with Timer. Accurate dosing is crucial, and I use a digital scale that measures to the gram, paired with a timer to control extraction time precisely. This setup allows me to dial in my grind size and tamp pressure, especially important when experimenting with new beans. Over time, consistently using these tools has sharpened my ability to produce shots with balanced extraction, reducing waste and improving flavor.
Investing in a Quality Coffee Grinder
A dependable burr grinder is non-negotiable. I prefer a flat burr grinder because of its ability to produce uniform grounds, leading to more consistent shots. Regular maintenance—like cleaning the burrs and checking their alignment—is vital. I schedule deep cleans monthly using specialized grinder brushes, which prevents buildup and ensures accuracy. Remember, a well-maintained grinder is the foundation of excellent espresso.
Tools for Steam and Milk Texturing
For milk steaming, I swear by a dual-purpose Thermometer and Frothing Pitcher. The thermometer helps maintain optimal milk temperature—around 140-150°F—while the pitcher’s shape and size influence foam quality. To prevent the common issue of large bubbles collapsing quickly, I suggest practicing your steaming technique with this setup and referencing resources like this guide on milk frothing. Over time, mastering these tools results in glossy, microbubbled milk perfect for lattes and cappuccinos.
Routine Maintenance Keeps Machines Fit
Beyond tools, establishing a regular cleaning schedule preserves your equipment’s performance. For instance, descaling your boiler with a specialized descaler helps prevent mineral buildup, which can impair temperature stability. Checking and replacing worn gaskets or seals—like the group gasket—is essential to avoid leaks and maintain proper pressure. Remember, a proactive maintenance routine saves money and elevates your coffee quality over the long term.
Future Trends: Smart Maintenance and IoT Integration
Looking ahead, I predict that IoT-enabled espresso machines will become more prevalent, offering real-time diagnostics and maintenance alerts. This integration will simplify routine checks, like monitoring boiler pressure or grinder burr wear, making home barista life even more manageable. Embracing these innovations will be key for enthusiasts aiming for consistent, studio-quality results without the hassle.
What’s the Best Way to Keep Your Equipment in Top Shape?
My advice is simple: develop a routine that combines regular cleaning, timely component replacements, and the use of precise tools like matching grinders and thermometers. Starting by investing in a high-quality grinder and keeping it clean with brushes and calibration will dramatically improve your shots. For example, regularly checking your grinder’s burr alignment with this maintenance guide helped me reduce grind inconsistency significantly. Try scheduling weekly quick cleans and monthly deep maintenance, and you’ll notice your espresso quality and machine longevity improve. The right tools and habits make all the difference in mastering your home espresso setup. Want to elevate your game? Start by calibrating your grinder with a precision tool and see immediate results.
The Hard-Won Wisdom of Espresso Enthusiasts
Through my years of brewing, I’ve realized that the tiniest details—the way I dry my water reservoir or choose natural cleaning agents—make a huge difference in flavor and health. The biggest lesson? Consistency beats quick fixes. Skipping routine cleaning only invites mold, which can silently ruin your espresso and compromise your well-being. Now I prioritize simple, effective habits, such as regular vinegar soaks and thorough drying, that safeguard my machine and elevate my mornings. Remember, the true secret is paying attention to what most overlook—your water tank is the foundation of every shot.
My Top Picks for Home Barista Mastery
For anyone serious about brewing at home, I recommend tools that have transformed my setup. A precision flat burr grinder ensures consistent grounds, while a digital scale with a timer helps dial in perfect extractions. Regularly checking and replacing worn group gaskets prevents leaks, and a reliable temperature control keeps milk microfoam sublime. Implementing these tools has been a game-changer for my coffee experience.
Your Next Espresso Breakthrough Starts Today
Mastering your home espresso setup isn’t about instant perfection but embracing a mindset of ongoing care and curiosity. Each small step—whether it’s cleaning your milk frother properly, adjusting your pre-infusion technique, or calibrating your grinder—sets the stage for extraordinary flavor. So, I challenge you: take one action today to improve your routine. Whether reprogramming your machine’s settings or deep cleaning your brew group, these efforts will pay dividends in taste and satisfaction. Your perfect espresso is just a dedicated step away—why not start now?