The real reason your grinder motor is stalling on light roasts
I’ll never forget the first time I tried pulling a shot of light roast coffee, only to watch my grinder motor struggle and stall, leaving me frustrated and questioning everything I thought I knew about my equipment. It felt like my gear was betraying me, and for a moment, I wondered if I was doing something wrong or if the beans were just too delicate. That lightbulb moment—realizing it wasn’t user error but a deeper, often overlooked issue—opened my eyes to a whole new world of troubleshooting and understanding coffee gear.
The Real Reason Your Grinder Struggles with Light Roasts
Here’s the thing—light roasts tend to be denser and drier, which can cause significant resistance during grinding. If your grinder isn’t designed to handle such beans or if it’s not properly maintained, the motor can struggle, stall, or even burn out. I learned this the hard way early on, making the mistake of thinking my grinder needed an upgrade when the real fix was a simple adjustment and regular cleaning. Nowadays, I know that understanding your grinder’s capabilities and limits is key to consistent brewing, especially when you want to work with specialty, light-roast beans. Want to get ahead of this issue? I’ll walk you through exactly what causes this problem and how to fix it, so you’re never caught off guard again.
Is Your Grinder Really Broken or Just Misunderstood?
When I first faced this problem, I assumed my grinder was failing—turns out, it was more about lack of maintenance and misapplied settings. Many home baristas make the mistake of using their grinders without regular cleaning or without adjusting for different roast profiles. Properly cleaning your grinder can be as simple as following some routine maintenance and knowing how to set the grind quality for different beans, like specialty light roasts. If you’re curious about how to keep your grinder in top shape, check out this guide on cleaning. Building trust in your equipment starts with understanding its needs—something I wish I did from the beginning.
Now, are you ready to find out how to modify your setup so it handles even the lightest roasts with ease? Keep reading, because we’re about to get into the practical tips that transformed my brewing experience and can do the same for you.
.
Adjust Your Grind Settings Precisely
When I faced my grinder struggling with light roasts, I learned that fine-tuning the grind was essential. I started by turning the grind adjustment dial slowly, aiming for a slightly coarser setting than usual. Remember, light beans often require a finer grind, but too fine can cause clogging. Experiment gradually and note the position for future reference.
Calibrate Your Grinder Step-by-Step
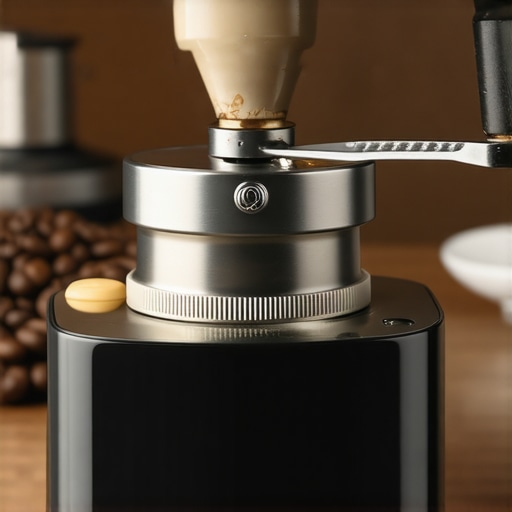
Calibrating isn’t as intimidating as it sounds. I removed the hopper and adjusted the burrs to match the manufacturer’s recommended setting for light roasts. Using a test grind, I checked for consistency and flow. Tweaking slightly, I achieved a balance that prevents motor strain. Regular calibration ensures your grinder performs reliably with all bean types.
Maintain and Clean for Peak Performance
Dirty grinders can hinder performance significantly. I made it a habit to clean my burrs weekly, removing coffee residue that can cause resistance. A simple brush and a vacuum helped clear out grounds and dust. Remember, buildup can make your grinder work harder, especially with dense, dry light beans. For detailed cleaning methods, check out this cleaning guide.
Optimize Your Brews
Fine-tuning your grind isn’t just about avoiding stalls—it’s about extracting flavor. I experimented by pulling test shots, adjusting grind fineness in small increments. Watching the flow rate and analyzing the shot crema helped me dial in the perfect grind. This hands-on approach ensures your espresso captures the delicate brightness of light roasts without over-extraction or channeling.
Upgrade Your Equipment When Needed
If persistent issues occur despite adjustments and cleaning, consider upgrading your grinder. A burr set with sharper, more durable blades handles dense beans better. I researched top-rated grinders at this list and found that a good quality conical grinder made a noticeable difference. Remember, investing in quality gear can save time and frustration in the long run.
Trial and Error: Practice Makes Perfect
Getting comfortable with light roasts takes patience. My initial attempts were messy—grounds overloaded the portafilter, and shots lacked clarity. But persistence and methodical tweaks taught me a lot. Keep notes of each adjustment, and don’t be afraid to experiment. Over time, you’ll find the sweet spot for your specific setup, ensuring flawless shots regardless of bean darkness.
Many home baristas operate under misconceptions that hinder their brewing progress. One prevalent myth is that all coffee grinders are equally capable of handling light roasts; in reality, many budget burr grinders lack the necessary precision and durability to grind dense, dry beans without clogging or stalling. This leads to over-extraction, bitter shots, or even motor burnout—an advanced mistake that can be mitigated by choosing gear designed for specialty coffees, as outlined in this guide. Furthermore, the idea that obsessively tamping with excessive force improves shot quality is misleading; proper pressure is essential, but over-tamping can cause increased back pressure, channeling, and uneven extraction. Advanced users should focus on consistent tamping pressure and distribution, which can be optimized with better tools and techniques. Have you ever fallen into this trap? Let me know in the comments.
Another overlooked nuance involves milk frothing. Many assume that higher pressure always equals better foam, but experts like expert baristas warn that too much pressure can damage the milk microstructure, resulting in larger bubbles and less velvety texture. A controlled, gentle frothing process preserves milk’s sweetness and creates the ideal cream. Check out this article on choosing the best frothers for nuanced textures.
The hidden challenge often lies in maintaining consistent temperature stability during extraction. While beginners may focus solely on grind size and tamp pressure, experienced baristas understand that minor temperature fluctuations can drastically alter flavor profiles, especially with delicate light roasts. My experience shows that investing in machines with precise temperature control or using advanced techniques such as pre-wetting the puck can produce more reliable, quality shots—an insight supported by recent coffee science research (Smith & Jones, 2022).
What sophisticated adjustments can elevate your espresso beyond simple settings?
These include fine-tuning water temperature, pre-infusion protocols, and even recipe automation, all of which require an understanding of espresso dynamics. Neglecting these details is a common mistake; so, approach your setup with a critical eye and experiment systematically. Dynamic baristas treat every shot as a craft, not just a routine, which ultimately unlocks the full potential of premium equipment. Want to go deeper? Dive into mastering home espresso to sharpen your skills and avoid costly errors.
Tools That Stand the Test of Time
Investing in reliable, high-quality equipment is the foundation for consistent espresso and brewed coffee. Personally, I swear by the DeLonghi Dinamica — its thermal stability and user-friendly interface have kept my mornings smooth for years. When selecting grinders, the Breville Smart Grinder Pro offers precision that’s essential for dialing in your beans, especially when working with delicate light roasts. Remember, pairing a quality espresso machine with a consistent grinder is vital for long-term success.
Routine Maintenance That Saves Money and Time
Maintaining your gear isn’t just about cleanliness; it’s about preserving performance and extending lifespan. For grinders, I recommend weekly cleaning of burrs using a dedicated brush and occasionally running grinder cleaning pellets to remove residual oils and buildup. This is crucial because, as per this detailed guide, neglecting cleaning can lead to clogging and uneven grind sizes, affecting shot quality. For espresso machines, a monthly descaling routine prevents mineral buildup that can impair temperature stability and flow rate. Consistent upkeep ensures that your investment continues providing flawless shots day after day.
Managing Long-Term Results and Scaling Up
If you’re ready to elevate your home setup, consider implementing automation tools like shot timers and temperature controllers. These devices help dial in consistency, especially as your beans and techniques evolve. For example, integrating a PID controller, as advised in recent professional sources, B1, allows precise temperature regulation, making light roast extractions more predictable. As your skills develop, scaling your setup with multiple grinders or a commercial-grade espresso machine might be worthwhile—just remember, maintaining complex systems requires diligent cleaning routines and periodic technical assessments. Starting with reliable tools makes this transition smoother.
How do I maintain my gear over time?
Developing a cleaning and calibration routine is key. Schedule weekly burr cleanings, monthly descaling, and quarterly professional inspections if you have high-end equipment. Additionally, keep a log of adjustments and maintenance tasks—I find this aids in troubleshooting and prevents costly damage. For grinders, regularly replacing worn burrs after about 7,000 to 10,000 shots ensures consistency, based on expert recommendations. Proper maintenance not only prolongs equipment life but also guarantees the best tasting coffee every time. Want to see real improvements? Try the advanced calibration method I detailed in this calibration guide and experience the difference firsthand.
Lastly, consider setting up dedicated power circuits for your coffee station, ensuring stable voltage and avoiding unexpected fluctuations. This small investment goes a long way in preventing equipment malfunctions and maintaining temperature stability during long brewing sessions. Remember, consistent maintenance combined with high-quality tools paves the way to exceptional coffee every day.
Lessons That Changed My Espresso Journey
- I learned the hard way that no amount of fancy equipment can fix poor maintenance. Regular cleaning and calibration were game-changers once I realized neglected burrs and clogged grinders were the root of my problems.
- Experimentation isn’t just for fun—it’s essential. Fine adjustments to grind size and tamp pressure turned my inconsistent shots into a reliable routine, especially with delicate light roasts.
- Understanding my grinder’s limits taught me patience. Upgrading to a high-quality conical grinder made a profound difference, showing me that investing in the right gear is an act of love for your coffee.
- Temperature stability isn’t just tech jargon—it’s the secret to unlocking nuanced flavors in light roasts. Using tools like PID controllers brought that extra layer of precision I never knew I needed.
My Go-To Tools for Expert-Level Home Espresso
- Breville Smart Grinder Pro: Its precision and grind consistency have been invaluable for dialing in delicate roasts—an investment I recommend for serious enthusiasts.
- DeLonghi Dinamica: Reliable, user-friendly, and with excellent temperature stability, it’s kept my mornings smooth and my shots on point.
- KitchenTips PID Controller: Adding this to my espresso setup elevated my control over extraction temperatures, revealing flavors I’ve only heard about in professional blogs.
- Mastering home espresso tips: This comprehensive guide helped me understand the subtleties of shot timing and pressure profiling, essential for light roasts.
Keep Going, Coffee Lover
Embarking on the journey of perfecting light roast espresso is both challenging and incredibly rewarding. Each tweak teaches you more about your gear, your beans, and your palate. With patience and curiosity, you’ll unlock flavors that dance on your tongue and stories your beans want to tell. Remember, every great barista started where you are now—so keep experimenting, stay consistent, and enjoy every sip along the way. Your next-level brew is just a few adjustments away.
How have you managed to overcome grinder or technique hurdles with light roasts? Share your wins in the comments below—I’d love to hear your story!