The Trick for Pulling Great Shots with a Cheap Grinder
I remember the first time I tried pulling a shot with my cheap grinder—what a disaster! The coffee was uneven, over-extracted in some places and underwhelming in others, leaving me frustrated and questioning whether good espresso was just a privilege of expensive gear. But here’s the thing—after countless failed attempts, I finally had that lightbulb moment: it wasn’t about having the priciest machine or the finest burrs; it was about working smarter with what I had. If you’ve ever faced similar frustrations, you’re not alone.
Why Your Grinder Doesn’t Have to Be Expensive for Great Shots
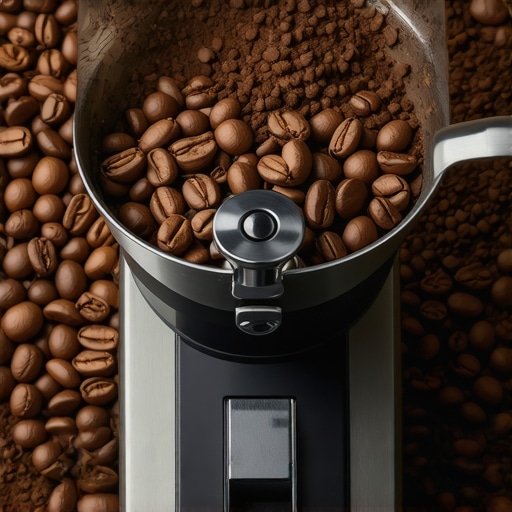
Let’s be honest. When I started my journey into home espresso, I believed that a high-end grinder was essential. I thought, “If I just had a more expensive grinder, every shot would be perfect.” Turns out, this is a common misconception. You see, many baristas and home enthusiasts pull incredible shots on budget grinders by tweaking their grind size, dose, and tamping technique. The secret lies not in the price tag but in understanding and optimizing your grinder’s potential.
One thing I learned early on is that a lot of folks make the mistake of ignoring grind consistency. An inconsistent grind results in uneven extraction, which ruins the flavor. I used to blame my machine for bad shots, but after reading [this guide](https://espressotechguide.com/how-to-fix-a-grinder-that-keeps-getting-jammed), I realized many issues stem from improper grinder settings—no matter the price.
Now, I focus on honing my technique—adjusting my grind in small increments, tamping with consistent pressure, and using fresh coffee beans. These simple steps transformed my espresso game without breaking the bank. If you’re eager to improve your shots with minimal investment, you’re in the right place. Let’s dig into how to get the most out of your humble grinder.
Adjust the Grind Size Precisely
Start by grinding your coffee to a slightly finer or coarser setting and observe the shot. I once accidentally used a very fine grind, which resulted in a sluggish shot and bitter taste. So, I adjusted by moving the grind dial one notch coarser, which improved flow and flavor. Think of your grinder like a guitar amp; small tweaks make a big difference. Experiment in small increments, about 0.5 to 1 second on your grinder’s dial, until the extraction flows steadily at about 25 to 30 seconds for a double shot.
Consistency in Dose and Tamping
Measure your coffee dose with a scale—aim for 18-20 grams for a double shot. During my first attempts, I used guesswork and ended up with inconsistent shots. Using a digital scale ensures accuracy. When tamping, press evenly with about 30 pounds of pressure, like pressing a basketball into the ground. A spring-loaded tamper helps maintain uniform pressure, but a weighted tamper gives more control. I recommend watching your tamp from the side to ensure a level surface; a tilted puck causes uneven extraction, resulting in sour or bitter flavors. Practice makes perfect here, but consistency is key for repeatable results.
Optimize Distribution Techniques
Even distribution and tamping go hand in hand. Use a distribution tool or your finger to spread coffee evenly in the basket before tamping. In my experience, uneven distribution caused channeling, leading to rapid espresso flow and weak flavor. Think of your coffee bed like a landscape; smooth and even ensures water flows uniformly. After distributing, apply firm, level tamp pressure with a tamper that fits your basket size—avoid forcing it in. A well-prepared puck allows water to extract flavor evenly, capturing nuances like fruity and floral notes.
Control Brew Temperature and Pressure
Monitor your machine’s temperature settings if adjustable; aim for around 195-205°F (90-96°C). I once had a machine that ran hot, burning the coffee; lowering the temperature improved sweetness. Use your machine’s pressure gauge to ensure 9 bar pressure during extraction. If the shot pulls too quickly or slowly, adjust the grind or dose accordingly. Consistency here can be delicate, but regular calibration of your espresso machine—like cleaning or descaling—ensures stable pressure and temperature over time. For more details, check out this calibration guide.
Tweaking the Extraction Time
Shoot for an extraction time of around 25-30 seconds. I initially aimed for 20 seconds, but that resulted in sour shots. Extending to 30 seconds helped extract more sweetness and body. Use a timer or your machine’s shot clock to keep track. If your shot is too fast, coarsen the grind; if too slow, make it finer. This balance affects flavor complexity, body, and crema. Make small adjustments and record your settings to find the sweet spot that brings out the best in your beans.
Fine-Tune Your Milk and Frothing
If you’re adding microfoam, keep your milk pitcher at an angle, submerge the steam wand just below the surface, and measure the temperature to avoid scorching. I once overheated milk by rushing, causing a burnt taste. Use a thermometer to reach 140°F (60°C), creating smooth, velvety foam. For creamier microfoam, incorporate small, steady steam bursts instead of continuous application. Remember, better milk opens up subtle flavor notes in your espresso, transforming it into a café-quality experience. Learn more about customizing your milk frothing technique at this resource.
Many enthusiasts believe that investing in the most expensive coffee grinder guarantees perfect shots, but this isn’t always the case. In fact, **most people overlook the importance of grind consistency** and improperly calibrate their machines, leading to subpar results regardless of gear quality. A common myth is that newer, more advanced espresso machines will automatically produce better coffee; however, without understanding fundamental maintenance and brewing techniques, even high-end machines can underperform.
How Does Grinder Dulling Affect Extraction and Flavors?
Research indicates that dull burrs increase heat during grinding, leading to oxidative changes in coffee oils and a loss of freshness, which can *dull* flavor profiles over time. Regularly replacing or sharpening burrs, instead of solely focusing on machine upgrades, can vastly improve extraction quality. Many home baristas make the mistake of neglecting this step, assuming their grinder’s age doesn’t matter. Have you ever fallen into this trap? Let me know in the comments. Also, many think that fancy milk frothers will automatically lead to better microfoam, but technique plays a crucial role. Over-foaming or overheating your milk destroys its delicate flavor nuances. For detailed tips, check out [this guide](https://espressotechguide.com/milk-frothers-that-transform-your-coffee-experience). Ensuring your steam wand is properly clean and calibrated can make the difference between silky microfoam and steamed milk with bubbles. Don’t assume that equipment alone solves quality issues; mastery of technique is essential. When it comes to selecting the right barista gear, many believe bigger or more expensive is better, but understanding how each piece complements your brewing style is more impactful. For instance, a weighted tamper ensures uniform pressure, which can dramatically improve shot consistency compared to a standard spring-loaded tamper. Additionally, home baristas often overlook the significance of routine cleaning. Buildup of coffee oils and mineral deposits in your espresso machine or grinder can alter extraction times and flavors, leading to bitter or sour tastes. Regular descaling and cleaning are your best allies here. Too often, the assumption is that equipment maintenance is a chore, but in reality, it’s vital to preserving your investment. Mastering these nuances and avoiding these common pitfalls will elevate your home coffee game far beyond the basics. Dive deeper into cornerstone techniques with [this comprehensive guide](https://espressotechguide.com/mastering-the-art-of-home-espresso-tips-for-beginners) and keep experimenting. Remember, the difference between a good cup and a great one often comes down to attention to these small details.
Maintaining your espresso setup is essential for achieving consistently high-quality shots. Investing in reliable tools and adopting routine maintenance practices can extend the lifespan of your equipment and ensure each brew meets your expectations. One of my favorite tools for maintenance is the Gaggia Rational Cleaning Kit, which I use monthly to descale my machine and clean the group head thoroughly. Regular descaling prevents mineral buildup that can cause pressure drops and uneven heating, as detailed in this guide. I also rely on O-Ring Replacement Kits to keep my portafilter and steam wand leaks-free; replacing worn seals prevents water damage and contamination.
How do I maintain my espresso machine over time?
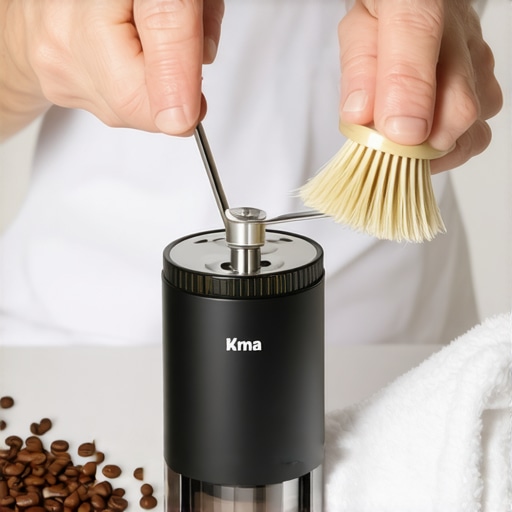
Implementing a scheduled cleaning routine—cleaning the group gasket every 3-6 months, backflushing weekly, and replacing burrs every 1-2 years—not only preserves machine performance but also elevates your espresso’s flavor. I personally set reminders to check component wear using tools like a burr gauge to ensure my grinder stays precise; dull burrs can generate static and uneven grounds, spilling coffee and impacting extraction. As the trend toward home barista perfection evolves, investing in tools like a burr cleaning brush and a calibrated pressure gauge helps maintain consistent pressure and temperature, key factors in extraction quality. Looking forward, I predict that smart maintenance devices—like IoT-enabled sensors—will soon notify us when service is due, making upkeep even more effortless. Until then, establishing a maintenance routine based on specific tools is your best bet for long-term success. Don’t forget: a well-maintained machine and grinder will always outperform a shiny, neglected setup—give these tips a try today and notice the difference in your next shot.
Throughout my journey into home espresso brewing, I’ve realized that the most valuable lessons come from embracing the nuances rather than chasing after expensive equipment. The real insight? Mastery of seemingly small details can dramatically elevate your coffee experience, often more than splurging on high-end gear. The lightbulb moment I had was understanding that consistency—whether in grind size, tamping pressure, or machine maintenance—is the true game-changer. When I started focusing on these aspects, I discovered that even with a modest grinder, I could craft espresso shots rivaling those from professional cafes. The key lies in being attentive to the little things that make big differences, like cleaning burrs regularly or adjusting grind in tiny increments. So, my advice? Don’t underestimate the power of knowledge and consistent technique; you might just unlock your perfect espresso with what you already have.