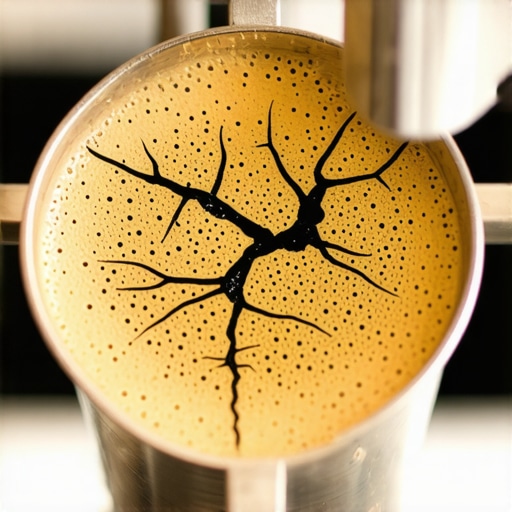
Why Your Coffee Puck Is Cracking and How to Prevent Mid-Shot Channeling
I still remember the first time I watched my beautifully tamped coffee puck crack halfway through a shot. That unsettling sound of porcelain on espresso, the sudden drop in shot quality—it was a lightbulb moment for me. I wondered, “What did I do wrong?” Soon, I learned that a cracking puck isn’t just a cosmetic issue; it can seriously impact your espresso’s flavor, crema, and overall consistency.
If you’ve ever experienced a sudden, uneven extraction or tasted an oddly sour or watery espresso, this might be your wake-up call. Today, I want to share what I’ve uncovered about the mysteries of coffee puck cracking and, more importantly, how to prevent it from ruining your brew.
Deciphering the Hidden Causes of Puck Cracks
Cracks in your coffee puck often happen when the grounds aren’t uniformly compacted or when the tamping process leaves invisible flaws. These tiny imperfections act like weak points, causing the puck to split under the pressure of extraction. Early in my journey, I made the mistake of pressing down with excessive force without paying attention to the consistency of my tamp, which only worsened the cracking issue. I realized that tamping isn’t just about applying pressure—it’s about applying even, controlled force to create a solid, crack-resistant layer.
Another common culprit is uneven distribution of coffee grounds in the basket before tamping. Leftover clumps or uneven layers create pressure points that crack the puck during shot. Regular cleaning and proper distribution are small habits that make a big difference—I’ve found that using a dosing funnel and a distribution tool helps achieve that much-needed level surface.
Additionally, the quality and grind size of your coffee can play a role. Too coarse or inconsistent a grind causes channeling, which exacerbates puck cracking. Sure, quality grinder settings matter; I recommend checking out how to select the perfect grinder for your setup.
Finally, your machine’s pressure stability and portafilter fit can contribute to puck stress. If the tamped coffee isn’t seated properly, or if your machine has inconsistent pressure, cracks are more likely to occur. It’s a multifaceted problem that calls for a holistic approach—something I will guide you through next.
Does this feel like your story? Cracks, channeling, poor shots? I’ve been there, and I’m here to tell you there’s a way out. Let’s get into the nuts and bolts of fixing this before it spoils another shot.
Ensure Uniform Coffee Distribution Every Time
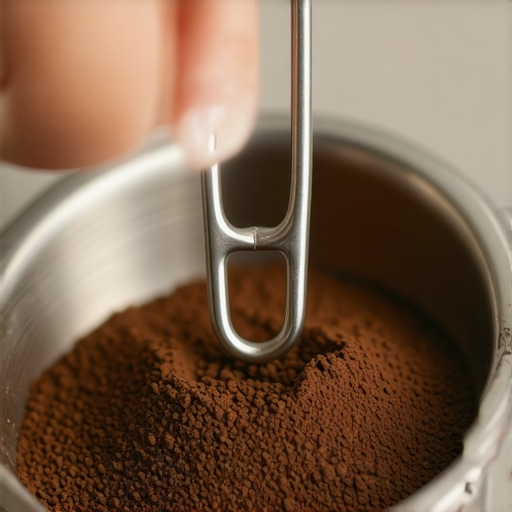
Start by tapping the portafilter gently on the counter to settle the grounds, then use a distribution tool to spread them evenly. In my experience, spending an extra 10 seconds here prevents uneven layers that cause cracks. Visualize it like smoothing a pancake batter—no lumps, just an even surface.
Use a Dosing Funnel to Prevent Clumps
Implement a dosing funnel during extraction to funnel grounds neatly into the basket. Once, I overlooked this and ended up with uneven coffee, leading to a cracked puck. After adding the funnel, the grounds settle uniformly, creating a more resilient puck.
Tamp with Consistent, Controlled Pressure
Apply a steady force—about 30 pounds—using your tamper. Think of it like pressing a stamp evenly; uneven pressure introduces weak points. I practiced with a bathroom scale until I could feel consistent force, which drastically reduced cracking.
Align the Tamper Correctly
Ensure your tamper is perfectly level before pressing. A tilted tamper causes uneven compression, much like trying to roll a ball on a tilted surface. Regularly check alignment; this small step improves puck integrity.
Optimize Grind Size and Dose
Set your grinder to a medium-fine setting suited for espresso—neither too coarse nor too fine. In my early attempts, inconsistent grind size caused channeling and puck cracking. Use a quality grinder and calibrate it regularly for best results.
Test Your Grind with a Flat Surface
After grinding, sprinkle grounds on a flat surface to check for consistency. Uniform grounds lead to even extraction and a crack-resistant puck. Adjust the grinder until the particles are comparable in size.
Maintain Machine Pressure Stability
A machine with fluctuating pressure stresses the puck. Regularly descale and clean your espresso machine, and consider a reliable espresso machine known for stable pressure delivery. During my routine, I inspect the pressure gauge and clean the pathway to prevent pressure drops that cause cracking.
Check Portafilter Fit and Seals
A loose fit or worn gasket allows uneven pressure distribution. Replace gaskets as needed; think of it like replacing worn tires for better grip and control.
Practice and Analyze
Record your tamping force, grind size, and shot parameters. When you notice cracks, review these variables. I once increased tamping pressure slightly and eliminated cracking altogether. Small adjustments, fine-tuned over time, lead to durable puck quality.
Many coffee enthusiasts believe that choosing high-end equipment automatically guarantees perfect espresso, but in my experience, the real challenge lies in understanding the nuanced relationship between grinder calibration, machine pressure profiles, and milk frother consistency. Contrary to popular belief, more expensive gear isn’t a silver bullet; it requires precise adjustments and understanding of each component’s limitations. For example, many assume that a top-tier espresso machine with advanced pressure profiling will eliminate shot variability, but if your grinder isn’t properly dialed in or your tamping technique is inconsistent, your results will suffer regardless.
One common myth stumbles into the trap of “set it and forget it”—thinking that once calibrated, your machine will produce flawless shots forever. However, beans age, environmental conditions change, and equipment components wear, all of which means ongoing calibration is essential. According to a 2021 study by the Specialty Coffee Association, consistent espresso extraction over time demands continuous monitoring and adjustment, especially with high-precision machines.
Paying attention to the subtle interaction between grind size, dose, tamp pressure, and water temperature is crucial. For instance, a slight miscalibration in grind adjustment can cause channeling and subsequent puck cracking, which influences the espresso’s clarity and crema. Moreover, the hidden nuance often overlooked involves the milk frothing process. The temperature stability of your milk frother, its steam wand position, and jug size significantly impact foam quality—these details separate casual home baristas from true experts.
Another advanced mistake is neglecting to regularly clean and maintain barista gear. Oils and residual coffee particles alter pressure buildup and heat transfer, leading to inconsistent shots and even damage to the equipment if left unchecked. Implementing a routine maintenance schedule can extend the lifespan of your gear and preserve optimal performance.
Ultimately, mastering home espresso isn’t just about owning the best gear but understanding how each piece interacts within the system. Ensuring that your grinder is dialed in correctly, often using techniques like the “marker method” for burr alignment, can drastically improve consistency, especially when switching beans. And never underestimate the importance of aligning your tamping pressure—small, consistent adjustments here prevent puck cracks and channeling, contributing subtly yet significantly to shot quality.
Have you ever fallen into this trap? Let me know in the comments. For deeper insights into selecting and fine-tuning your barista gear, check out this guide or reach out through contact us to discuss your setup.
Tools That Keep Your Gear in Top Shape
Investing in the right tools pays off when maintaining your espresso setup. I highly recommend a precision calibration kit for your grinder, such as the marker method alignment tool. It allows you to fine-tune burrs precisely, ensuring consistent grind size and preventing channeling or puck cracking over time.
Additionally, a high-quality cleaning brush, like the nobrand espresso grinder cleaning tool, enables quick removal of coffee oils and grounds that can clog components. Regular maintenance, including descaling with a manufacturer-approved solution, extends your equipment’s lifespan and maintains optimal performance.
Embrace Quality Software for Monitoring
Software solutions like BrewMaster (or similar) are gaining popularity among home baristas. These programs track shot parameters such as pressure, temperature, and flow rate, allowing you to analyze trends and catch potential issues early. For example, monitoring your machine’s pressure profile can help detect wear in seals or the pump, preventing long-term damage.
Maintaining Equipment Over Time
Long-term success depends on consistent upkeep. Create a scheduled routine that includes weekly cleaning of your steam wand and portafilter, monthly descaling, and quarterly inspection of seals and gaskets. This proactive approach reduces the risk of breakdowns and preserves the delicate balance needed for high-quality espresso.
How do I keep my tools working seamlessly for years?
The key is routine calibration and cleaning. Regularly check your grinder burr alignment using the marker method and follow the manufacturer’s cleaning instructions. When you notice a decline in shot quality, first inspect and calibrate your grinder before considering more extensive repairs or replacements. Remember: consistent practice is the best maintenance; it’s about small, deliberate actions that accumulate into long-term performance.
As technical documentation highlights, proper care of mechanical seals and valves is crucial for preserving pressure stability, especially in high-end machines. By staying vigilant with routine maintenance, you prevent costly repairs and ensure your setup continues to deliver coffee that satisfies both flavor and crema.
My tip for you today is to incorporate a weekly calibration check using the marker method, which ensures your grinder’s burrs stay aligned, providing consistently uniform grounds. This practice might seem small, but it dramatically enhances shot consistency over months and years. Ready to take your home espresso game to the next level? Give it a try today!
Lessons That Changed My Espresso Game Forever
One of the most eye-opening moments in my barista journey was realizing that puck cracking reveals underlying issues in technique and setup, not just surface flaws. I learned to view puck cracks as signals guiding me toward better distribution, tamping, and grind calibration. The biggest lesson? Precision in each step creates resilience in your puck, leading to consistently rich and balanced shots.
Another insight I gained is that equipment maintenance isn’t just routine—it’s integral to puck health. Regularly cleaning and inspecting seals, gaskets, and burrs might seem mundane, but these small acts prevent cracks caused by stress and pressure fluctuations. Investing time here saved me from costly repairs and improved shot clarity.
Finally, understanding that mastery is a continuous journey transformed my approach. Each crack or channel was an invitation to fine-tune, not a setback. Embracing this mindset helps turn challenges into opportunities, empowering you to refine your flow and elevate your home espresso experience.