Why Your Espresso Machine Pump Runs Non-Stop
It was 6:15 AM, and the silence of my kitchen was shattered by a sound every home barista fears: the never-ending drone of a vibration pump. [IMAGE_PLACEHOLDER] I had just finished [mastering the art of home espresso](https://espressotechguide.com/mastering-the-art-of-home-espresso-tips-for-beginners) and felt like a pro, but my machine had other plans. It just wouldn’t stop. I stood there, steam wand in hand, watching the seconds tick into minutes while the pump vibrated against the counter with a frantic energy. That low, vibrating hum—which usually signals a delicious shot—now sounded like a ticking time bomb. The air in the kitchen started to feel heavy with the smell of warm copper and hard-working electronics, and I could see the water level in the reservoir dropping steadily with nowhere for it to go. I’ve been in your shoes, panicked and reaching for the power cord with wet hands, and I’m here to tell you that your machine probably isn’t headed for the landfill just yet.
Stop the Noise Before You Fry the Motor
When a pump runs non-stop, it’s usually trying to fulfill a ‘request’ it simply can’t complete. Whether it’s trying to fill a boiler that has a hidden leak or struggling against a stubborn airlock after you’ve moved the machine, that motor is working overtime. I remember one of my first ‘real’ setups where I ignored a small drip, only to realize later I was dealing with a [leaky drip tray](https://espressotechguide.com/how-to-fix-a-drip-tray-that-leaks-into-the-machine-body) and a failing water level sensor. It’s a stressful moment that can ruin your morning faster than a sour shot of robusta. But we can fix this together. Today, we’re going to dive into the common culprits, from trapped air to faulty sensors, so you can get back to your morning ritual without the mechanical drama. Have you ever stood over your machine, praying for the silence of a completed cycle while the floor gets wetter?
Is my machine actually broken for good?
This is the first thing we all think, isn’t it? We see the dollar signs flying out of our wallets and imagine ourselves lugging a 50-pound stainless steel beast to a repair shop three towns over. But honestly, most of the time, it’s a simple fix that doesn’t require a degree in mechanical engineering or a massive toolkit. Skepticism is healthy, especially when you’ve invested in one of the [top-rated espresso machines](https://espressotechguide.com/top-rated-espresso-machines-for-coffee-lovers-in-2025), but don’t let it stop you from checking the basics first. Before you call a repair tech, have you checked if your reservoir is properly seated? I once spent twenty minutes panicking only to realize I hadn’t pushed the water tank in all the way after a cleaning session, which led to a [rattling noise](https://espressotechguide.com/why-your-espresso-machine-is-making-a-rattling-noise-during-heat-up) and a pump that just couldn’t prime.
The Invisible Culprits Behind the Endless Hum
One surprising fact that many home baristas miss is that most vibration pumps are only rated for a limited duty cycle. According to technical specifications from major pump manufacturers like Ulka, these pumps are often designed for a ‘2 minutes on, 1 minute off’ cycle. This means they aren’t meant to be marathon runners. Often, the pump keeps running because the internal computer thinks the boiler isn’t full. This is frequently caused by [lime scale accumulation](https://espressotechguide.com/how-to-tell-if-your-machine-boiler-is-accumulating-lime-scale) on the water level probes, which ‘insulates’ the sensor and tells the machine the boiler is empty even when it’s about to overflow. Early in my journey, I made the mistake of thinking my machine was just ‘deep cleaning’ itself, only to find a [stuck pressure stat](https://espressotechguide.com/how-to-fix-a-stuck-pressure-stat-in-an-older-machine) or a [clogged water filter](https://espressotechguide.com/the-fix-for-a-clogged-water-filter-in-your-reservoir) was the real culprit. Let’s look at how to identify these invisible issues before they become permanent failures.
Kill the Power and Save the Pump
The first rule of espresso machine triage is simple: if it won’t stop, pull the plug. A vibration pump is like a high-strung athlete; it’s designed for short bursts of intense activity, not a marathon. When you hear that endless drone, the internal thermal protector is the only thing standing between you and a melted motor. Once you’ve cut the power, you’ve bought yourself time to think without the smell of burning copper filling your kitchen. Think of the pump as a messenger that hasn’t received an ‘order received’ confirmation from the brain of the machine. It will keep yelling—or pumping—until that signal arrives. This is a common issue even with [top-rated espresso machines](https://espressotechguide.com/top-rated-espresso-machines-for-coffee-lovers-in-2025) when the maintenance schedule slips.
Scrub Away the Scale That Blinds Your Machine
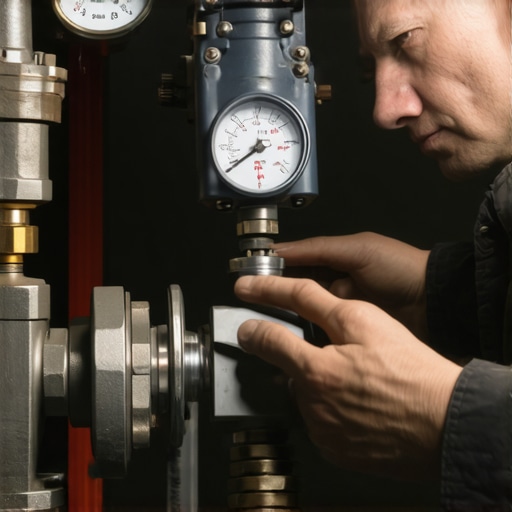
The most frequent reason a pump won’t quit is a ‘blind’ water level probe. Inside your boiler, there is a small metal rod that tells the computer when the water has reached the top. If this rod is coated in minerals, it acts like it’s wearing a raincoat—it can’t ‘feel’ the water even when it’s submerged. I once spent two hours troubleshooting a machine that was practically spitting water out of the vacuum breaker because the pump wouldn’t stop filling. I pulled the probe, and it looked like a piece of chalk. A quick scrub with some Scotch-Brite and a soak in citric acid fixed it instantly. If you are worried about this, you should learn [how to tell if your machine boiler is accumulating lime scale](https://espressotechguide.com/how-to-tell-if-your-machine-boiler-is-accumulating-lime-scale) before it causes a full-scale flood on your counter.
Burp the Air Out of the Lines
If you recently ran your reservoir dry, your pump might be ‘airlocked.’ This is like trying to drink through a straw that has a massive hole in it; the pump is spinning fast, but it’s just moving air bubbles instead of water. To fix this, you need to force the air out. Open your steam wand fully and turn on the pump. This reduces the backpressure and gives the air an escape route. It’s the same principle as [the best way to purge your steam wand without getting burned](https://espressotechguide.com/the-best-way-to-purge-your-steam-wand-without-getting-burned)—you are clearing the path for the actual liquid to flow. If the pump tone changes from a high-pitched whine to a deep, throaty growl, you’ve successfully primed the system.
Check the Solenoid for Mechanical Hang-ups
Sometimes the issue isn’t electrical but mechanical. A tiny grain of sand or a flake of scale can get stuck in the 2-way solenoid valve, which is responsible for letting water into the boiler. If that valve is stuck open, the machine might think it’s still filling, or if it’s stuck closed, the pump will struggle against a wall. Knowing [how to spot a failing solenoid valve before it floods your kitchen](https://espressotechguide.com/how-to-spot-a-failing-solenoid-valve-before-it-floods-your-kitchen) is vital for any serious home barista. I remember a particularly humid Tuesday when a tiny bit of debris from a [clogged water filter](https://espressotechguide.com/the-fix-for-a-clogged-water-filter-in-your-reservoir) jammed my valve. The pump ran for three minutes straight before I realized the boiler wasn’t actually taking in any water at all. Always keep your [choosing the best barista gear for coffee enthusiasts](https://espressotechguide.com/choosing-the-best-barista-gear-for-coffee-enthusiasts) manual handy to identify where these valves live on your specific model.
Is the Brain Misreading the Temperature?
In some advanced machines, the pump might run as part of a cooling or filling cycle dictated by temperature. If your PID or thermostat is sending wonky data, the machine gets confused. If you suspect the electronics are the culprit, you may need to look into [how to fix a broken boiler temperature sensor](https://espressotechguide.com/how-to-fix-a-broken-boiler-temperature-sensor). I once had a sensor wire wiggle loose after a move, and the machine spent ten minutes trying to ‘save’ itself from an overheat that wasn’t actually happening. It’s a nerve-wracking experience, but usually, it’s just a matter of reseating a connector or clearing a simple airlock.
The Pump is Rarely the Real Problem
Common wisdom suggests that a screaming pump is a dying pump, but in my years behind the counter, I’ve found that the pump is often the most resilient part of the machine. The real culprit is usually the ‘logic’ governing it. Everyone tells you to buy the most expensive water filtration systems for your [top-rated espresso machines](https://espressotechguide.com/top-rated-espresso-machines-for-coffee-lovers-in-2025), but there is a massive trap here: using water that is ‘too pure.’ If you use 100% distilled or ZeroWater-style RO water, your machine might never stop filling. Why? Because the water level sensors rely on electrical conductivity to know when the boiler is full. Without minerals, the circuit never completes, and the pump keeps hammering away until it burns out. It’s a classic case of being too clean for your own good.
The Duty Cycle Danger Zone
One nuance that separates the pro-sumers from the beginners is understanding the ‘duty cycle’ of a vibration pump. Industry standards, such as those discussed by the Specialty Coffee Association (SCA) regarding equipment reliability, highlight that the standard Ulka pumps found in most home units are designed for a 1/1 ratio—meaning they need as much rest as they do work. If you are running the pump for three minutes straight to try and force water through a [clogged water filter](https://espressotechguide.com/the-fix-for-a-clogged-water-filter-in-your-reservoir), you are causing internal thermal expansion in the piston spring. This weakens the pump’s ability to create pressure over time. Have you ever fallen into this trap of over-working your gear? Let me know in the comments.
Why does your espresso shot volume vary even with the same dose?
This is the ultimate frustration for perfectionists. You have the [how to select the perfect coffee grinder for your brew](https://espressotechguide.com/how-to-select-the-perfect-coffee-grinder-for-your-brew) dialed in, and you’re using the [best angle for tamping to avoid wrist strain](https://espressotechguide.com/the-best-angle-for-tamping-to-avoid-wrist-strain), yet the output is inconsistent. Often, the pump continues to run because the 3-way solenoid is leaking pressure back into the drip tray. If you notice your [espresso machine is discharging too much water into the drip tray](https://espressotechguide.com/why-your-espresso-machine-is-discharging-too-much-water-into-the-drip-tray) while the pump is running, it’s a sign that your seals are failing, not the motor itself.
The Over-Descaling ‘Oops’ Factor
Here is a specific warning: over-descaling can be just as dangerous as not descaling at all. When you flush a heavy descaler through a machine that hasn’t been cleaned in a year, you risk breaking off a large ‘flake’ of calcium. This flake travels through the pipes and acts like a stroke for your machine, getting stuck in the tiny gicleur or the solenoid valve. Suddenly, the pump is straining against a wall, and if you aren’t careful, the [espresso pressure drops suddenly during the shot](https://espressotechguide.com/why-your-espresso-pressure-drops-suddenly-during-the-shot). If this happens, stop immediately. You haven’t fixed the problem; you’ve just moved it. Before you dive into a deep chemical soak, it’s vital to learn [how to tell if your machine boiler is accumulating lime scale](https://espressotechguide.com/how-to-tell-if-your-machine-boiler-is-accumulating-lime-scale) properly. If you’re still stuck, feel free to reach out via our [contact us](https://espressotechguide.com/contact-us) page for more advanced troubleshooting.
Gear I Actually Keep in My Kitchen Drawer
When you’re deep in the weeds of troubleshooting a screaming pump, you realize that having the right tools on hand isn’t just a luxury—it’s a sanity saver. I don’t recommend buying every shiny gadget you see, but there is one tool I never skip: a reliable TDS meter and a hardness test kit. Because minerals are the primary cause of those ‘blind’ sensors we talked about, I use [the easy way to test your machines water hardness at home](https://espressotechguide.com/the-easy-way-to-test-your-machines-water-hardness-at-home) every single month. It takes thirty seconds, but it prevents the scale buildup that keeps your pump running forever. I also swear by a long-neck 2.5mm hex key; it’s the only way to reach the hidden screws on most E61 shells without scratching the chrome when you need to inspect the internals. If you are still [choosing the best barista gear for coffee enthusiasts](https://espressotechguide.com/choosing-the-best-barista-gear-for-coffee-enthusiasts), start with the tools that keep your machine alive, not just the ones that make it look pretty.
Keep Your E61 Moving Without the Squeak
Maintenance isn’t just about the water; it’s about the mechanical friction. If you’ve successfully stopped your pump from running non-stop, you might notice your lever feels a bit crunchy or stiff. This usually happens after a deep chemical backflush. The detergent strips away the coffee oils that—ironically—were lubricating your cam. I personally use Molykote 111, a food-grade silicone grease, because it doesn’t break down under the high heat of a brew group. You really need to learn [how to properly lubricate your e61 group head cam](https://espressotechguide.com/how-to-properly-lubricate-your-e61-group-head-cam) if you want that buttery smooth tactile feel back. This level of detail is exactly what separates a machine that lasts five years from one that lasts twenty. Technical documentation from manufacturers like La Marzocco, specifically their ‘Preventive Maintenance Checklist,’ emphasizes that ignoring these small lubrication points leads to premature wear on the brass internal components, which eventually causes those phantom leaks into the drip tray.
How do I maintain my home espresso setup over time?
Consistency is your best friend here. I’ve found that a ‘little and often’ approach beats a ‘once-a-year deep clean’ every time. For your grinder, don’t wait for it to jam. I use a stiff pipe cleaner to clear the chute weekly, which prevents that ‘old coffee’ funk from ruining my fresh shots. If you aren’t sure where to start, checking [how to select the perfect coffee grinder for your brew](https://espressotechguide.com/how-to-select-the-perfect-coffee-grinder-for-your-brew) can help you understand the specific cleaning needs of flat vs. conical burrs. For the espresso machine itself, I set a calendar reminder to pull my shower screen every Sunday. It’s amazing how much gunk hides behind a perfectly clean-looking screen, contributing to why [your group head shower screen is getting clogged so fast](https://espressotechguide.com/why-your-group-head-shower-screen-is-getting-clogged-so-fast). By staying ahead of the grime, you ensure the pump never has to work harder than it was designed to.
Smart Sensors are the Future of Home Brewing
Looking ahead, the ‘dumb’ vibration pump and simple metal probe system are slowly being phased out. We are starting to see the rise of flow-meter-driven logic and AI-integrated water quality sensors in high-end consumer gear. In the next few years, I predict your machine won’t just keep pumping blindly; it will send a notification to your phone saying ‘Boiler probe 2 is scaled 30%, please run a mild descaling cycle.’ This shift toward data-driven maintenance will make our lives easier, but it also means we need to be more tech-savvy. Even with these advancements, the basics of [mastering the art of home espresso](https://espressotechguide.com/mastering-the-art-of-home-espresso-tips-for-beginners) remain the same: clean water, clean gear, and a sharp eye for detail. My advanced tip for you today? Spend ten minutes tonight checking your water tank for any signs of biofilm—if it’s there, [how to clean a moldy water tank without harsh chemicals](https://espressotechguide.com/how-to-clean-a-moldy-water-tank-without-harsh-chemicals) is your next logical step.
Hard-Won Truths from Years of Mechanical Meltdowns
After tinkering with countless setups, the biggest ‘lightbulb moment’ I ever had was realizing that being ‘too clean’ is a real thing. If you’ve switched to ultra-pure water, you might be the reason your pump is confused. Without those tiny minerals, the boiler sensor is effectively blind and will never signal the machine to stop filling. Another hard truth is that we often treat our home machines like commercial workhorses, forgetting that the vibration pumps inside need a recovery period just like we do. If you force your machine through back-to-back shots without a rest, you aren’t just making coffee—you’re causing internal thermal expansion that will eventually kill the motor. Lastly, always trust your ears. A high-pitched, metallic scream from a pump is a cry for help; a deep, rhythmic growl is the sound of success.
Tools That Saved My Morning Ritual
I don’t believe in cluttering your counter with useless gadgets, but a few specific items are non-negotiable for long-term machine health. First, the easy way to test your machines water hardness at home isn’t with a fancy lab kit, but a simple TDS meter that stays right next to my beans. I also keep a small tube of food-grade Molykote 111 handy; knowing how to properly lubricate your e61 group head cam has saved me from replacing expensive internal brass parts more than once. For the grinder, I’ve found that how to clean your grinders discharge chute with a pipe cleaner is the most effective way to prevent the static-induced jams that stress your motor. These aren’t just tools; they are the insurance policy for your choosing the best barista gear for coffee enthusiasts journey.
Take Back Control of Your Coffee Bar
It’s easy to feel defeated when your machine starts acting like it has a mind of its own, but remember that you are the one in charge. Most of these ‘scary’ mechanical failures are just the machine’s way of asking for a little maintenance or a change in how you’re treating its internals. By taking the time to learn the quirks of your setup, you’re not just fixing a pump; you’re mastering the art of home espresso one step at a time. Your home espresso journey is supposed to be about the joy of the craft, not the stress of the repair shop. So, pull the plug, take a breath, and get back in there. You’ve got this. [IMAGE_PLACEHOLDER_E]
Have you ever faced a ‘runaway’ pump or a mysterious flood that made you want to switch back to instant coffee? Let me know your troubleshooting stories in the comments below!