Why Your Espresso Puck is Always Wet and Sludgy
Imagine pulling that perfect shot, only to find your espresso puck sits soggy, wet, and resembling mud rather than a firm disk. I remember the first time I experienced this frustrating mess; I was convinced I had done something wrong, wasting precious coffee and time. Turns out, it’s a common issue many home baristas face, and trust me, you’re not alone in this.
When your espresso puck refuses to dry out and ends up sludgy, it can feel like your entire brew process has gone off the rails. Not only does this affect the flavor and consistency of your shots, but it also makes cleaning and maintaining your machine a headache. But here’s the good news: this problem isn’t a mystery, and there’s a straightforward way to fix it.
In today’s post, we’re going to explore why your puck stays wet, how it impacts your espresso quality, and simple, proven steps to achieve a dryer, more stable puck every time. No more muddy messes or wasted coffee — just consistent, barista-quality shots from your own kitchen.
Why Is My Espresso Puck Always Wet and Sludgy?
First off, I have to admit, I made a huge mistake early on. I thought that simply pouring coffee into the basket and tamping it firmly would do the trick. It wasn’t until I learned about proper grind size, dose, and tamping pressure that I started to see real improvements. If you’ve been struggling with a wet puck, it might be due to a combination of factors like grind size, tamp technique, or even the machine’s temperature.
A key reason is under-extraction caused by a grind that’s too coarse or uneven tamping, which prevents water from flowing evenly through the coffee. When water finds the path of least resistance, it channels and results in flooding the puck, leaving it soaked and sludgy. Additionally, high humidity or using coffee with too much moisture can contribute significantly to the problem.
But there’s more. If your machine isn’t maintaining consistent temperature or pressure, the water’s ability to properly extract and dry out the puck diminishes. For instance, a poorly calibrated grinder or inconsistent tamping can be the culprits, leading to that dreaded soggy mess.
I used to ignore these signs, hoping that more coffee or longer extraction would fix it. Spoiler: it doesn’t, and it likely worsens the problem. Instead, treating the root cause—starting with your grind and tamp—makes all the difference. Want to learn how to identify whether your grinder is the issue? Check out [this guide](https://espressotechguide.com/how-to-select-the-perfect-coffee-grinder-for-your-brew) to get your setup dialed in.
Now, what if you’re still skeptical? Many think that a wet puck is just part of the process or that a certain level of moisture is unavoidable. I questioned this myself, but by paying attention to small adjustments in technique and equipment, I noticed immediate improvements. It’s worth trying these tweaks—because a dry, compact puck not only makes cleanup easier but also boosts flavor clarity and shot consistency.
Stay with me as I walk you through practical steps that will transform your wet, sludgy pucks into neat, firm disks. Promise, once you get the hang of it, your shots will be different—more precise and satisfying. Ready to take your home espresso skills to the next level? Let’s dive into what really causes this issue and how to fix it.
Tighten Your Grind for Better Extraction
Start with your coffee grinder; a consistent, fine grind is essential. If your grind is too coarse, water channels through and leaves the puck soggy. Dial in your grinder by adjusting the burrs until the grind looks like sugar. A micro-story: I once upped the grind size slightly after noticing the puck stayed wet, resulting in a much cleaner shot and a dryer puck. For precise calibration, check out this guide.
Control the Dose for Compactness
Measure your coffee precisely; too much or too little affects puck density. Use a scale to dose around 18-20 grams for a standard double shot. A loosely packed dose creates channels leading to wetness. By dosing accurately, you ensure uniform density, preventing water from creating those muddy puddles.
Master Your Tamp Technique
Apply firm, even pressure—about 30 pounds—using a consistent method. Think of tamping like pressing a stamp evenly onto paper; uneven pressure causes water to find weak spots. During my early days, I used a kitchen scale to monitor tamp pressure until I found the sweet spot. This helped me produce consistently dry pucks. Consider investing in a tamper with a pressure indicator or a dedicated tamping station to improve consistency.
Optimize Machine Temperature and Pressure
Ensure your espresso machine maintains stable temperature and pressure. Use a machine with a PID controller if possible, which keeps water at the ideal brewing temperature. Also, preheat your equipment: run hot water through the portafilter and basket before inserting coffee. This reduces temperature fluctuations that cause inconsistent extraction and wet pucks.
Adjust Your Extraction Time and Flow Rate
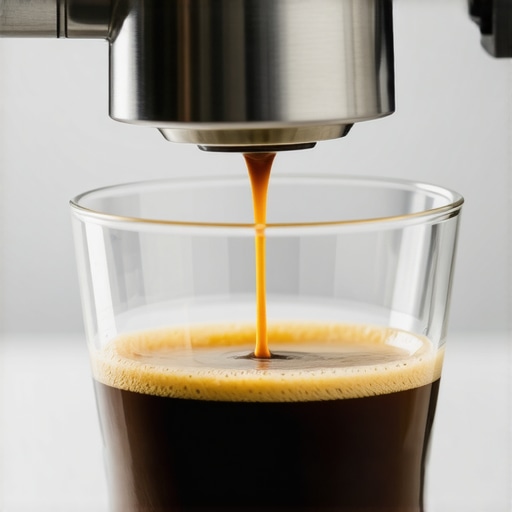
Aim for a total extraction time of about 25-30 seconds. If water gushes through too quickly, you might need a finer grind or increased tamp pressure; if it’s too slow, adjust by coarser grind or lighter tamp. Observe the flow: a slow, steady stream indicates good flow, leading to a firmer, less wet puck. I personally monitor shot timing with a timer and fine-tune until I reach the ideal flow rate.
Manage Humidity and Coffee Freshness
Humidity can make coffee grounds damp; store beans in an airtight container away from moisture. Use freshly roasted beans, but allow them to degas for 24 hours before brewing. This reduces excess CO2 and moisture, preventing soggy pucks. For more insights on bean freshness, visit this article.
Regular Machine Maintenance
Descale your espresso machine regularly to prevent mineral buildup that hinders proper brewing. Also, inspect and replace worn shower screens and group seals, which can affect water distribution. A well-maintained machine ensures even water flow, helping produce consistent, dry pucks.
#Many enthusiasts assume that acquiring high-end espresso machines or barista gear guarantees perfect results, but in my experience, there’s often more to the story. One widespread misconception is that expensive equipment automatically produces better coffee, yet without understanding the nuances of maintenance and calibration, you’re likely to encounter issues like inconsistent extraction or bitter flavors. Another myth is that tossing more coffee or tamping harder will improve extraction; in reality, precise grind size and tamp pressure are key, and misunderstanding these can lead to over- or under-extraction. When choosing grinders, many overlook the importance of burr quality and consistency—investing in a cheap model might seem economical, but it can hamper your ability to dial in the ideal grind and ultimately spoil your shots. A common trap with milk frothers is assuming all frothing devices are equal; many home models fail to produce microfoam suitable for latte art, yet users settle for subpar results due to lack of awareness. Advanced users know that behind the scenes, factors like water temperature stability and machine calibration profoundly influence shot quality, yet these are often neglected.
What are some overlooked technical adjustments that truly elevate home espresso brewing?
The truth is, small tweaks—such as regularly cleaning shower screens, adjusting pressure relief valves, or calibrating grinder settings—make a measurable difference in flavor, consistency, and overall experience. A study by the Specialty Coffee Association highlights how proper maintenance extends equipment lifespan and improves brewing quality, emphasizing that knowledge of these hidden details is crucial for serious enthusiasts. Don’t fall into the trap of thinking that gear alone will solve all issues; mastering the subtle art of calibration and routine upkeep is what separates average results from exceptional ones. To deepen your understanding, I recommend exploring our advanced guides on selecting the right grinder and mastering home espresso techniques. Have you ever fallen into this trap? Let me know in the comments.Maintaining your home espresso setup requires more than just occasional cleaning; it involves a strategic approach to tools and routine checks that preserve performance over time. Investing in quality equipment like a precise coffee grinder and a reliable espresso machine pays dividends in consistency, but knowing how to care for these tools prolongs their lifespan and keeps your brew tasting exceptional.
How do I maintain my barista tools to ensure long-term excellence?
One crucial tip is regularly calibrating your grinder to prevent uneven grind sizes that can cause inconsistent shots and soggy puck formation. For instance, I personally use a digital burr calibration tool, which provides precise measurements and ensures my grinder remains in peak condition. This small investment in a calibration device, like this guide, has significantly reduced shot variability and sediment issues. Furthermore, routine cleaning of the espresso machine’s group head and shower screen with tools such as a brush and descaling agents keeps water flow unobstructed, favorably impacting extraction quality. For example, using a dedicated cleaning brush like this well-designed burr brush ensures thorough removal of coffee oils and buildup. Additionally, I recommend setting a schedule — monthly deep cleans and weekly quick maintenance routines — to prevent scale buildup and water inconsistency. This consistent upkeep makes a noticeable difference in shot clarity and reduces machine downtime. As for future trends, integrating IoT-enabled sensors into espresso machines could provide real-time performance monitoring, alerting you to potential issues before they affect your brew. Imagine receiving a notification when your boiler temperature drifts or when cleaning is overdue, minimizing surprises and maximizing uptime. To stay ahead, consider adopting a system like this to automate maintenance tracking. Can you commit to calibrating your grinder this week? Because a finely tuned grinder combined with routine cleaning forms the foundation of a reliable, long-lasting espresso setup. For detailed procedures, check out the guide on calibrating your grinder,
Lessons Only the True Espresso Enthusiasts Learn
One of the most valuable lessons I stumbled upon was realizing that precision in every step—grind size, tamp pressure, and machine calibration—trumps high-end equipment. I used to believe that owning the most expensive machine would guarantee perfect shots, but I discovered that consistent technique and routine maintenance are what truly matter. Additionally, I learned that small adjustments, like adjusting tamp pressure or recalibrating my grinder, can drastically improve puck dryness and shot quality. Patience and attention to detail became my best tools, transforming my home espresso experience into something truly professional.
Another insight was understanding the moisture content of my beans—freshly roasted beans need proper degassing. Ignoring this step meant battling wet pucks despite all my efforts. Initially, I thought storage didn’t matter, but proper bean storage in airtight containers was a game-changer, preventing excess humidity from ruining my brew. Lastly, I found that routine cleaning of the shower screens and group head not only prolongs equipment lifespan but also ensures even water flow, which is vital for dryer, more stable pucks. These lessons have elevated my home espresso game beyond mere hobby to a craft I genuinely enjoy.