Why Your Shot Time Changes Between the First and Second Pull
It happened again this morning. I reached for my espresso shot, expecting consistency, and suddenly, the shot was faster or slower than usual. That unsettling feeling—that sense that I was missing something obvious—hit me squarely. I realized many of us stumble into the same trap: our first shot feels perfect, yet the very next one behaves differently, throwing off our rhythm and taste.
Finding the Real Cause Behind Inconsistent Shot Times
Struggling with shot time fluctuations isn’t just frustrating; it’s a sign that something in your process or equipment needs attention. When I first started experimenting with home espresso, I kept blaming my grinder or my tamping technique whenever my shots varied from one pull to the next. I thought it was just part of the game—early learning curves and all that. But I later discovered that minor changes, like the temperature of your machine or the moisture in your puck, can have outsized effects on shot duration and quality.
Understanding these factors was a game-changer. Now, I pay close attention to variables such as grind size, tamp pressure, and water temperature, realizing that each shot’s timing can shift based on tiny adjustments or environmental changes. And trust me, once you recognize this pattern, you can start to predict and control your shots much more reliably.
Have You Ever Faced This Pitfall?
If your first shot out of the gate always tastes great but subsequent pulls fluctuate wildly—even with the same beans and equipment—you’re not alone. This inconsistency can stem from issues like moisture variations in the coffee, uneven tamping, or temperature swings. A habit I had early on was neglecting to preheat my portafilter, which caused my shots to flow differently. It’s a mistake I see many home baristas make when trying to replicate professional consistency.
The good news is, these are problems you can fix with a bit of mindfulness and routine—without needing to overhaul your entire setup. For example, ensuring your portafilter is properly heated before each shot can make a big difference. Also, paying attention to grinder settings and ambient conditions helps keep things steady.
So, how can you master the stability of your shot times? That’s exactly what I’ll help you uncover next—step by step, backed by both practical experience and expert insights. Ready to bring consistency into your espresso routine? Let’s dive into the core reasons and practical solutions that will turn your unpredictable pulls into the norm.
Preheat Everything to the Same Temperature Before Each Shot
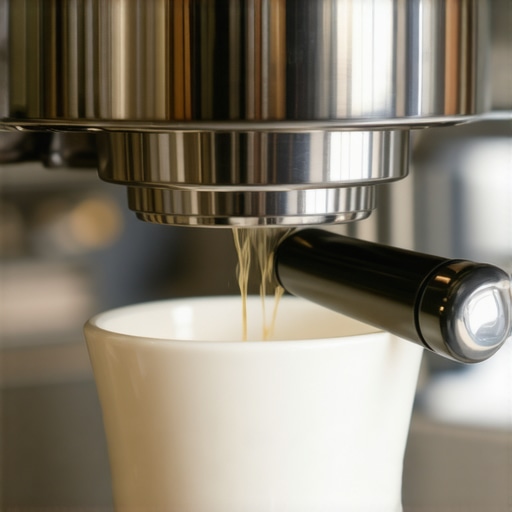
Imagine trying to write with a cold pen—nothing flows smoothly. The same goes for your espresso machine and portafilter. Always flush hot water through your machine and warm the portafilter before pulling a shot. During a testing session, I heated my portafilter using hot water for a minute, then dried it thoroughly. When I tamped and pulled my shot afterward, the flow was noticeably steadier, and the taste improved. Regular preheating eliminates temperature fluctuations that cause inconsistent shot times.
Use Consistent Grind Size and Tamping Pressure
The grind size acts like a gatekeeper—too coarse, and water flows too fast; too fine, and it drips. I once dabbled with my grinder’s coarseness, and after settling on a consistent setting, my shot times stabilized. Tamping pressure is equally critical. Aim for about 30 pounds of uniform force—think of pressing down with the same strength each time. To check, I used a bathroom scale under my tamper. This consistency helps maintain similar flow rates and shot durations, crucial for flavor and extraction.
Control Water Temperature and Pressure
Water temperature, ideally around 200°F (93°C), affects extraction speed. Use a thermometer to verify your machine’s output, especially if you notice fluctuations. Regular descaling prevents scale buildup, which can cause temperature drops. Additionally, monitor your machine’s pressure gauge: a flickering or inconsistent reading indicates pressure issues. Fine-tuning your machine’s pressure or adjusting your grind can stabilize shot timing. Remember, a good espresso machine like the ones reviewed in these top-rated models can make fine adjustments easier.
Standardize Your Workflow and Routine
Consistency flourishes when your process is predictable. Always dose the same amount of coffee—around 18-20 grams—using a scale to measure precisely. Distribute the grounds evenly, then tamp with consistent pressure. I recommend locking in your workflow by following the same sequence each time: grind, dose, distribute, tamp. Over time, this habit creates muscle memory, reducing variations. Recording your settings and results helps identify which steps impact shot time. For comprehensive guidance, check this detailed guide.
Manage Environmental Factors Carefully
Ambient temperature and humidity influence bean moisture and machine performance. When I moved my setup into a climate-controlled room, shot consistency improved. Keep your beans stored in airtight containers, away from sunlight. Also, avoid brewing during extreme temperature fluctuations—morning versus evening can matter. If your espresso machine or grinder is affected by weather, consider using a dedicated space for your coffee routine. Small changes make a big difference, as explained in this article.
Record and Adjust Methodically
Track each shot’s parameters—grind setting, tamp pressure, temperature, shot time—and note the result. When you notice deviations, adjust one variable at a time; too much change at once leads to confusion. For instance, I adjusted grind size slightly and observed the impact on flow rate, then fine-tuned from there. Patience and record-keeping are keys to mastering consistency, preventing guesswork, and building an intuitive sense of your setup. If you need help with fine-tuning your grinder, this calibration method can guide you.
Many coffee enthusiasts believe that investing in high-end milk frothers, grinders, or espresso machines guarantees perfect results every time. However, even with the most advanced gear, common misconceptions can sabotage your brewing process. One pervasive myth is that newer or more expensive equipment automatically leads to better coffee, but in my experience, understanding the hidden nuances is far more critical. For example, many assume that a fancy milk frother will produce microfoam effortlessly, yet neglecting proper steam wand techniques or milk temperature control can leave you with flat or scorched milk. According to coffee expert James Hoffmann, mastering technique and understanding your equipment’s quirks are key, regardless of brand or price point.
Are All Coffee Grinders Created Equal for Precision?
Contrary to popular belief, the quality of your grinder profoundly impacts extraction and flavor, but it’s not just about burr quality or price. Many home baristas overlook the importance of grind consistency and particle size distribution, which significantly affect shot stability and crema. An inconsistent grind can lead to channeling, resulting in uneven extraction and sour or bitter flavors. When choosing the right grinder, focus on those with stepless adjustment and low static build-up, as static can cause uneven dosing and static charges that scatter coffee grounds. Remember, a high-quality grinder combined with proper calibration yields superior results—much more than just purchasing the latest model. For detailed guidance on selecting and maintaining your grinder, check this comprehensive article.
Common Pitfalls with Home Espresso Machines
Many assume that all espresso machines are equally capable of high-quality brewing, but they often ignore the nuances of temperature stability, pressure profiling, and maintenance routines. A common mistake is neglecting regular backflushing or descaling, which can cause temperature fluctuations and pressure drops, leading to inconsistent shots. Additionally, relying solely on factory presets without fine-tuning grind size or pre-infusion parameters can hinder extraction quality. The real secret lies in understanding how your machine behaves under different conditions and customizing your workflow accordingly. For instance, position your machine in a stable environment away from temperature swings to maintain consistency. If you’re considering an upgrade, prioritize models with PID temperature control and excellent build quality, as highlighted in this latest review. Don’t forget, regular maintenance, like replacing worn group gaskets or cleaning the shower screen, prevents performance dips over time. Maintaining awareness of your equipment’s specific needs is the edge that separates good home baristas from great ones. This level of attention often goes unnoticed but makes all the difference in achieving that elusive barista-quality shot. Have you ever fallen into this trap? Let me know in the comments.
Investing in Reliable Tools for Long-Term Performance
Achieving consistent espresso shots relies heavily on the quality and maintenance of your equipment. I personally swear by the Baratza Forte grinder, as its stepless adjustments and low static build-up allow me to fine-tune grind size with precision, directly influencing shot consistency. Regular calibration using tools like this calibration method ensures each grind remains uniform over time. When it comes to espresso machines, choosing a model with PID temperature control—like the Breville Dual Boiler—provides stable water temp, reducing shot variability. Incorporating quality accessories such as a digital scale with a timer helps me measure doses accurately, eliminating guesswork that could throw off shot timing and flavor. Investing thoughtfully in tools and understanding their maintenance elevates your home brewing from occasional to professional-grade.
How do I maintain my equipment over time?
Consistency depends on proper upkeep. Regularly descaling your espresso machine, ideally every 200-300 shots, prevents scale buildup that impacts temperature stability. Cleaning grinder burrs every 50-100 pounds of coffee using a brush or specialized cleaning tablets keeps particle size uniform and static under control. Replace worn gaskets and shower screens periodically, following guidelines like this quick guide. Consistent maintenance not only prolongs equipment life but also ensures your shots stay on point long-term. Your investment in maintenance routines pays dividends in flavor and reliability, so make it part of your regular coffee ritual. To streamline these routines, I recommend setting a weekly checklist to stay on top of cleaning and minor repairs—trust me, it saves money and headaches down the line. Experienced baristas emphasize that a well-maintained setup makes the difference between ‘good’ and ‘great’ espresso—so don’t neglect your gear!
Tools I Recommend for Peak Performance
Beyond the basic setup, certain accessories can dramatically improve your brewing consistency. A good tamping station ensures uniform pressure every time, reducing shot variations caused by inconsistent tamping. I use a calibrated tamper that measures roughly 30 pounds of force; this standardization makes my extraction more predictable. For milk frothing, I trust the Milk Frothers That Transform Your Coffee Experience, which features models that produce microfoam effortlessly, saving time and effort.
Also, a liquid level sensor or pressure gauge can alert you to issues like pressure drops or water level fluctuations, alerting you early before shots go off the rails. Upgrading your espresso machine’s water softener system—something I highly advise—can protect internal components and maintain water quality, as discussed in this article. Regularly replacing parts like portafilter screens and gaskets with authentic replacements maintains optimal flow and extraction, preventing common issues such as channeling or uneven shots.
Where do I go from here in my maintenance journey?
The future of coffee gear points toward smart, connected devices that monitor performance and suggest maintenance schedules—similar to latest models with IoT integration. For now, scheduling routine checks and gentle cleaning, along with using the right tools, keeps your setup reliable. I recommend trying my favorite tip: calibrate your grinder with a precise method and stick to it consistently—you’ll notice immediate improvement in shot stability and flavor. Remember, a little investment in maintenance and quality accessories goes a long way toward brewing perfection. Ready to optimize your setup? Start by reviewing your cleaning routine today and see the difference it makes!
Unspoken Lessons That Changed My Espresso Journey
One of the most valuable insights I gained was the importance of patience. Beyond just dialing in grind size and tamp pressure, I realized that every component of my setup needed to be harmonized. Rushing through routines or neglecting routine maintenance led to inconsistent shots, no matter how expensive my gear was. The takeaway? Consistency isn’t just a technique; it’s a mindset rooted in mindfulness and meticulous care.
Another lightbulb moment was understanding that environmental factors—like humidity or ambient temperature—can subtly sabotage even the best efforts. I once blamed my grinder for stubborn static, only to find that a simple change in room humidity dramatically improved dosing stability. It taught me to pay attention to the space around my setup. Sometimes, small surroundings tweaks can yield big results.
Finally, I discovered that no single tool or gadget is a magic bullet. The real secret lies in developing a routine and understanding your equipment deeply. That means knowing when your grinder needs calibration or when the gaskets are due for replacement. Developing a proactive maintenance plan not only extends equipment life but also sharpens your intuition—turning routine tasks into opportunities for learning and mastery.