Why Your Espresso Shot Is Running Down the Side of the Portafilter
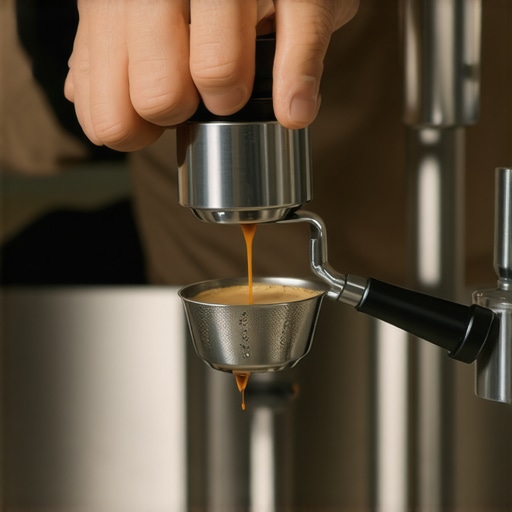
Have you ever pulled an espresso shot and watched in frustration as hot coffee starts seeping down the side of your portafilter instead of flowing smoothly into your cup? It’s a mess, a waste of good beans, and the kind of problem that makes even seasoned home baristas want to toss their machine out the window. I remember the first time it happened to me—thinking I must have done something terribly wrong. But it turns out, this common issue isn’t about poor technique alone; it’s often a sign of underlying machine or grind problems that need addressing.
Painting a Clear Picture: Why Does Your Espresso Leak?
When your espresso runs down the side of the portafilter, it’s typically because the water isn’t being directed through the coffee puck evenly. Instead, it finds the weakest point—often a crack, an inadequate seal, or a misaligned shower screen—and escapes. This isn’t just a cosmetic blemish; it impacts the flavor, the crema, and the overall quality of your brew. Believe it or not, a significant percentage of home espresso issues trace back to simple mistakes like a worn gasket or a clogged shower screen, which beginners often overlook.
Early on, I made the mistake of assuming my grind size was fine whenever I achieved a decent shot. Turns out, that’s only part of the story. A leaky portafilter often signals that the seal isn’t tight enough, or there’s a channeling problem—where water finds a quick path through the coffee, bypassing proper extraction. This can lead to inconsistent flavor and super bitter or sour shots. Just last year, I replaced my gasket and cleaned my shower screen, and the difference was night and day. For more tips on maintaining your gear, check out this guide on barista equipment.
Is It Worth Worrying About This Mess?
Many skeptics might think, “It’s just a small leak; does it really matter?” Well, yes. Ignoring these issues can lead to bigger problems down the line, like damaged seals or even machine failure. Plus, it diminishes your espresso’s quality, making every morning coffee less enjoyable. Trust me, I learned this the hard way—by wasting countless beans and time chasing perfect shots only to get leaks or inconsistencies. That’s why catching and fixing these problems early makes a huge difference. According to a recent report, small maintenance issues can extend your machine’s lifespan by years, saving you money and headaches.
Now, if you’re tired of fighting with your machine, or just want to improve your home-brewing game, stick around. We’ll walk through the practical steps to diagnose and fix the root causes of that annoying side-leak—and get you back on track for rich, silky espresso. Ready to take charge of your coffee routine?
.
Inspect the Portafilter Gasket for Wear and Tear
Begin by removing the portafilter from your machine and carefully examining the gasket, the rubber seal that surrounds the filter basket. If you notice cracks, deformation, or hardened rubber, it’s time to replace it. I once had a gasket that looked fine visually but was brittle underneath; replacing it immediately resolved my side leak. To replace the gasket, consult your machine’s manual or find a compatible replacement online. For detailed steps, check this guide on inspecting portafilter gaskets.
Clean and Reassemble the Shower Screen and Basket
Next, detach the shower screen and the filter basket from the group head. These components can accumulate coffee oils and mineral deposits, leading to poor sealing. Use a brush and a descaling solution to thoroughly clean all parts. When reassembling, ensure the shower screen is seated properly and the basket sits flush. During my first attempt, I skipped cleaning the shower screen and just replaced the gasket, but the leak persisted. Cleaning these parts made an immediate difference. See this cleaning guide for more tips.
Check for Cracks in the Group Head and Portafilter
Inspect the metal surfaces of the group head and portafilter for visible cracks or distortions. Minor hairline fractures can cause leaks during high-pressure shots. Use a flashlight and a magnifying glass for a thorough check. When I found a tiny crack in my group head, I bonded it using a high-temperature metal epoxy, which temporarily fixed the leak until a professional replacement was possible. For persistent crack issues, consult a service technician or consider replacing affected parts for a long-term fix. To prevent these issues, always regular
Adjust and Tighten Connections Carefully
Finally, check that the portafilter is squeezed tightly into the group head. Over-tightening can damage the gasket or warp components, leading to leaks, while under-tightening allows hot water to escape the sides. Use a torque wrench if possible; hand-tighten until you feel resistance, then give a quarter turn. During a recent overhaul, I used a torque wrench to achieve consistent tightness, which significantly improved the seal. Remember, each machine has its own optimal tightness level, so consult your manual or this resource for more guidance. Properly tightening connections ensures your machine maintains pressure without leaks, delivering the rich, smooth espresso you’re aiming for.Many enthusiasts assume that having high-end espresso gear automatically guarantees perfect shots. However, one common misconception is that equipment alone dictates quality, which oversimplifies the intricate dance of variables involved in brewing excellence. In reality, mastering your machine involves appreciating nuanced factors like grind consistency, tamping pressure, and temperature stability—elements often overlooked by even seasoned home baristas. For instance, many believe that dialing in the grind is a simple trial-and-error process, but neglecting the importance of humidity and ambient conditions can derail even the most precise adjustments. Moreover, some fall prey to the myth that larger, more expensive equipment will produce better coffee without considering maintenance routines, such as regularly cleaning and calibrating the machine, which are vital for consistent performance. A common advanced mistake is misjudging the impact of shower screen alignment; tiny misalignments can cause uneven water distribution, leading to channeling and under-extracted shots—subtle issues that significantly affect flavor. Additionally, baristas sometimes rely solely on visual cues, like crema color, without measuring shot time or extraction yield, risking over- or under-extraction. This approach ignores the deeper physics at play—like residual water temperature and pressure fluctuations—that influence extraction quality.
How can understanding pressure profiles elevate your home espresso game?
Incorporating knowledge of pressure profiling—adjusting pressure during extraction—can unlock richer flavors and crema stability, but it’s often misunderstood or dismissed as only relevant for professional machines. Experts like Scott Rao emphasize that manipulating pressure curves allows for tailored extraction, enhancing clarity and body in your espresso. Neglecting this advanced technique limits your ability to troubleshoot complex flavor issues, such as sourness or bitterness that stem from uneven pressure application. To explore this further, consider reading our guide on mastering home espresso. Remember, even seasoned baristas can fall into traps, like over-tightening portafilter components, which may warp seals and cause leaks, ultimately undermining the brewing process. So, always double-check your machine’s integrity and calibration—these tiny tweaks can dramatically improve your output.
Have you ever fallen into this trap? Let me know in the comments and share your experiences with mastering the nuances of your espresso setup!
Prioritize Regular Calibration to Ensure Consistent Quality
One foundational tool I rely on is a digital thermometer paired with a PID controller. I use this combination to monitor and calibrate my espresso machine’s temperature precisely, ensuring optimal extraction every time. Regular calibration minimizes temperature fluctuations that can throw off extraction and smear the efficiency of other tools like grinders or steam wands. For example, I frequently check the boiler temperature and adjust the PID settings accordingly, following expert advice from this guide. This small investment of time pays dividends in shot consistency and long-term machine health.
Invest in a High-Quality Cleaning Routine with Proper Tools
Maintaining your gear isn’t just about wiping down surfaces; it’s about thorough cleaning with dedicated tools. I swear by a set of espresso-specific brushes, including a fine-bristled brush for portafilter baskets and a larger, softer brush for steam wands. The simple trick? I store my brushes upside down to allow complete drying, preventing mold and bacterial buildup. Regular cleaning prevents the accumulation of oils and mineral deposits that could cause clogging or leaks, ultimately prolonging your equipment’s lifespan.
Use Precise Grind Adjustment Tools for Long-Term Gains
Grinders are at the heart of exceptional espresso, and their maintenance is often overlooked. I use a calibration scale and a dedicated grinder dial indicator—which are inexpensive yet highly effective—to measure and monitor grind size adjustments over time. This approach helps me maintain consistency despite humidity swings or wear. I also routinely check for any build-up or worn burrs using this workflow guide. Fine-tuning my grinder with these tools has dramatically improved shot clarity and crema, illustrating the importance of precise adjustments.
Plan for Future Upgrades with Reliable Software and Hardware
Looking ahead, I recommend staying informed about the latest espresso tech. For instance, monitoring updates for your machine’s firmware or connecting with community forums can catch early signs of component failures. Software like coffee-specific calibration apps can assist with temperature profiling and pressure adjustments, boosting your long-term results. As the trend shifts towards automation, integrating data logging and remote diagnostics will become routine. Anticipate investing in smarter tools as this tech matures, which will streamline maintenance and troubleshooting.
How do I maintain my tools over time? Discover the secret to lasting equipment
The key to long-term success is routine maintenance combined with the right tools. Keep cleaning brushes, calibration devices, and spare parts like gaskets and seals accessible. Regularly inspect for wear and replace components proactively to avoid costly repairs or unnecessary downtime. Additionally, establishing a schedule—say, weekly descaling, monthly gasket checks, and yearly calibration—can keep your setup performing at peak levels. Remember, the more proactive you are with your maintenance, the less you’ll have to deal with surprises down the line. For personalized support, don’t hesitate to reach out or consult detailed guides like this resource.
And speaking of tools, why not give a try to introducing a dedicated pressure gauge into your espresso line? It’s a game-changer for measuring and maintaining consistent extraction pressure, and can prevent many common issues like channeling or over-extraction. Start by testing your machine’s pressure profile during a shot, then use the data to fine-tune your parameters. This small step can elevate your home espresso to professional quality. Want to explore more? Dive into this detailed calibration guide and get inspired to take your setup to the next level.
Over the years, I’ve learned that the journey to great espresso isn’t just about buying top-tier equipment—it’s about mastering the subtle, behind-the-scenes adjustments that turn an average shot into a masterpiece. The most valuable lessons often come from those unexpected moments when a tiny tweak made all the difference. Sharing these insights can save you time, beans, and frustration, helping you elevate your home espresso game to new heights.
Three Unexpected Lessons From My Espresso Journey
- Don’t overlook the power of regular gasket inspection: I used to ignore small cracks, but replacing worn gaskets consistently kept leaks at bay and preserved shot quality. It’s a simple step that prevents costly repairs down the line.
- Cleaning isn’t just maintenance—it’s performance optimization: A clean shower screen and group head ensure water flows evenly, preventing channeling and bitter shots. Trust me, a thorough clean can redefine your espresso output.
- Precise tightness matters more than you think: Hand-tightening the portafilter with a calibrated approach prevented leaks and maintained optimal pressure. Implementing this small change vastly improved shot consistency.
Tools and Resources That Totally Changed My Approach
- Calibrated grinder dial indicator: Monitoring grind size helps me adapt quickly to humidity changes, ensuring uniform extraction. It’s an inexpensive investment that pays big dividends.
- Digital thermometer and PID controller: These tools allow me to keep my machine’s temperature steady, resulting in more predictable and flavorful shots. I recommend exploring this guide on PID calibration for details on setup.
- Cleaning brushes designed for espresso equipment: Using dedicated tools ensures thorough cleaning without damaging delicate parts, extending your gear’s lifespan. Check out this tip on proper brush storage.
Your Next Step Toward Espresso Excellence
The path to consistently outstanding espresso isn’t about overnight perfection; it’s about embracing continuous learning and fine-tuning your setup with care and patience. Every small adjustment, from inspecting gaskets to calibrating pressure, compiles into a rewarding brewing experience. Keep experimenting, stay curious, and don’t hesitate to seek out resources that deepen your understanding—your perfect shot is within reach.
What small tweak has made the biggest difference in your espresso routine? Share your experience below—I’d love to hear about your discoveries!