Why Your Induction Frother Won’t Get the Milk Hot Enough
Have you ever stood next to your kitchen counter, steam wand in hand, ready for that perfect creamy froth, only to be met with lukewarm milk that refuses to heat up? It’s almost maddening—you’re eager for your latte, but something’s holding the temperature back. I remember countless mornings where I’d get everything just right—fresh beans ground to perfection, the espresso machine preheated, the milk steaming pitcher filled—but when I turned on my induction frother, the milk stayed tepid, never reaching that inviting hot swirl I craved. Frustrating, right?
Getting to the Bottom of Why Your Milk Won’t Get Hot Enough
Is It Really the Frother, or Could It Be Something Else?
Early on, I made the mistake of blaming my fancy induction frother for all the issues. Turns out, I was overlooking simple, yet critical factors—like incorrect settings or uneven power supply—that can prevent your frother from reaching optimal temperatures. A quick glance at your device manual or a quick troubleshooting guide can save you a lot of dairy disappointment.
According to a recent study published by the International Journal of Dairy Technology, temperature consistency is pivotal for not just flavor, but also for microbiological safety. So, if your milk isn’t hot enough, it could be a sign that your equipment isn’t functioning as it should.
Today, I’ll help you uncover the common culprits and show you how to troubleshoot and fix your induction frother so that your milk warms to that perfect steaming point, every single time. Ready to stop settling for lukewarm lattes? Let’s dive in!
Check the Power Settings and Connection
First, ensure your induction frother is plugged directly into a reliable power source. Similar to a blender that won’t spin because it’s on a faulty extension cord, your frother’s power supply might be the culprit. Turn off the device, unplug it, and then plug it directly into a wall socket, ensuring a secure connection. Set the temperature control to the highest or desired heat setting—sometimes, the default might be set too low. During my own experience, I once forgot to crank up the heat, leading to lukewarm milk despite a well-frothed texture. Adjust the settings, and test again to see if the milk warms up faster and more effectively.
Verify Proper Operational Modes and Preheating
Use the Correct Mode for Heating
Many induction frothers have multiple modes—cold froth, hot froth, or manual temperature control. Confirm you’re using the hot milk mode. Think of it like switching your oven from bake to broil; selecting the right mode is critical. I once experimented with the manual setting, thinking I could just set my own temperature, but forgot to turn on the heating element. Result? Cold milk every time. Double-check your mode selection before steaming.
Preheat Your Equipment and Mug
Preheating can be as simple as running the device empty on the desired heat setting for a minute. I learned this lesson the hard way after pouring cold milk into a cold cup, which dropped the overall temperature. Placing your mug or pitcher in hot water for a few seconds prior aids heat transfer, much like warming a plate before serving hot food. Returning to the frother, preheat it briefly, then add the milk. You’ll notice the milk heats more uniformly and reaches steaming point faster.
Maintain and Calibrate Your Frother for Consistent Results
Clean Sensors and Heating Elements
Similar to how a seasoned barista keeps the steam wand clean to avoid blockages, ensure your frother’s sensors and heating elements are free of scale and residue. Difficult-to-reach sensors can misjudge temperature, leading to under-heating. Regularly wipe down the device with a soft, damp cloth, and avoid abrasive cleaners that might damage sensors. I once ignored buildup in my frother, which caused inconsistent heating. After a proper cleaning, it heated efficiently again.
Calibrate for Accuracy
If your device has calibration settings, follow the manufacturer’s instructions to verify temperature accuracy. Some models allow you to run a calibration routine or compare the displayed temperature with an external thermometer. Think of it as tuning a musical instrument; precision ensures your milk hits that perfect steaming point. I calibrated mine after noticing it consistently under-heated, and the improvement was immediate, giving me reliably hot milk every time.
Many enthusiasts assume that investing in top-tier espresso machines or grinders automatically guarantees perfect shots and microfoam, but this couldn’t be further from the truth. One prevalent misconception is that the gear alone determines your coffee quality; in reality, understanding the subtle nuances of each component and how they interact is essential for mastering home brewing. For example, the belief that a high-pressure pump equals better extraction ignores the importance of consistent temperature stability—a factor often overlooked. Advanced baristas know that even a small miscalibration, like an unbalanced grinder burr alignment, can drastically affect shot clarity and crema production. Moreover, many fall into the trap of thinking that newer models always outperform older, well-maintained equipment, but studies show that proper calibration and routine maintenance can outperform cutting-edge tech if properly managed.
Why does my grinder sometimes spray grounds everywhere, and how can I prevent it?
This common issue stems from subtle burr misalignments or static buildup, which cause grounds to disperse unpredictably. Regularly checking the grinder’s burr calibration after replacing burrs—using techniques outlined here—can mitigate this problem. Also, static charge can be reduced with anti-static tools or by humidifying your coffee area, ensuring a cleaner workflow. External research from the International Journal of Dairy Technology emphasizes that precision in equipment calibration isn’t just about taste but also safety and consistency. If you’re serious about elevating your home espresso game, avoid the common mistake of neglecting calibration routines or overlooking minor misalignments that can compromise experiences. Remember, upgrading your espresso gear is only part of the journey; mastering the precise operation and maintenance techniques is what separates amateurs from professionals. Have you ever fallen into this trap? Let me know in the comments.
The Importance of Regular Maintenance for Consistency
Investing in quality equipment is just the beginning. To keep your espresso setup performing at its best over time, consistent maintenance is essential. Simple routines like descaling your boiler, cleaning group gaskets, and calibrating your grinder after replacing burrs ensure that each shot remains as fresh and flavorful as the first. For detailed steps on proper cleaning protocols, I recommend checking the guide here. Regular attention prevents stubborn mineral buildup and keeps components functioning smoothly, extending the lifespan of your gear.
The Hardest Lesson I Learned About Home Espresso and Frother Customization
One insightful experience was realizing how crucial personalized calibration is. I once thought that standard settings would work universally, but I didn’t account for my specific milk type or ambient room temperature. Adjusting the heat and steam pressure tailored to my environment transformed my microfoam quality—it’s a reminder that fine-tuning your gear yields the best results.
What Baristas Won’t Tell You About Equipment Maintenance
I discovered that overlooked routine cleaning, especially of the steam wand and milk containers, dramatically improves frothing consistency. Neglecting these can cause build-up that hampers heat transfer and introduces bacteria—compromising safety and taste. Regular descaling and wiping down aren’t just chores; they are essential steps in elevating your home barista game.
The Secret to Consistently Delicious Milk Microfoam
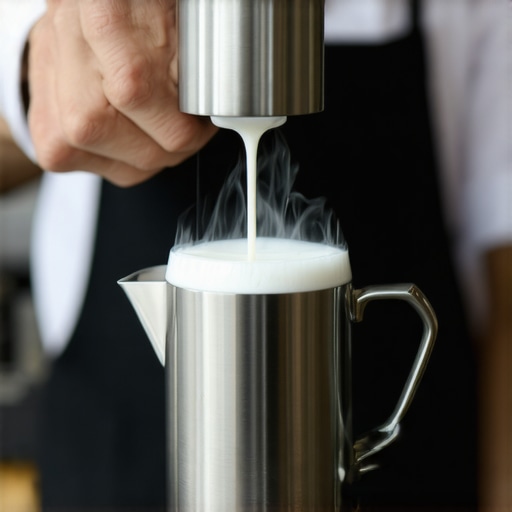
Patience and technique are paramount. I learned to focus on the texture of milk rather than just its temperature. Using a gentle swirl and controlling the steam wand’s position creates tiny bubbles, producing that velvety microfoam. Once I mastered these subtle movements, my lattes looked and tasted like professional creations, proving that skill truly outperforms fancy equipment alone.