Why Your Milk Foam Is Too Dry for Latte Art
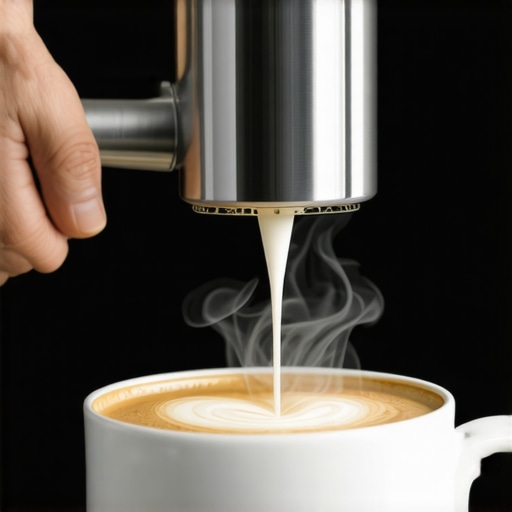
It was a quiet Sunday morning when I finally decided to tackle latte art creation at home. I had just steamed my milk, eagerly expecting that silky microfoam to glide effortlessly into my espresso for a beautiful heart or rosette. But instead, I was met with a stubborn, dry foam that wouldn’t pour smoothly, leaving my attempt looking more like a scribbled mess than an artful design. Frustration flooded in, and I wondered—why is my milk foam too dry? I know I’m not alone in this struggle. Many home baristas and even seasoned enthusiasts face the frustrating reality that their foam isn’t as velvety or as workable as they’d like.
**
Getting to the Heart of Dry Milk Foam
**
The problem of dry foam isn’t just about texture; it impacts your entire latte art game. The good news? It’s often linked to simple, fixable issues with technique or equipment settings. Today, we’ll unravel this common challenge and find practical solutions that can elevate your foam from stubborn to sublime.
**
Is the Hype Over Milk Frothing Actually Worth It?
**
Early on, I made the mistake of focusing solely on the frothing temperature without paying attention to milk texture. I believed that just heating the milk to the right temperature was enough—big mistake. It turns out, the key lies in achieving the perfect microfoam consistency, not just the right temperature. Incorporating proper technique and equipment calibration can make all the difference, as highlighted by studies on steam efficiency and milk aeration. In fact, selecting the right frothing tools and understanding their mechanics can prevent a dry, separated foam. Want to dive deeper into the best frothing gear? Check out [this guide on milk frothers that transform your coffee experience](https://espressotechguide.com/milk-frothers-that-transform-your-coffee-experience).
Have you ever struggled with getting that perfect, creamy microfoam? If so, you’re in good company—and this article will walk you through the steps to turn things around. Let’s move past the theory and start fixing your dry milk foam today, so that next time, your latte art can truly shine.
Control Your Milk Temperature for Optimal Frothing
Start by choosing the right milk—full-fat tends to produce creamier microfoam—but focus on heating it to about 140°F (60°C). Use a reliable thermometer and aim for a steady, gentle steam to avoid drying out the foam. During my first attempt, I overheated the milk, leading to a dry, separation-prone foam. Using a thermometer transformed my approach, ensuring the foam stayed silky and workable.
Position Your Steam Wand Correctly
Place the tip of your steam wand just below the milk surface and slightly off-center in the pitcher. This position introduces air into the milk and creates tiny, stable bubbles. I found that angling the wand too much caused splattering and inconsistent foam. Experimenting with different angles—ideally about 45 degrees—helped me develop a fine, glossy microfoam.
Master the Technique of Aeration
Once the wand is in position, turn on steam and listen for a gentle hissing sound—this signifies proper aeration. Submerge the wand deeper gradually to maintain consistent foam. Keep the pitcher tilted to encourage swirl and prevent large bubbles. In my early days, I struggled with large, dry bubbles, but focusing on gentle, consistent aeration made my foam dense and creamy.
Stretch and Spin to Achieve Velvety Microfoam
This step combines stretching the milk (introducing air) and spinning it (developing texture). Begin steaming to create a slight vortex; lift the pitcher higher once the milk reaches temperature, then spin the milk gently to break up bubbles. I often paused and tapped the pitcher on the counter to burst large bubbles, which improved the smoothness. Practice this motion to develop a uniform, glossy microfoam.
Properly Store and Handle Your Milk Pitcher
Use a stainless-steel pitcher with a narrow spout for better control. Keep the pitcher at a consistent hand temperature—if it gets too hot, your milk can scald, ruining foam quality. A well-balanced pitcher provides better handling, mimicking professional barista tools. I learned that a comfortable grip made pouring latte art easier and more precise.
Practice Pouring Techniques for Artistic Designs
Once your foam is ready, start with simple movements: pour from a moderate height to sink the milk before raising it to draw shapes. Keep your wrist steady and use controlled, fast movements. For a heart, pour into the center and then wiggle the pitcher to pull in the foam. My early attempts looked sloppy, but focused practice with consistent foam and pouring angles steadily improved my latte art. For more detailed guidance, check out [this comprehensive guide on mastering home espresso](https://espressotechguide.com/mastering-the-art-of-home-espresso-tips-for-beginners).Many coffee enthusiasts assume that choosing top-tier equipment guarantees perfect espresso and froth, but the truth is more nuanced. One common misconception is that expensive espresso machines automatically produce better shots; however, they often require precise calibration and maintenance, something overlooked by many. Additionally, a prevalent myth is that all coffee grinders are created equal—yet, grinders vary vastly in burr quality, grind consistency, and how they impact extraction quality. According to industry experts, understanding the subtle differences in burr types and their effects on flavor clarity can make or break your coffee experience. For example, ceramic burrs tend to retain less heat, preserving bean freshness, but may chip more easily, affecting grind uniformity. Opting for the wrong setup leads to inconsistencies, such as channeling or uneven extraction, which compromise flavor and body.
Another common mistake is relying solely on the capabilities of automatic milk frothers, neglecting temperature control and steam pressure stability. Many users believe that turning on the frother is enough, but advanced users know that adjusting steam pressure and incorporating techniques like “stretching” milk properly are crucial for velvety microfoam. Studies highlight that inefficient aeration often stems from poorly maintained or improperly calibrated steam wands, a subtlety many miss.
For seasoned baristas and curious homebrewers alike, the key lies in mastering the meta—knowing that each component interacts dynamically. Optimizing your workflow might involve calibrating your grinder after routine burr replacements, as detailed in guides on [grinder calibration](https://espressotechguide.com/how-to-calibrate-your-grinder-after-replacing-your-burrs). Also, investing in the right accessories, like precision tampers or quality tamping mats, can prevent uneven puck density, leading to more consistent extraction.
Even with sophisticated barista gear, the importance of routine cleaning cannot be overstated—residue buildup significantly impacts taste. Conversely, many believe that a “set and forget” approach to cleaning suffices, but emerging research indicates that micro-oils and mineral deposits gradually diminish machine performance. Regularly referencing comprehensive maintenance guides, such as [this article on cleaning techniques](https://espressotechguide.com/how-to-clean-your-grinder-hoat-without-taking-it-apart), can prolong equipment lifespan and elevate your brews.
In summary, the secret sauce isn’t just about buying the latest gadgets—it’s about understanding their nuances and integrating precise techniques. Whether it’s selecting the appropriate grinder burrs, fine-tuning steam pressure, or maintaining your gear meticulously, these details distinguish a good coffee experience from a great one. Have you ever fallen into this trap? Let me know in the comments.Keeping your home espresso setup in top shape requires more than just initial investment; it involves regular maintenance, choosing reliable tools, and understanding long-term care. I personally swear by certain tools that have saved me time and kept my gear running smoothly. For example, a **calibrated grinder** ensures consistent grind size, which is vital to prevent over-extraction or channeling. I use a dial gauge to finely tune my burrs, which according to industry experts, extends the lifespan of the burrs and maintains flavor clarity. Regular cleaning of the steam wand and portafilter with a soft brush prevents milk residue build-up that can cause clogs and spoil the taste. I strongly recommend using **magnetic tools** to clean small parts, like the shower screen, to avoid damaging delicate components.
For those serious about speed and efficiency, I find a **precision tamping station** invaluable—it guarantees flat, even tamping, reducing puck inconsistencies. As you scale your setup, investing in **automated dosing grinders** can dramatically improve workflow, especially when paired with software that allows for precise dose and grind adjustments. I’ve switched to a **smart grinder**, which connects via Bluetooth to my phone app, allowing me to pre-set grind settings for different beans and brewing methods.
Looking ahead, I believe that machine monitoring tools will become ubiquitous. Devices that track boiler pressure or temperature in real-time can alert you to potential failures before they happen, saving expensive repairs. For instance, some espresso machines now incorporate **smart sensors** linked with mobile apps—this is a trend I see accelerating. According to technical documentation from manufacturers, regular calibration and preventive maintenance extend equipment life and improve shot consistency.
**How do I maintain my barista gear over time?** Regularly replacing worn gaskets and seals is crucial; I schedule quarterly checks and keep spare parts handy. Also, following a cleaning routine—like flushing the group head and descaling the boiler—is essential. For detailed steps, check out my recommended practices in [mastering the art of home espresso](https://espressotechguide.com/mastering-the-art-of-home-espresso-tips-for-beginners).
Remember, consistent care isn’t just about prolonging your equipment’s life but also about ensuring every espresso shot or milk froth is perfect. If you’re serious about maintaining your setup, start with investing in a quality cleaning tool kit and integrate a regular calibration routine. Want to learn more precise calibration tips? Visit our [contact page](https://espressotechguide.com/contact-us) for personalized advice and resources.
The Hidden Lessons That Changed My Coffee Game
One of the most profound lessons I learned was that equipment quality often matters less than technique. I used to believe that owning the most expensive espresso machine guaranteed perfect shots, but I discovered that calibration and understanding your gear are just as crucial. Additionally, I underestimated the importance of routine maintenance; cleaning and tuning my machine regularly prevented so many issues I thought were inevitable. Another eye-opener was realizing that patience during the steaming process yields far better microfoam than rushing. These insights transformed my approach and can do the same for you, making your home barista efforts more rewarding.
Top Resources That Elevated My Coffee Craft
First, the guide on mastering the art of home espresso provided step-by-step instructions that demystified complex techniques. For honeing milk frothing skills, I rely on this comprehensive guide on milk frothers, which offers honest reviews and usage tips. My toolkit wouldn’t be complete without a calibrated grinder—this calibration technique has kept my grind consistent and my shots balanced. Finally, a good maintenance routine from this article has extended my equipment’s lifespan and performance.
Your Next Step Toward Coffee Mastery
Now, it’s your turn to put these lessons into action. Whether you’re just starting or fine-tuning your setup, remember that mastery comes through practice, patience, and continual learning. Every small adjustment brings you closer to that perfect shot or velvety microfoam. Keep experimenting, stay curious, and don’t hesitate to dive deeper into specific techniques or gear—your perfect brew awaits. Are you ready to elevate your home espresso experience? Share your biggest challenge below—I’d love to help you overcome it and celebrate your progress.