How to Set Up a Plumbing Line for Your Home Espresso Machine
Have you ever cranked up your espresso machine early in the morning, only to be greeted with sputtering water and a groan of frustration? I sure have. That moment when your machine refuses to cooperate, and you realize it’s not just the beans or grind size—sometimes, it’s the plumbing behind the scenes. I vividly remember my own lightbulb moment: after hours of troubleshooting, I finally understood that a proper plumbing line setup isn’t just a convenience; it’s the backbone of consistent, quality espresso at home.
Why a Reliable Plumbing Line Changes the Game for Home Baristas
Setting up a dedicated plumbing line for your espresso machine can dramatically improve your brewing experience. No more worrying about water pressure fluctuations or tricky refill schedules. But here’s the catch—many home enthusiasts skip this step altogether, believing it’s too complicated or unnecessary. That was my mistake early on. I rushed into things, ignoring the importance of proper plumbing, and paid the price in inconsistent shots and unnecessary headaches.
In my journey, I learned that a well-designed plumbing setup ensures clean, steady water flow, optimal pressure, and minimizes potential issues like leaks or air bubbles. Plus, it saves you a ton of time and hassle in the long run, letting you focus on enjoying your coffee instead of fixing problems. If you’re tired of the guesswork or facing unpredictable performance, this post will guide you through the essential steps to set up your home espresso plumbing line correctly.
What’s the biggest fear about tackling your own plumbing line?
Many worry about accidentally flooding their kitchen or damaging their prized machine. I get it. I made that mistake myself when I first attempted to connect a new line—cringing at the puddle I created. But with proper guidance and a cautious approach, you can avoid these pitfalls. Did you know that using the right fittings and double-checking connections can almost eliminate leaks? It’s surprisingly straightforward once you know what to look for. For more tips on preventing common setup mistakes, check out this guide on group head issues.
Now that we’ve set the stage, let’s dive into the practical steps that will make your plumbing line setup seamless and reliable. Trust me—once it’s done right, your mornings will become infinitely more satisfying, with flawless espresso shots every time.
,
Gather Your Supplies and Prepare
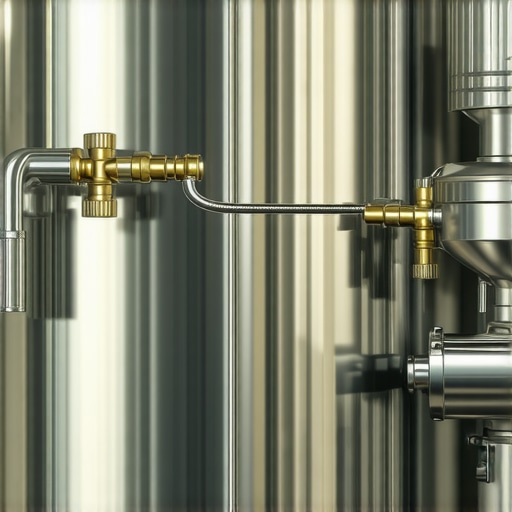
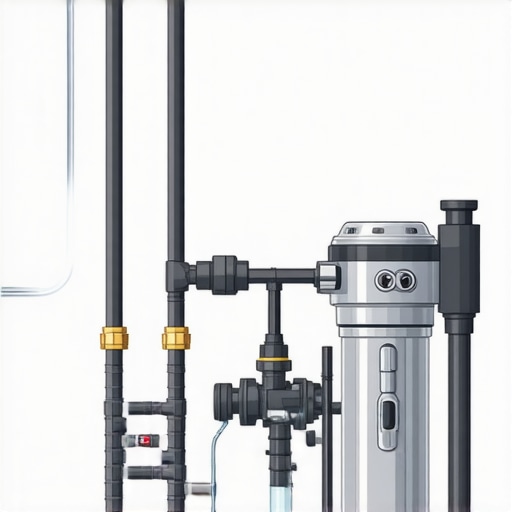
Start by collecting all necessary tools: adjustable wrenches, Teflon tape, flexible water hoses rated for potable water, and the appropriate fittings for your machine. I remember a particularly messy day when I realized I was missing a crucial fitting; preparing everything beforehand saved me from multiple trips to the hardware store. Ensure that the water supply valve you plan to connect to has a quick shut-off feature for safety and convenience.
Disconnect and Drain Existing Water Lines
Turn off your water main or the dedicated line valve. Carefully loosen the fittings connecting your machine to prevent water spillage. Use a towel to catch drips. I once rushed this step, causing a minor flood on my counter, which was a valuable lesson in patience and readiness. Make sure the line is completely drained before proceeding.
Attach the New Water Supply Line
Connect your flexible hose to the water source, wrapping Teflon tape onto threaded fittings to ensure a leak-proof seal. Tighten securely with an adjustable wrench—avoid over-tightening, which can strip threads. When I first attempted this, I cracked a fitting because I didn’t use enough torque; now, I tighten until snug plus an extra quarter turn. Double-check all connections before turning the water back on.
Secure Fittings and Prevent Leaks
Use hose clamps at connection points for added security, especially if the line will experience movement or vibrations. During my setup, I noticed a minor drip after testing, which was quickly resolved by tightening the fittings again. This extra step can save time troubleshooting later.
Integrate the Line with Your Espresso Machine
Connect the supply hose to the machine’s inlet port. Ensure the port is clean and free of debris. Some machines have a dedicated filter or screen at the inlet—clean or replace it if necessary. I once neglected this, which led to inconsistent water flow; cleaning it improved performance immediately. Make sure the connection is tight and secure to prevent airlocks and leaks.
Test the System and Adjust Pressure
Slowly turn on the main water supply, checking for any leaks. Observe the water flow into your machine—steady and free of sputtering. If pressure seems too high or low, adjust the supply valve gradually. Remember, high pressure can cause over-extraction, leading to bitter espresso; low pressure results in under-extraction, producing sour shots. If you experience fluctuating pressure, consider adding a pressure regulator inline, which is akin to tuning a guitar string for perfect pitch.
Address Common Issues During Testing
If you notice water spraying or leaks, immediately turn off the supply and tighten fittings. For persistent leaks, reapply Teflon tape or replace faulty fittings. During my initial setup, I ignored a small leak, which worsened over time until I replaced the faulty fitting entirely. Continuous observation during this phase helps catch problems early.
Finalize and Secure Your Setup
Once water flows smoothly without leaks, secure all fittings and hoses with clips or ties to prevent movement. Keep the area dry and organized to avoid accidents. I learned the hard way that an unsecured hose can disconnect unexpectedly, causing water damage. Proper securing also minimizes vibrations, reducing noise and potential wear on fittings.
Regular Maintenance Checks
Periodically inspect hoses and fittings for signs of wear or leaks. Replace worn components promptly. I make it a habit to check my setup monthly, which has extended the lifespan of my lines and kept my espresso shots consistent. Remember, a well-maintained plumbing line ensures your mornings are smooth, just like the flow of a perfect espresso shot.
When it comes to home espresso setups and barista gear, there’s a lot of misinformation floating around. Many enthusiasts believe that investing in high-end equipment alone guarantees perfect shots, but in my experience, mastering the nuances makes all the difference. A frequent myth is that grind size is the only factor affecting extraction; however, the tamping pressure, distribution, and even the puck quality play critical roles. Overlooking these details can lead to flat or sour espresso despite using a top-tier grinder. Additionally, many assume that milk frothers are just simple devices; in reality, controlling steam wand pressure and temperature is crucial to achieve microfoam that enhances your latte art.
**Beware of the ‘More Beans, Better Coffee’ Fallacy** This misconception leads many to stockpile beans, only to find their shots dull or overly bitter. Freshness matters, but improper storage—like leaving beans in the fridge or exposed to air—accelerates staling. It’s essential to focus on proper storage methods and grind just before brewing for optimal flavor.
**Advanced Mistake: Overlooking Pre-Infusion Effects** A subtle yet impactful factor—pre-infusion gently saturates the coffee grounds, reducing channeling and uneven extraction. While some believe it’s an unnecessary step, studies indicate that proper pre-infusion can significantly improve shot consistency, especially with darker roasts. Check out this guide on pre-infusion techniques for more insights.
**The Hidden Danger of Ignoring Machine Calibration** Even a seemingly well-functioning espresso machine can produce inconsistent results if its internal components drift out of calibration. For example, pump pressure fluctuations or boiler temperature inaccuracies are subtle but detrimental. Regular calibration and maintenance ensure your machine performs at its best, avoiding the trap of chasing perfect shots that are actually compromised by hidden mechanical issues.
**So, what about the sophisticated questions?** Some advanced baristas ask: ‘How does extraction yield relate to grind particle size distribution?’ A broader understanding of particle size variation, as explained in peer-reviewed research, reveals that uniform particle sizes promote even extraction and reduce channeling. Adjusting grind consistency and employing tools like a paper shim or WDT in distribution can significantly refine results.
Getting past these misconceptions is key to elevating your home brewing. If you’ve ever fallen into these traps, let me know in the comments below. Sharing experiences can help others avoid common pitfalls and enjoy truly exceptional espresso every time.
How do I keep my espresso gear running smoothly over time? Ensuring your machine, grinder, and accessories stay in top shape requires a targeted approach. I personally rely on a mix of high-quality tools and disciplined routines that prevent breakdowns and preserve flavor. For example, I swear by a portable ultrasonic cleaner for descaling small parts—it’s a game changer for cleaning stubborn oils and mineral deposits without damaging sensitive components. Regularly replacing worn gaskets and seals using manufacturer-approved parts prevents leaks and maintains pressure consistency, which is crucial for repeatable shots. Additionally, I invest in a digital refractometer to monitor extraction yields, helping me fine-tune grind size and dosage for optimal flavor extraction. This small device empowered me to elevate my brewing precision, and I recommend it to anyone serious about consistency.
Looking ahead, the trend is shifting toward smart maintenance tools that integrate with your smartphone. Imagine receiving notifications about descaling schedules or filter replacements directly, which simplifies long-term care. As technology advances, upgrading to machines with built-in diagnostic systems may become standard—saving you costly repairs and ensuring peak performance.
Accessible tips for maintaining your espresso setup
One of the most impactful maintenance tips is to schedule monthly cleaning routines that include backflushing your machine with a dedicated cleaner, such as espresso-specific cleaner tablets, following the manufacturer’s guidelines. Don’t forget to remove and soak shower screens and portafilters in a vinegar solution periodically—this prevents buildup that can cause channeling or uneven extraction. For grinders, a quick brush with a specialized burr cleaning brush after every few shots keeps grounds from caking and ensures uniform particle size.
If you’re wondering how to keep your milk frother performing at its best, avoid hard water deposits by using filtered water and performing a quick vinegar flush monthly. For more detailed guidance, check out this water tank cleaning method.
How do I maintain my equipment to avoid common pitfalls?
Prevention is always better than repair. For example, I once experienced a spitting steam wand because of mineral buildup—a problem easily avoided by regular descaling using a descaling solution recommended in machine manuals. A good rule of thumb is to review your machine’s service schedule; many manufacturers suggest a thorough inspection and descaling every 2-3 months if you use hard water. Additionally, aligning your grinder burrs with a precision calibration can improve shot consistency and reduce wear. Using tools like a burr alignment gauge can greatly extend your grinder’s life and ensure uniform grind particles.
Finally, adopting a systematic approach—like keeping a maintenance journal—allows you to track issues and catch patterns before they turn into costly repairs. This habit also helps in diagnosing subtle problems, such as fluctuations in temperature or pressure, which can impact espresso quality. Implementing these maintenance routines, along with investing in trusted tools, lays the foundation for reliable long-term brewing. For instance, I recommend trying out a high-quality ultrasonic cleaner for your small parts; it’s surprisingly effective at preserving the delicate elements of your espresso setup.
Remember, consistent maintenance not only extends the life of your equipment but also ensures that each shot is as delicious as the first. Staying proactive with your care routines reflects a genuine barista mindset that values precision and patience—qualities that shine through in every cup. Upgrading your maintenance toolkit today can significantly elevate your home espresso experience.
The Hardest Lesson I Learned About coffee grinders,home espresso,milk frothers,barista gear,espresso machines
One of the most enlightening moments in my coffee journey was realizing that even the most advanced equipment can’t compensate for overlooked details. I once believed upgrading to a high-end grinder would solve all my brewing woes, but I ignored the importance of calibration and burr alignment. The result? Inconsistent grinds and flat shots. It taught me that the real game-changer is understanding and maintaining your gear meticulously, not just having the fanciest tools.
3 Myths About coffee grinders,home espresso,milk frothers,barista gear,espresso machines That Held Me Back
Myth one: More expensive equipment always means better coffee. False—proper technique and maintenance matter more. Myth two: Milk frothers are simple devices that don’t require care. Wrong—controlling steam pressure and temperature is key for microfoam. Myth three: Regular cleaning isn’t critical for machine longevity. Definitely not true—neglect leads to buildup and flavor tainting. Busting these myths transformed my approach and improved my espresso quality drastically.
What Experts Won’t Tell You About coffee grinders,home espresso,milk frothers,barista gear,espresso machines
One insider tip is the significance of dialling in your grind size precisely. The difference between a good shot and a bad one often boils down to subtle adjustments in burr alignment and particle consistency. Also, pre-infusion practices—often overlooked—can dramatically reduce channeling and sourness. These secrets, shared among seasoned baristas, empowered me to troubleshoot common issues effectively and elevate my home brewing experience.
Curated Resources for Your Coffee Mastery Journey
- Espresso Precision Tools: I trust a high-quality burr calibration gauge because it ensures uniform grind particles—crucial for consistent extraction. It’s a small investment that pays off in shot quality.
- Detailed Maintenance Guides: The comprehensive articles on [this site](https://espressotechguide.com/) have saved me countless troubleshooting hours. They demystify complex procedures and keep my gear in top shape.
- Brewing Technique Courses: Online classes focusing on milk steaming and shot dialing have transformed my skills, making me more confident during busy mornings.
- Specialized Cleaning Supplies: Using microbial-safe descaling solutions and cleaning brushes tailored for my machine has extended its lifespan and maintained purity in my flavors.
Your Brew, Your Masterpiece—Time to Dive Deep
Embarking on this journey of mastering your home espresso gear is both challenging and rewarding. Every tweak, every maintenance routine, brings you closer to that perfect shot—rich, balanced, and personal. Remember, the true magic lies in understanding your equipment at a granular level—what makes it tick, what needs attention, and how to keep it performing at its peak. The future of home brewing belongs to those willing to learn, adapt, and experiment. So, what’s the next upgrade or technique you’re eager to try? Share your plans below and continue pushing the boundaries of your coffee craft!