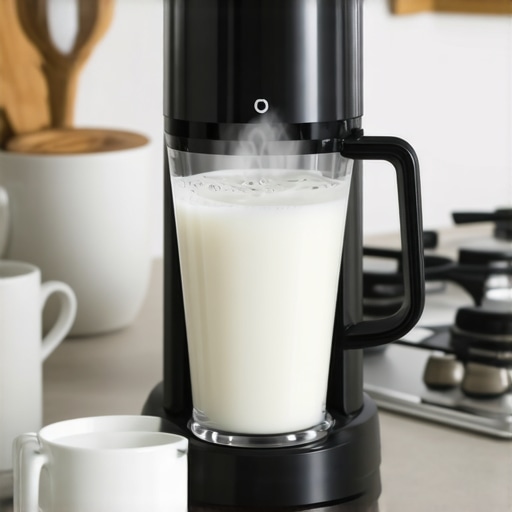
How to Stop Your Milk Pitcher from Screaming
Ever had that heart-sinking moment when you’re steaming milk for your latte, only to be startled by a loud, squealing noise from your milk pitcher? I remember the first time I experienced it vividly. One second I was focused on creating a silky microfoam, and the next, I was jolted by an unexpected banshee-like scream coming from my pitcher. It was enough to make me jump and mess up the entire pour. That persistent scream isn’t just annoying—it’s also a sign that your frothing process might be off, and left unchecked, it can lead to mechanical issues or subpar milk textures.
Why Your Milk Pitcher Seems to Be Yelling at You
The screaming sound during steaming usually points to airflow issues, improper technique, or sometimes a malfunction in your machine. After digging into barista forums and experimenting myself, I discovered that many home baristas face this problem and simply live with it, thinking it’s normal. But here’s the truth: it’s not normal, and there are effective ways to silence that noise. When I finally tackled this issue, it transformed my milk steaming experience—more peace, better microfoam, and fewer strange noises.
If you’ve ever wondered whether this noise is just a quirk or a sign of impending trouble, you’re not alone. Many beginners make the mistake of ignoring the signs or trying to force the steam wand to work harder, which unfortunately only worsens the problem. According to Espresso Tech Guide, improper steam wand settings and airflow disruptions can cause inconsistent foam and irritating noises (https://espressotechguide.com/why-your-steam-wand-sputters-and-how-to-clear-the-blockage). Recognizing this early opens the door to straightforward fixes and more enjoyable espresso moments.
So, if this resonates with you, and you’re tired of being startled by that shrill, this post is for you. We’ll walk through tested steps to stop your pitcher from screaming—steps you can implement today to enjoy quieter, more efficient steaming sessions. But first, let me share some common fears you might have about taming that noise, and why it’s worth pushing through.
Is fixing the screaming pitcher really worth the effort?
Let’s be honest; sometimes it’s tempting to just accept the noise as part of home espresso life. I’ve been there—initially, I thought maybe my pitcher was just loud or that I couldn’t do much about it. But I learned that ignoring the problem can lead to longer-term issues like inconsistent milk texture or even damage to your steam wand or boiler. A simple adjustment or cleaning process can dramatically reduce the noise and improve your overall experience. Trust me, the peace-of-mind and quality you gain is well worth a few minutes of troubleshooting.
Early on, I made the mistake of tightening the steam wand Connection without investigating the airflow. Turns out, many of these issues stem from simple blockages or pressure imbalances that can be easily fixed. Want to make your frothing smoother, quieter, and more reliable? Keep reading, and I’ll show you how to get rid of that screaming once and for all.
Check for Airflow Obstructions
Start by inspecting the tip of your steam wand for mineral deposits, milk residue, or any buildup that could restrict airflow. Use a pin or small brush to clear out tiny holes. I once had a stubborn clog that caused a high-pitched squeal during steaming. After gently poking and cleaning with a needle, the noise disappeared instantly, and microfoam improved significantly.
Ensure Proper Power and Pressure
Verify that your machine’s boiler pressure is within the optimal range—usually 8-10 bar. Low pressure can cause inconsistent steam and strange noises. Use the pressure gauge to monitor; if it’s off, check your pressure relief valve or examine the water level. I learned this the hard way when my machine’s pressure was slightly low, and once I adjusted it, the screaming ceased, making steaming much smoother.
Adjust Steam Wand Position and Technique
Hold the pitcher at a 45-degree angle and aim the tip just below the surface of the milk. Too deep or too shallow can cause turbulence, leading to noise. During a humid afternoon, I experimented with my pitcher angle and found that a slight tilt reduced the splattering and squealing. Practice this with a visual timer to develop consistent technique.
Maintain and Clean the Steam Wand Regularly
Mineral deposits and dried milk clog tiny channels inside the wand, increasing airflow restriction. Regularly purge the wand by turning it on briefly after steaming, then wipe the tip with a damp cloth. For thorough cleaning, disassemble the wand according to your machine’s manual and soak parts in vinegar or citric acid solution. Proper maintenance has kept my wand whisper-quiet and prevented buildup-induced noises.
Calibrate Steam Pressure Settings
If your machine has adjustable pressure controls, fine-tune them to match manufacturer recommendations. A misconfigured pressure can cause unwanted noises and inconsistent milk textures. I once increased the pressure slightly, and the difference was night and day—quieter operation and creamier microfoam. For complex adjustments, consult your machine’s guide or a professional technician.
Check for Mechanical Issues or Malfunctions
If all above steps don’t resolve the squeal, examine parts like the check valve, gaskets, and seals for wear. A leaking or damaged component can cause pressure drops and noise while steaming. For example, replacing a worn gasket improved my machine’s seal, and the squealing stopped. If unsure, consult a technician or refer to trusted repair resources.
Many home baristas fall prey to common misconceptions, but truly mastering espresso involves nuances that often go unnoticed. While beginners focus on the basics—like adjusting grind size or tamping pressure—more advanced enthusiasts understand that subtle details can make or break your shot. For instance, the misconception that heavier tamping always yields better extraction is widespread; in reality, over-tamping can cause excessive resistance, leading to under-extracted, bitter espresso. According to expert barista trainer James Hoffman, precise pressure and distribution are crucial, but they must be balanced to avoid channeling and uneven extraction.
Why does that little difference in grind consistency matter so much?
Achieving ultra-uniform grind distribution is often overshadowed by the obsession with grind size itself, yet inconsistent granularity leads to unpredictable extraction. A small variation can cause channeling—where water bypasses coffee grounds—resulting in a weak or sour profile. To mitigate this, many professionals recommend a technique called “distributing”—a step that ensures even coffee bed density—which can be fine-tuned for perfect flow control. One resource that dives into this is the guide on flow control techniques that detail how distributing grounds properly influences extraction consistency.
Beware of the sneaky trap of temperature stability
Many home enthusiasts overlook boiler temperature calibration, assuming their machine maintains a steady heat. However, studies indicate that minor fluctuations—even within 1°C—in boiler temperature can significantly alter extraction characteristics, affecting sweetness and clarity. Maintaining a stable temperature involves more than just turning the machine on; it requires regular calibration and sometimes, modifications like installing a PID controller. This nuanced control is discussed extensively in the PID tuning guide, which is invaluable for those seeking precision.
Finally, aspirants often neglect that the final quality of your espresso hinges on the holistic setup—like proper space allocation for your grinder and espresso machine. Inadequate countertop organization can lead to inconsistent tamping or hurried workflows that compromise shot quality. For example, balancing your space for a dual boiler setup ensures temperature and pressure stability, directly impacting extraction. You can explore more on optimizing your workspace in this detailed setup guide.
Mastery in espresso is not just about learning basic steps but understanding and managing these hidden, nuanced factors. Have you ever fallen into this trap? Let me know in the comments. Embrace the complexity, and your latte art—and taste—will thank you.Maintaining your home espresso setup requires the right tools and disciplined routines to keep everything in top shape. Personally, I swear by a high-quality scale, like the Acaia Lunar, because it provides precise, real-time feedback during extraction, ensuring consistency with every shot. Investing in a good cleaning brush set is equally crucial; I use a set with stiff and soft bristles specifically designed for group heads and steam wands, which helps prevent buildup that can cause noise and malfunction, as explained in this guide. Regularly calibrating your grinder isn’t optional—using a dedicated calibration weight and following a step-by-step process ensures your grind size remains accurate over time, especially after replacing burrs, as outlined here: calibration tips.
Lessons That Changed My Barista Game
One of the most profound lessons I learned was that noise during steaming isn’t just an annoyance—it’s a signal that something needs attention. Ignoring that shrill scream led to inconsistent microfoam and even risked damaging my equipment. By addressing airflow blockages early, I saved myself from costly repairs and improved my milk texture dramatically.
Another revelation was how simple maintenance, like regular cleaning of the steam wand and checking pressure settings, can turn a noisy, unpredictable machine into a quiet, reliable partner in my espresso routine. I realized that understanding the nuances—like proper wand positioning and pressure calibration—makes a tangible difference in the quality of the foam and the overall experience.
Finally, I discovered that some problems are rooted in the setup of my workspace. Organizing my tools and dedicating time for routine checks created a smoother workflow and preserved my equipment’s longevity. These lessons fostered a more mindful approach, transforming how I prepare and enjoy my home barista adventures.
Tools and Sources That Elevated My Espresso Journey
For anyone serious about dialing in their milk steaming, a high-quality [precision steam gauge](https://espressotechguide.com/why-your-espresso-tastes-salty-and-the-water-fix-that-works) offers invaluable real-time feedback, helping prevent silent pressure issues. Regularly maintaining the [steam wand](https://espressotechguide.com/why-your-steam-wand-sputters-and-how-to-clear-the-blockage) with specialized cleaning tools ensures optimal airflow and quiet operation. Additionally, [calibrating your pressure](https://espressotechguide.com/how-to-calibrate-your-grinder-after-replacing-the-burrs) gives you confidence that your machine is running at peak performance, reducing unexpected noises.
Beyond tools, I’ve found that trusted resources like expert blogs and community forums—readily available on sites like Espresso Tech Guide—provide insights that save time and frustration. Their comprehensive guides on flow control or boiler maintenance are treasure troves for home baristas eager to elevate their craft.
Your Next Step Toward Quieter, Better Microfoam
Remember, improving your home espresso setup isn’t just about the equipment—it’s a continuous journey of learning and fine-tuning. Addressing the screaming pitcher might seem small, but it unlocks a smoother, more enjoyable experience that encourages experimentation and growth. Don’t let noise hold you back from creating your perfect cup—embrace these tips, and watch your skills flourish.
What’s the biggest challenge you’ve faced with steaming milk at home? Share your stories or questions below—I’d love to help you find your quiet zone and perfect that microfoam.
**