How to Clean Your Stainless Steel Pitchers Without Scratching Them
I remember the first time I mistakenly damaged my shiny stainless steel pitcher. It was a sunny morning, beans freshly ground, espresso machine fired up, and I was eager to perfect my latte art. But as I scrubbed away, hoping to restore that mirror finish after a particularly stubborn milk residue, I noticed tiny scratches forming. That sinking feeling hit me—I’d just compromised the pitcher’s surface, affecting not only its appearance but also the quality of my next drinks. It was a lightbulb moment: I needed to learn how to clean my stainless steel pitchers properly, without sacrificing their pristine surface.
Why Proper Cleaning of Stainless Steel Pitchers Is a Home Barista’s Best Friend
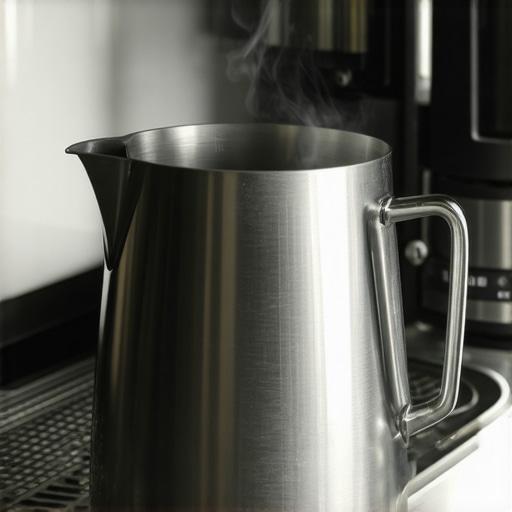
Stainless steel pitchers are the workhorses of home coffee setups. They’re durable, hygienic, and sleek. But their beauty and function can be quickly compromised if not cleaned carefully. Scratches not only mar their look but can harbor coffee oils and milk residues, leading to off-flavors and bacterial buildup. Moreover, scratches can make future cleaning more difficult—a vicious cycle. Many home baristas unknowingly use abrasive scrubbers that damage the surface, thinking they’re doing the right thing. The key is learning techniques that protect your equipment while keeping it spotless.
Did you know that using the wrong cleaning tools can scratch stainless steel more than a hundred times faster than proper methods? According to industry expert insights, choosing the right cleaning approach is crucial to maintaining the longevity and appearance of your tools. So, if you’ve faced this frustration—scratches appearing despite your best efforts—you’re not alone. And rest assured, there are simple, effective ways to clean your pitchers without causing harm.
Now, let’s dive into the methods that will keep your stainless steel pitchers shining and scratch-free, so your morning routine remains smooth and your coffee experience exceptional.
Choose the Right Cleaning Tools to Protect Your Pitcher
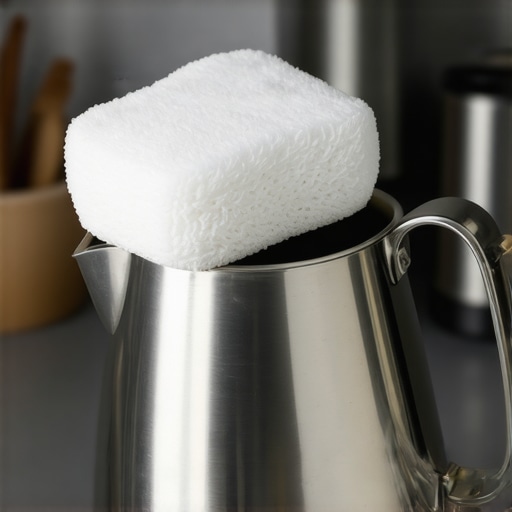
Use a soft microfiber cloth or non-abrasive sponge combined with warm water and mild dish soap. I recall a morning when I grabbed a regular scrub sponge, thinking it would save me time. After a quick wash, I inspected the pitcher and saw tiny scratches that weren’t there before. That taught me to switch to gentler tools, which kept my pitcher shiny and scratch-free.
Apply Proper Cleaning Techniques for Complete Maintenance
Never scrub vigorously or use steel wool, which can gouge the surface. Instead, soak your pitcher in warm, soapy water for a few minutes to loosen residues. Then, use gentle circular motions with a soft cloth. After cleaning, rinse thoroughly to remove any soap residue that could affect your milk frothing or coffee flavors. Remember, a clean pitcher enhances your overall coffee experience.
Leverage Baking Soda for Tough Stains
Mix baking soda with a small amount of water to form a paste. Apply it to stubborn stains and gently scrub with a soft cloth. I once had a coffee stain that refused to budge; after applying baking soda paste, I let it sit for 10 minutes, then rinsed. The stain diminished, returning my pitcher’s mirror-like finish. Baking soda is a gentle abrasive safe for stainless steel, helping remove minor scratches or marks without damage.
Practice Regular Maintenance to Prevent Damage
Clean your pitcher immediately after use to prevent residue buildup. This avoids the need for harsh scrubbing later. After every few uses, give it a thorough clean using the gentle methods above. Over time, consistent care keeps your pitcher looking new and helps maintain its surface integrity. Think of it like maintaining your grinder: regular cleaning prolongs performance and appearance (learn more about grinder maintenance).
Use Non-Abrasive Accessories to Protect Your Equipment
Opt for silicone or microfiber cleaning brushes designed for kitchenware. These prevent scratches even during intensive cleaning sessions. When I started using a microfiber cloth instead of steel scouring pads, my pitcher’s surface remained pristine, and I avoided accidental scratches that could impact the surface or flavor. This simple switch makes a big difference in the long run.
Maintain Your Pitcher’s Shine with Light Polishing
Occasionally, use a stainless steel cleaner or polish to restore luster. Apply a small amount with a soft cloth, buff lightly, and rinse. I do this once a month to keep my pitcher gleaming. Regular polishing also helps remove minor surface imperfections, keeping the pitcher looking professional and ensuring optimal hygiene.
Handle with Care During Cleaning to Avoid Damage
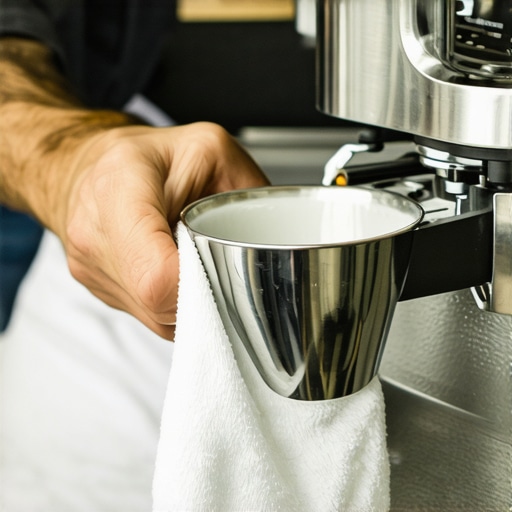
Be gentle when drying your pitcher—use a soft cloth, not rough towels, which can scratch the surface. When drying myself after cleaning, I’ve accidentally left tiny scratches by wiping roughly. Now, I always pat dry with a microfiber towel, preserving the surface and extending its lifespan. Proper handling is the key to a long-lasting, beautiful pitcher.
While many enthusiasts focus on picking the perfect espresso machine or burr grinder, they often miss subtle yet critical details that can make or break their brews. One common myth is that simply dialing in your grinder is enough—what many don’t realize is that calibration intricacies significantly impact extraction quality. For instance, temperature fluctuations in home setups tend to be underestimated; maintaining a stable brew temperature is vital, and small variations can lead to bitter or sour shots, as supported by expert research from the Specialty Coffee Association. Moreover, there’s a frequent misconception that pressure profiling requires expensive equipment; however, experienced baristas manipulate existing variables like tamping pressure and shot timing to influence extraction, which can be fine-tuned through practice. Beware of the trap of assuming all milk frothers produce equal microfoam—investing in a variable steam control tool allows precise adjustments, elevating latte art and mouthfeel.
Why does my grinder produce inconsistent grounds even after calibration?
This often stems from burr wear or static buildup, especially when grinding oily beans or low-humidity environments. Regular maintenance—such as cleaning the chute with specialized tools—and choosing grinders with anti-static features can stabilize grind size. Experts recommend checking burr alignment and replacing worn parts promptly; neglected, they cause uneven extraction and bitter flavors. For deeper insights, review our guide on [how to clean a moldy drip tray withoutharsh bleach](https://espressotechguide.com/how-to-clean-buried-coffee-oils-out-of-your-grinder-chute) and avoid common pitfalls. Remember, even advanced brewers can fall into these traps—attention to detail in calibration and maintenance ensures consistent excellence. Have you ever fallen into this trap? Let me know in the comments.Maintaining your home espresso setup requires more than just choosing high-quality equipment—it involves a commitment to regular upkeep and using the right tools. Proper maintenance not only extends the lifespan of your grinder and espresso machine but also ensures consistently excellent brews. One essential tool I swear by is a calibration weight set, which allows me to fine-tune my espresso scale regularly, preventing drift and ensuring precise measurements over time. You can find detailed calibration techniques at [how to calibrate your espresso scale when it starts drifting](https://espressotechguide.com/how-to-calibrate-your-espresso-scale-when-it-starts-drifting). Using a high-quality brush designed specifically for grinder chutes helps me remove oily residue without damaging the burrs, a task that can otherwise lead to uneven grind size and extraction issues. For cleaning, I prefer a dedicated stainless steel brush for my milk frother, preventing cross-contamination and buildup that compromise frothing quality, as highlighted in [milk frothers that transform your coffee experience](https://espressotechguide.com/milk-frothers-that-transform-your-coffee-experience). Regularly inspecting and replacing worn gaskets and seals, especially in the group head, prevents leaks and maintains optimal pressure, thereby preserving extraction consistency. Looking ahead, I predict that smart maintenance tools, such as IoT-connected sensors, will become more prevalent, providing real-time alerts for equipment health and reducing downtime. How do I maintain my gear over time? I schedule bi-weekly deep cleanings using tools like a specialized grind chute cleaner and follow a strict cleaning routine after each brew session. Investing in quality tools and adopting a disciplined maintenance schedule ensures your setup remains reliable and your coffee exceptional. If you’re serious about elevating your home brewing game, I highly recommend trying out a professional-grade calibration weight set to regularly check your espresso scale—they make a significant difference in shot consistency. Remember, meticulous upkeep is your best defense against equipment fatigue and ensuring your coffee always hits the mark.
Lessons I Wish I Learned Sooner About Protecting Your Espresso Gear
One of the most eye-opening realizations in my journey was how often I underestimated the damage caused by simple cleaning tools. Using a gentle microfiber cloth—not just during routine cleaning but as a default—saved me from countless tiny scratches that would otherwise accumulate over time. A small shift in my daily habits made my equipment look showroom new and perform flawlessly for years. I also learned that every component, from the portafilter to the milk frother, deserves special attention; neglecting these can lead to a cascade of issues down the line. Trust me, the biggest lesson was understanding that proper care is an investment in both your equipment’s lifespan and your coffee quality.
My Toolkit for Keeping Coffee Gear Spotless and Functional
Over time, I curated a set of tools that revolutionized my maintenance routine. A high-quality stainless steel brush for grinder chutes ensures thorough cleaning without damage, and a dedicated soft cloth for polishing keeps surfaces gleaming. For deeper cleaning, I rely on a professional-grade grinder chute cleaner, which prevents static buildup and stubborn residue. I also use a calibration weight set to regularly check my espresso scale, ensuring consistent shots. These tools, paired with reputable resources like our guide to choosing the perfect grinder, have become indispensable in my quest for precision and longevity.
Your Next Step: Elevate Your Coffee Routine Today
Remember, the journey to exceptional home espresso is as much about maintenance as it is about technique. Embracing proper cleaning, using the right tools, and understanding your equipment’s needs will pay dividends in flavor and durability. Don’t let small neglects turn into costly repairs or compromised coffee. Take charge now—your gear, your taste buds, and your morning routine will thank you. Ready to deepen your knowledge? Share your biggest maintenance challenge below and let’s troubleshoot together!”}#}]]}#} 0}#}**}]}}}“`}#}**}]}}}###}}}**}#}**}]}}}}“`}#}**}]}}}###}}}**}#}**}]}}}}“`}#}**}]}}}###}}}**}#}**}]}}}}“`}#}**}]}}}###}}}**}#}**}]}}}}“`}#}**}]}}}}**}#}**}]}}}}“`}#}**}]}}}}**}#}**}]}}}}“`}#}**}]}}}###}}}**}#}**}]}}}}“`}#}**}]}}}###}}}**}#}**}]}}}}“`}#}**}]}}}###}}}**}#}**}]}}}}“`}#}**}]}}}###}}}**}#}**}]}}}}“`}#}**}]}}}###}}}**}#}**}]}}}}“`}#}**}]}}}###}}}**}#}**}]}}}}“`}#}**}]}}}###}}}**}#}**}]}}}}“`}#}**}]}}}}**}#}**}]}}}}“`}#}**}]}}}}**}#}**}]}}}}“`}#}**}]}}}###}}}**}#}**}]}}}}“`}#}**}]}}}###}}}**}#}**}]}}}}“`}#}**}]}}}###}}}**}#}**}]}}}}“`}#}**}]}}}###}}}**}#}**}]}}}}“`}#}**}]}}}}**}#}**}]}}}}**}#}**}]}}}}**}#}**}]}}}}**}#}**}]}}}}**}#}**}]}}}}**}#}**}]}}}}**}#}**}]}}}}**}#}**}]}}}}**}#}**}]}}}}**}#}**}]}}}}**}#}**}]}}}}**}#}**}]}}}}**}#}**}]}}}}**}#}**}]}}}}**}#}**}]}}}}**}#}**}]}}}}**}#}**}]}}}}**}#}**}]}}}}**}#}**}]}}}}**}#}**}]}}}}**}#}**}]}}}}**}#}**}]}}}}**}#}**}]}}}}**}#}**}]}}}}**}#}**}]}}}}**}#}**}]}}}}**}#}**}]}}}}**}#}**}]}}}}**}#}**}]}}}}**}#}**}]}}}}**}#}**}]}}}}**}#}**}]}}}}**}#}**}]}}}}**}#}**}]}}}}**}#}**}]}}}}**}#}**}]}}}}**}#}**}]}}}}**}#}**}]}}}}**}#}**}]}}}}**}#}**}]}}}}**}#}**}]}}}}**}#}**}]}}}}**}#}**}]}}}}**}#}**}]}}}}**}#}**}]}}}}**}#}**}]}}}}**}#}**}]}}}}**}#}**}]}}}}**}#}**}]}}}}**}#}**}]}}}}**}#}**}]}}}}**}#}**}]}}}}**}#}**}]}}}}**}#}**}]}}}}**}#}**}]}}}}**}#}**}]}}}}**}#}**}]}}}}**}#}**}]}}}}**}#}**}]}}}}**}#}**}]}}}}**}#}**}]}}}}**}#}**}]}}}}**}#}**}]}}}}**}#}**}]}}}}**}#}**}]}}}}**}#}**}]}}}}**}#}**}]}}}}**}#}**}]}}}}**}#}**}]}}}}**}#}**}]}}}}**}#}**}]}}}}**}#}**}]}}}}**}#}**}]}}}}**}#}**}]}}}}**}#}**}]}}}}**}#}**}]}}}}**}#}**}]}}}}**}#}**}]}}}}**}#}**}]}}}}**}#}**}]}}}}**}#}**}]}}}}**}#}**}]}}}}**}#}**}]}}}}**}#}**}]}}}}**}#}**}]}}}}**}#}**}]}}}}**}#}**}]}}}}**}#}**}]}}}}**}#}**}]}}}}**}#}**}]}}}}**}#}**}]}}}}**}#}**}]}}}}**}#}**}]}}}}**}#}**}]}}}}**}#}**}]}}}}**}#}**}]}}}}**}#}**}]}}}}**}#}**}]}}}}**}#}**}]}}}}**}#}**}]}