Why Your Built-in Grinder Simply Can’t Handle Ultra-Light Coffee Roasts
Have you ever pulled a shot of espresso only to be disappointed by a sour, underwhelming brew that just refuses to improve no matter how many tweaks you try? I recall countless mornings of frustration, adjusting grind settings and tamping harder, only to end up with a cup that tasted more like dishwater than the rich, complex espresso I craved. It was a lightbulb moment when I realized the culprit wasn’t my beans or my technique, but my built-in grinder’s inability to handle ultra-light roasts properly.
This is a common dilemma among home baristas and coffee enthusiasts alike. If you’re using a coffee grinder that came with your espresso machine—often designed for medium to dark roasts—you might be unintentionally limiting your brewing potential. The truth is, ultra-light roasts are more delicate, require finer and more consistent grounds, and often demand equipment with more precise control. Otherwise, your efforts to dial in the perfect shot are doomed from the start.
Why Your Built-in Grinder Struggles with Light Roasts
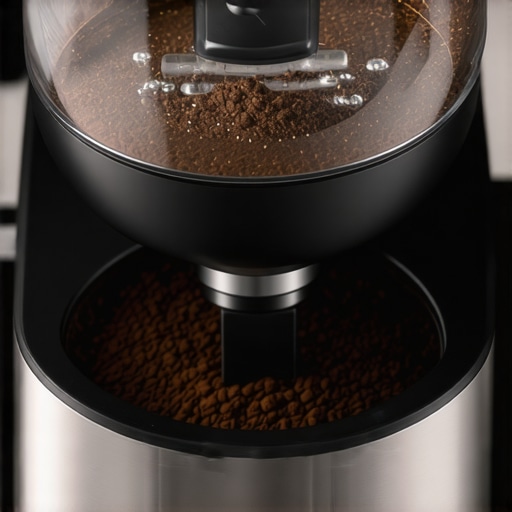
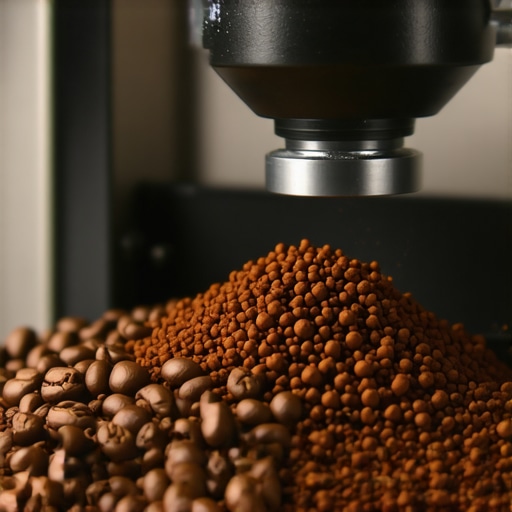
Built-in grinders are typically optimized for convenience and speed rather than for the nuanced demands of specialty coffee. They tend to have limited grind settings, often in broad increments, which makes it challenging to reach the ultra-fine, consistent grind size that light roasts require. Additionally, these grinders often feature blade mechanisms or lower-quality burrs that can’t handle the abrasiveness or the fine grind needed for these beans.
In my personal experience, I initially thought that switching beans or adjusting tamping pressure would fix my sour shots. But the real breakthrough came when I started investing in a dedicated burr grinder with stepless grind adjustment and more robust burrs. The difference was night and day. The consistency I gained allowed me to extract flavors I had only read about in high-end cafes.
If you’ve faced similar struggles, you’re not alone. Many home enthusiasts are unaware of how their equipment’s limitations sabotage their efforts. But the good news is, there are practical solutions to this problem, and I promise you’ll find them in the upcoming sections.
Is Upgrading Your Grinder Really Worth It?
Initially, I hesitated to invest in a new grinder, fearing it would break the bank or complicate my setup. Turns out, choosing the right grinder is a game-changer that directly impacts your coffee quality. You might want to check out our guide on choosing the best barista gear for advice tailored to home setups.
Early mistakes I made included sticking with a cheap, built-in grinder far past its prime, convinced I could squeeze better results out of it. That approach only led to wasted beans and mounting disappointment. Instead, investing in a grinder with a stepless grind adjustment and high-quality burrs allowed me to fine-tune my shots precisely. I highly recommend doing your research and considering an upgrade if you want to enjoy the full potential of light roasts.
In the next sections, I’ll walk you through the specific adjustments and gear options that can help you finally tame those delicate beans and brew coffee that truly does justice to their brightness and complexity. Ready to improve your espresso? Let’s dive in.
Adjust Your Grinder for Finer, Consistent Grounds
Begin by calibrating your grinder to achieve the finest setting possible without choking the machine. Think of it like sharpening a blade—sharp and even is key. I once spent an afternoon meticulously turning the grind dial, watching the coffee trickle out too quickly then too slowly, but never right. When I finally dialed in to a slightly finer setting—testing by observing the flow—I noticed my shots began to resemble that creamy, PDT (precise, detailed, and tasty) espresso from my favorite cafe.
Check Your Zero Point
Use a calibration tool or the simple paper test—place a sheet between the burrs, tighten, and then grind. Remove the paper and see if it’s just lightly torn or cleanly cut; that’s your zero point. Nail this down to ensure consistency. Once set, make small incremental adjustments, for example, turning the grind dial a quarter turn finer. Remember, light roasts often require these micro-adjustments to get the perfect grind size for extraction.
Dose and Distribute Properly
Measure your grind accurately; use a digital scale to weigh your dose. For light roasts, aim for about 18–20 grams in a standard basket. Distribute the grounds evenly using a distribution tool or a gentle tap—like leveling the soil before planting. Proper distribution prevents channeling—when water finds an easier path through, resulting in weak, sour shots. When I first started, I used to ignore distribution, but after a few messy pulls, I bought a distribution tool, and the consistency improved dramatically.
Keep the Bed Even and Tamped with Precision
Tamp with firm, even pressure—around 30 pounds of force. Use a calibrated tamper or a weighted tamper if needed. Think of tamping like pressing a pancake; even pressure ensures uniformity. I once used a cheap, uneven tamper and ended up with erratic shots. Then I switched to a calibrated tamping station and saw a marked difference—more crema, richer flavors, less sourness. Focus on consistency here; small variations can drastically affect the shot quality.
Control Extraction Variables Carefully
Pay attention to shot time—ideally between 25 to 30 seconds. Use a stopwatch or a digital timer. Adjust grind size or dose until you hit the sweet spot. For ultra-light roasts, slightly longer shots—up to 35 seconds—may be necessary to extract the flavors fully. I remember the first time I shot for 30 seconds, and the resulting espresso was vibrant and balanced, not sour or underdeveloped. Don’t rush this; patience is critical for fine-tuning light roast extraction.
Optimize Water Temperature
Ensure your machine maintains a stable temperature—ideally around 200°F (93°C). If your machine has temperature control, dial it up slightly, as light roasts can benefit from hotter water that extracts more compounds. I learned this the hard way—initially brewing at default settings gave me sour shots. Adjusting the temperature up helped deepen flavor and eliminate sourness without making the shot bitter.
Finally, Test and Refine
Once you’ve gotten the grind, dose, tamp, and temperature dialed in, pull a test shot. Observe the flow—aim for a steady, honey-like stream. Taste and analyze—sour, under-extracted shots indicate grind or timing issues. Adjust accordingly; for example, if it’s sour, go finer or increase temperature. Keep detailed notes of each adjustment; consistency will come from this iterative process. I used a simple logbook—recording grind settings, dose, shot time, and notes—making future pulls more predictable.
By approaching these steps systematically, you’ll transform your light roast brews from disappointing to delightful. Remember, every coffee bean and machine combination is unique—what works for one may not for another, so patience and meticulous observation are your best friends in achieving perfect espresso.
Many home baristas fall prey to common misconceptions that hinder their espresso journey. One widespread mistake is believing that all coffee grinders are created equal—people often overlook that cheap, built-in grinders lack the precision and consistency needed for high-quality espresso, especially with light roasts. These grinders typically have limited grind adjustments and lower-quality burrs, leading to uneven grounds and extraction issues, which manifest as sour or underwhelming shots. Investing in a proper burr grinder with stepless adjustment can dramatically improve your results, as it allows fine control over grind size crucial for delicate beans.
Another myth is that sophisticated espresso machines automatically produce perfect espresso without proper technique. In reality, even top-tier machines require meticulous calibration of dose, tamping pressure, and extraction parameters. Many enthusiasts make the mistake of relying solely on automatic features and neglect the importance of understanding and manually controlling variables like water temperature and shot timing. This neglect often results in inconsistent flavor profiles, despite the premium equipment.
When it comes to milk frothers, there’s a misconception that any device can produce microfoam. In fact, most consumer-grade milk frothers struggle to achieve the silky microfoam necessary for latte art and optimal texture. The secret lies in the steam wand and how you control it; mastering steam pressure and milk temperature involves nuance that basic frothers can’t provide. Using a quality manual or semi-automatic steam wand with proper technique yields significantly better milk texture.
A common oversight is choosing gear based solely on specs rather than suitability for your specific needs. For example, a powerful grinder isn’t beneficial if it’s not compatible with your espresso machine’s grind requirements. Always consider your equipment holistically and consult guides like this resource to ensure components work in harmony.
What most people get wrong is underestimating the importance of routine maintenance and calibration. Dirty grinders, clogged machines, and uncalibrated settings can all sabotage your brewing results, regardless of how expensive your gear is. Regular cleaning and calibration, such as checking your grinder’s zero point, are essential but often neglected steps. For detailed guidance, check out this article.
One tricky nuance experts emphasize is that extraction is affected by a complex interplay of parameters. Small deviations in temperature, grind size, and tamping pressure can compound, causing flavor shifts. For advanced users, understanding how to balance these variables is key. A study published in the *Journal of Food Science* highlights that even minor temperature variations during extraction can lead to significant taste differences, underscoring the importance of precise control.
Don’t fall into the trap of thinking that more expensive gear guarantees perfect coffee. Instead, focus on understanding your equipment’s nuances, performing regular maintenance, and mastering fundamental techniques. Improving in these areas often yields greater results than upgrading gear alone. Want to dive deeper into gear choices? I recommend exploring top-rated espresso machines for 2025.
Have you ever fallen into this trap? Let me know in the comments.
Maintaining your home espresso setup isn’t just about cleaning once in a while; it’s about developing a disciplined routine that keeps your equipment performing at its best for years to come. Over time, even high-quality gear can suffer from wear and debris buildup, leading to inconsistent shots and frustration. That’s why investing in specific tools and adopting a regular maintenance schedule is crucial.
One of my most recommended tools is a high-precision grinder brush. Unlike generic brushes, these are designed to reach deep into burrs and chutes, removing oils and grounds that can cause clogs or uneven particle sizes. I personally use a dedicated silicone scraper to dislodge grounds from the portafilter and shower screen, which minimizes scratches and keeps everything sanitary.
To keep your espresso machine’s vital components in top shape, I strongly recommend a regular descaling routine. Use high-quality descaling solutions like Urnex or Dezcal, following the manufacturer’s instructions. I’ve found that monthly descaling prevents mineral buildup that can cause fluctuations in water temperature and pressure—factors critical to brewing perfect espresso. For boilers and group heads, regular valve cleaning also prevents leaks and weak steam power.
Another essential aspect is maintaining your grinder burrs’ sharpness. Dull burrs not only slow down your workflow but also produce uneven grounds, impacting shot quality. A burr grinder sharpener can be a worthwhile investment, especially if you prefer to do maintenance yourself. Regularly checking your grinder’s zero point with a simple calibration process ensures consistent particle size over time.
Looking ahead, the trend is moving toward smart maintenance systems that alert you when certain components need attention. Automated notifications from machine apps or integrated sensors are becoming standard, helping you avoid avoidable issues and prolong equipment life. But for now, establishing a routine with the right tools remains the most reliable approach.
To maximize your setup’s longevity, I recommend creating a maintenance calendar. For instance, descale every 4-6 weeks, clean the shower screens weekly, and de-scale your grinder monthly. Don’t forget to consult your machine’s manual or trusted guides like this resource for specific recommendations.
How do I keep my equipment working flawlessly over time?
The key is balancing routine cleaning with proactive inspections. Regularly check for signs of wear—worn gaskets, clogged steam wands, or spotted burrs. Remember, a well-maintained machine doesn’t just produce better espresso; it also lasts longer. Try adopting a simple weekly checklist: clean filters and baskets, run a descaling cycle, inspect burrs and seals, and test water flow. This habit can dramatically reduce costly repairs and downtime.
For those serious about long-term performance, I highly suggest investing in a precision brewing scale. Accurate dosing and shot timing become second nature, and it’s easier to spot inconsistencies early. Regular calibration and using fresh cleaning supplies ensure every shot remains consistent and delicious.
Remember, the secret isn’t just in the gear but how you treat it. Daily attention coupled with these strategic tools will have your junior home barista setup producing café-quality espresso consistently. So, get familiar with your equipment’s specific needs, set a maintenance rhythm, and watch your brews improve steadily.
The Hardest Lesson I Learned About Home Espresso, Milk Frothers, and Coffee Gear
One of the most profound realizations I had was that my pursuit of perfect espresso wasn’t just about having the right beans or a fancy machine. It was about understanding that the gear I had—particularly my humble built-in grinder—was holding me back from unlocking the brightness and complexity of light roasts. I used to believe that tweaking variables like tamping or shot timing alone would be enough, but I was overlooking the importance of equipment precision. That lightbulb moment changed everything, teaching me that investing in quality gear isn’t a luxury but a necessity for elevating home brewing experiences.
Why Some Common Beliefs About Coffee Gear Are Just Myths
Many espresso enthusiasts fall prey to the idea that all grinders are created equal. I once thought so, too, until I realized that cheap, built-in grinders can be a nightmare with light roasts—causing inconsistent grounds and sour shots. Similarly, I believed that top-tier espresso machines would automatically produce stellar results without proper calibration, which isn’t true. Every piece of equipment—be it the grinder, machine, or frother—requires attention, understanding, and maintenance. Knowing this helped me focus on selecting gear that matched my technical needs, rather than just following trends.
The Power of Routine and Mindful Maintenance
One lesson that transformed my approach was the importance of regular, strategic maintenance. Simple tools like a high-precision grinder brush and routine descaling kept my equipment performing optimally. I discovered that even the best gear deteriorates without proper cleaning, leading to flavor inconsistencies and machine downtime. Setting a weekly maintenance schedule, including checking burr sharpness and cleaning the shower screens, saved me hours of troubleshooting in the long run and consistently improved my espresso quality.
Investing Beyond the Equipment — Cultivating a Learning Attitude
Real improvement in home espresso is as much about mindset as it is about gear. I’ve found that mindful experimentation—keeping detailed notes on grind adjustments, shot times, and temperatures—accelerates learning and helps me fine-tune my craft. Resources like this guide have been invaluable in guiding my choices and understanding the nuances that make or break my brew. Remember, mastery doesn’t happen overnight; it’s a marathon built on curiosity, patience, and consistent effort.
Your Turn to Brew Better Than Ever
Now that I’ve shared some of my biggest lessons learned, I encourage you to evaluate your gear, routines, and mindset. Sometimes, upgrading your grinder or adopting a disciplined maintenance routine can revolutionize your home espresso. The journey is as rewarding as the destination, so don’t shy away from the learning process. Are you ready to take your coffee game to the next level? Remember, each small adjustment brings you closer to that perfect cup of light roast espresso you’ve always envisioned.
What has been your biggest challenge in getting consistent espresso shots at home? Let me know below—your story might inspire someone else to keep pushing forward!